Tạo Extract Email Function
Đây là hàm đầu tiên, với các nhiệm vụ:
- Trích xuất nội dung email từ kiểu MIME thành dữ liệu JSON
- Gửi dữ liệu đó đến SQS.
Tại sao tôi cần hàm này?
Vì nhiều lý do:
- Tôi muốn tiết kiệm chi phí khi gọi Amazon Bedrock và Lambda function trong Generate email (Nếu email có dữ liệu sai, chúng ta có thể phân tích chúng thành dữ liệu đã định dạng trước khi gọi AI agent, giảm số lượng token gửi đến mô hình LLM)
- Dễ debug hơn
- Trong thực tế, có thể một số hater sẽ tấn công endpoint này bằng cách gửi thư rác, vì vậy chúng ta có thể đặt một hàm xử lý ở đây.
Các bước thực hiện
- Ở AWS Console, tìm kiếm “lambda” và chọn Lambda
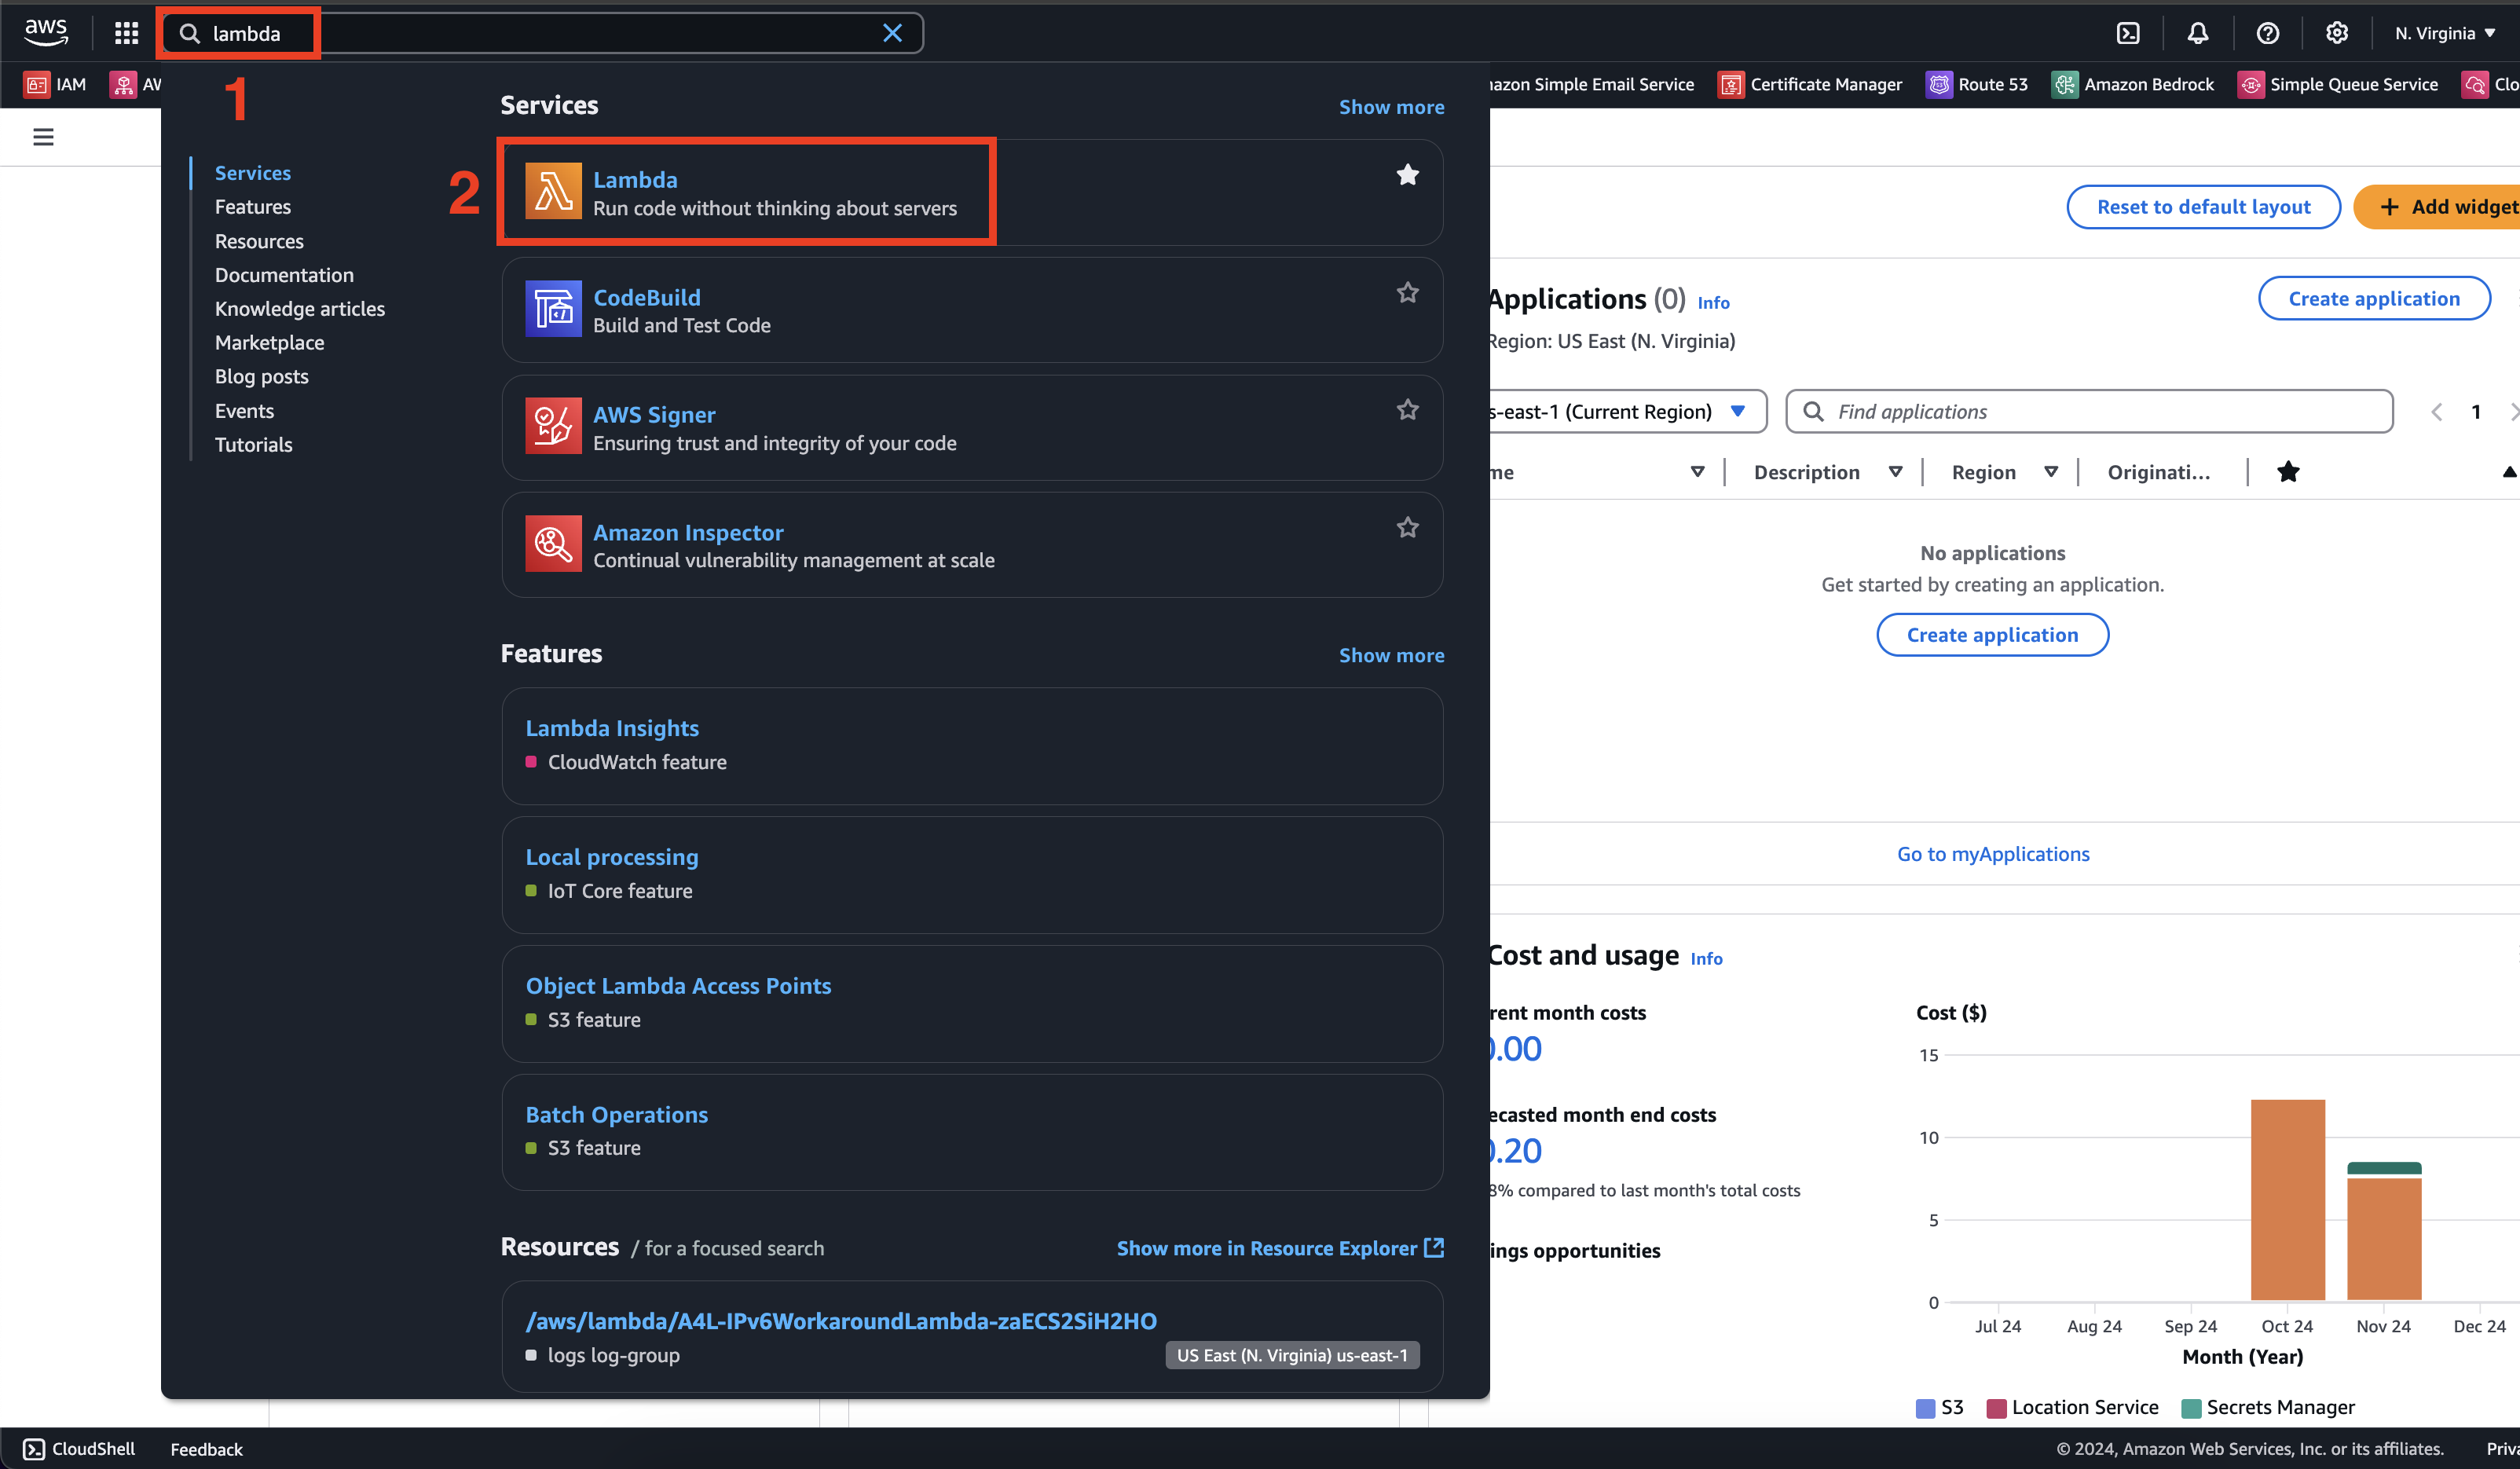
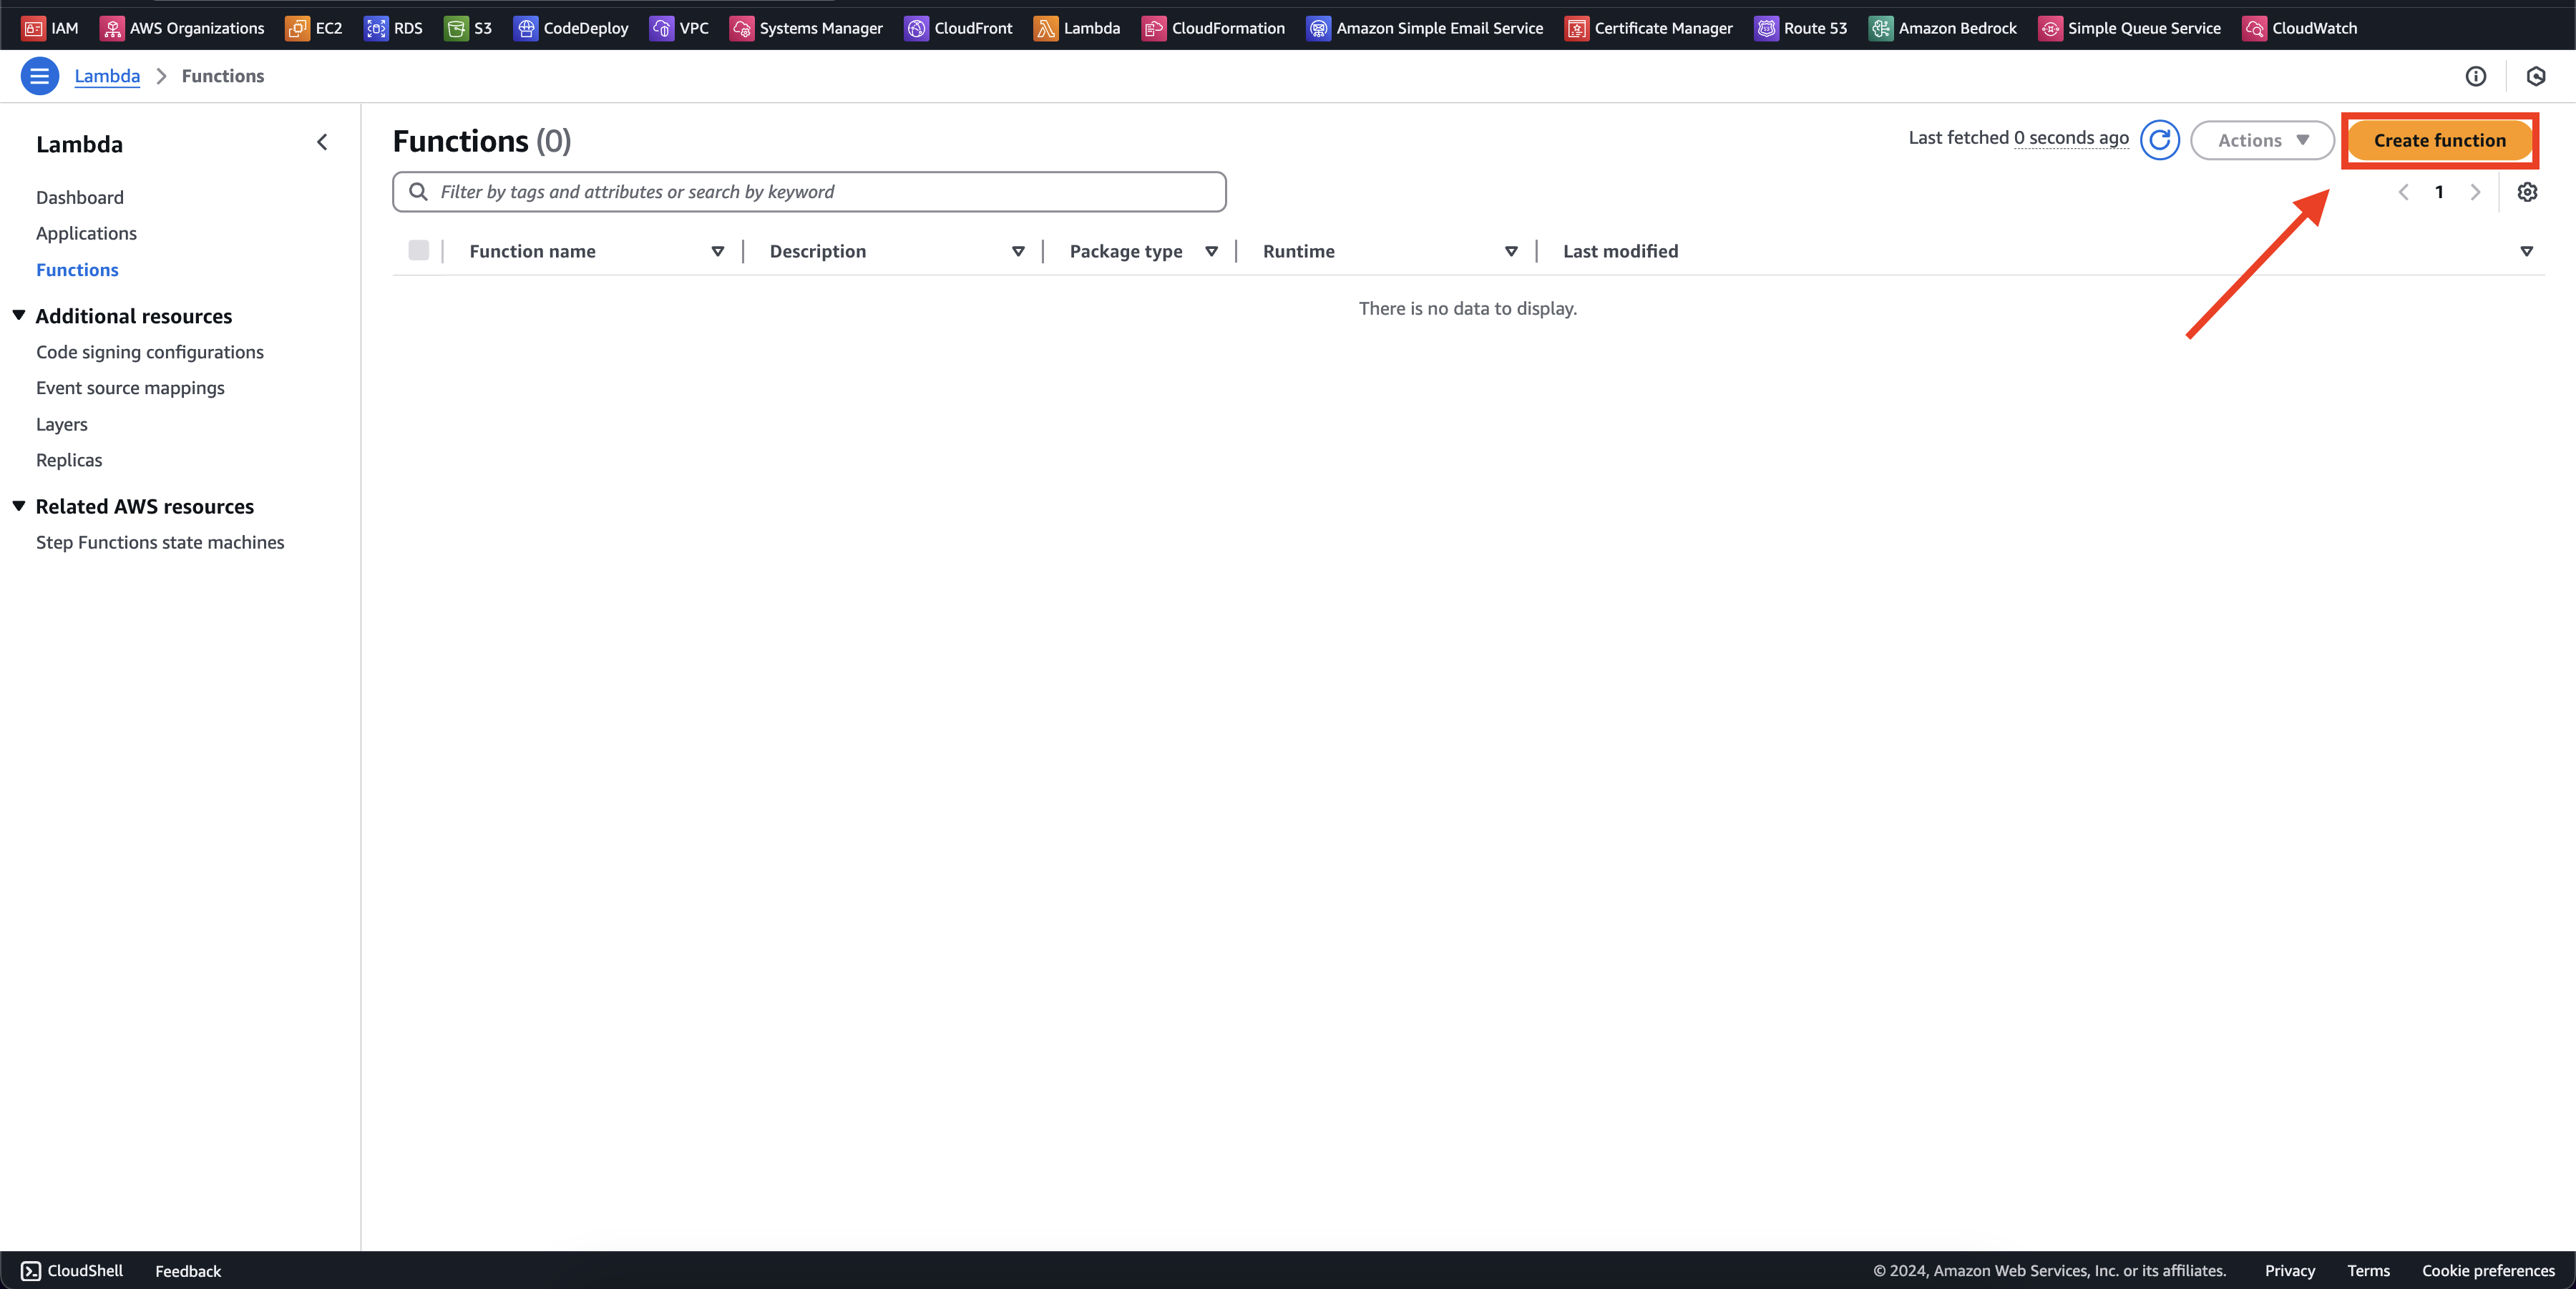
- Chọn Create function
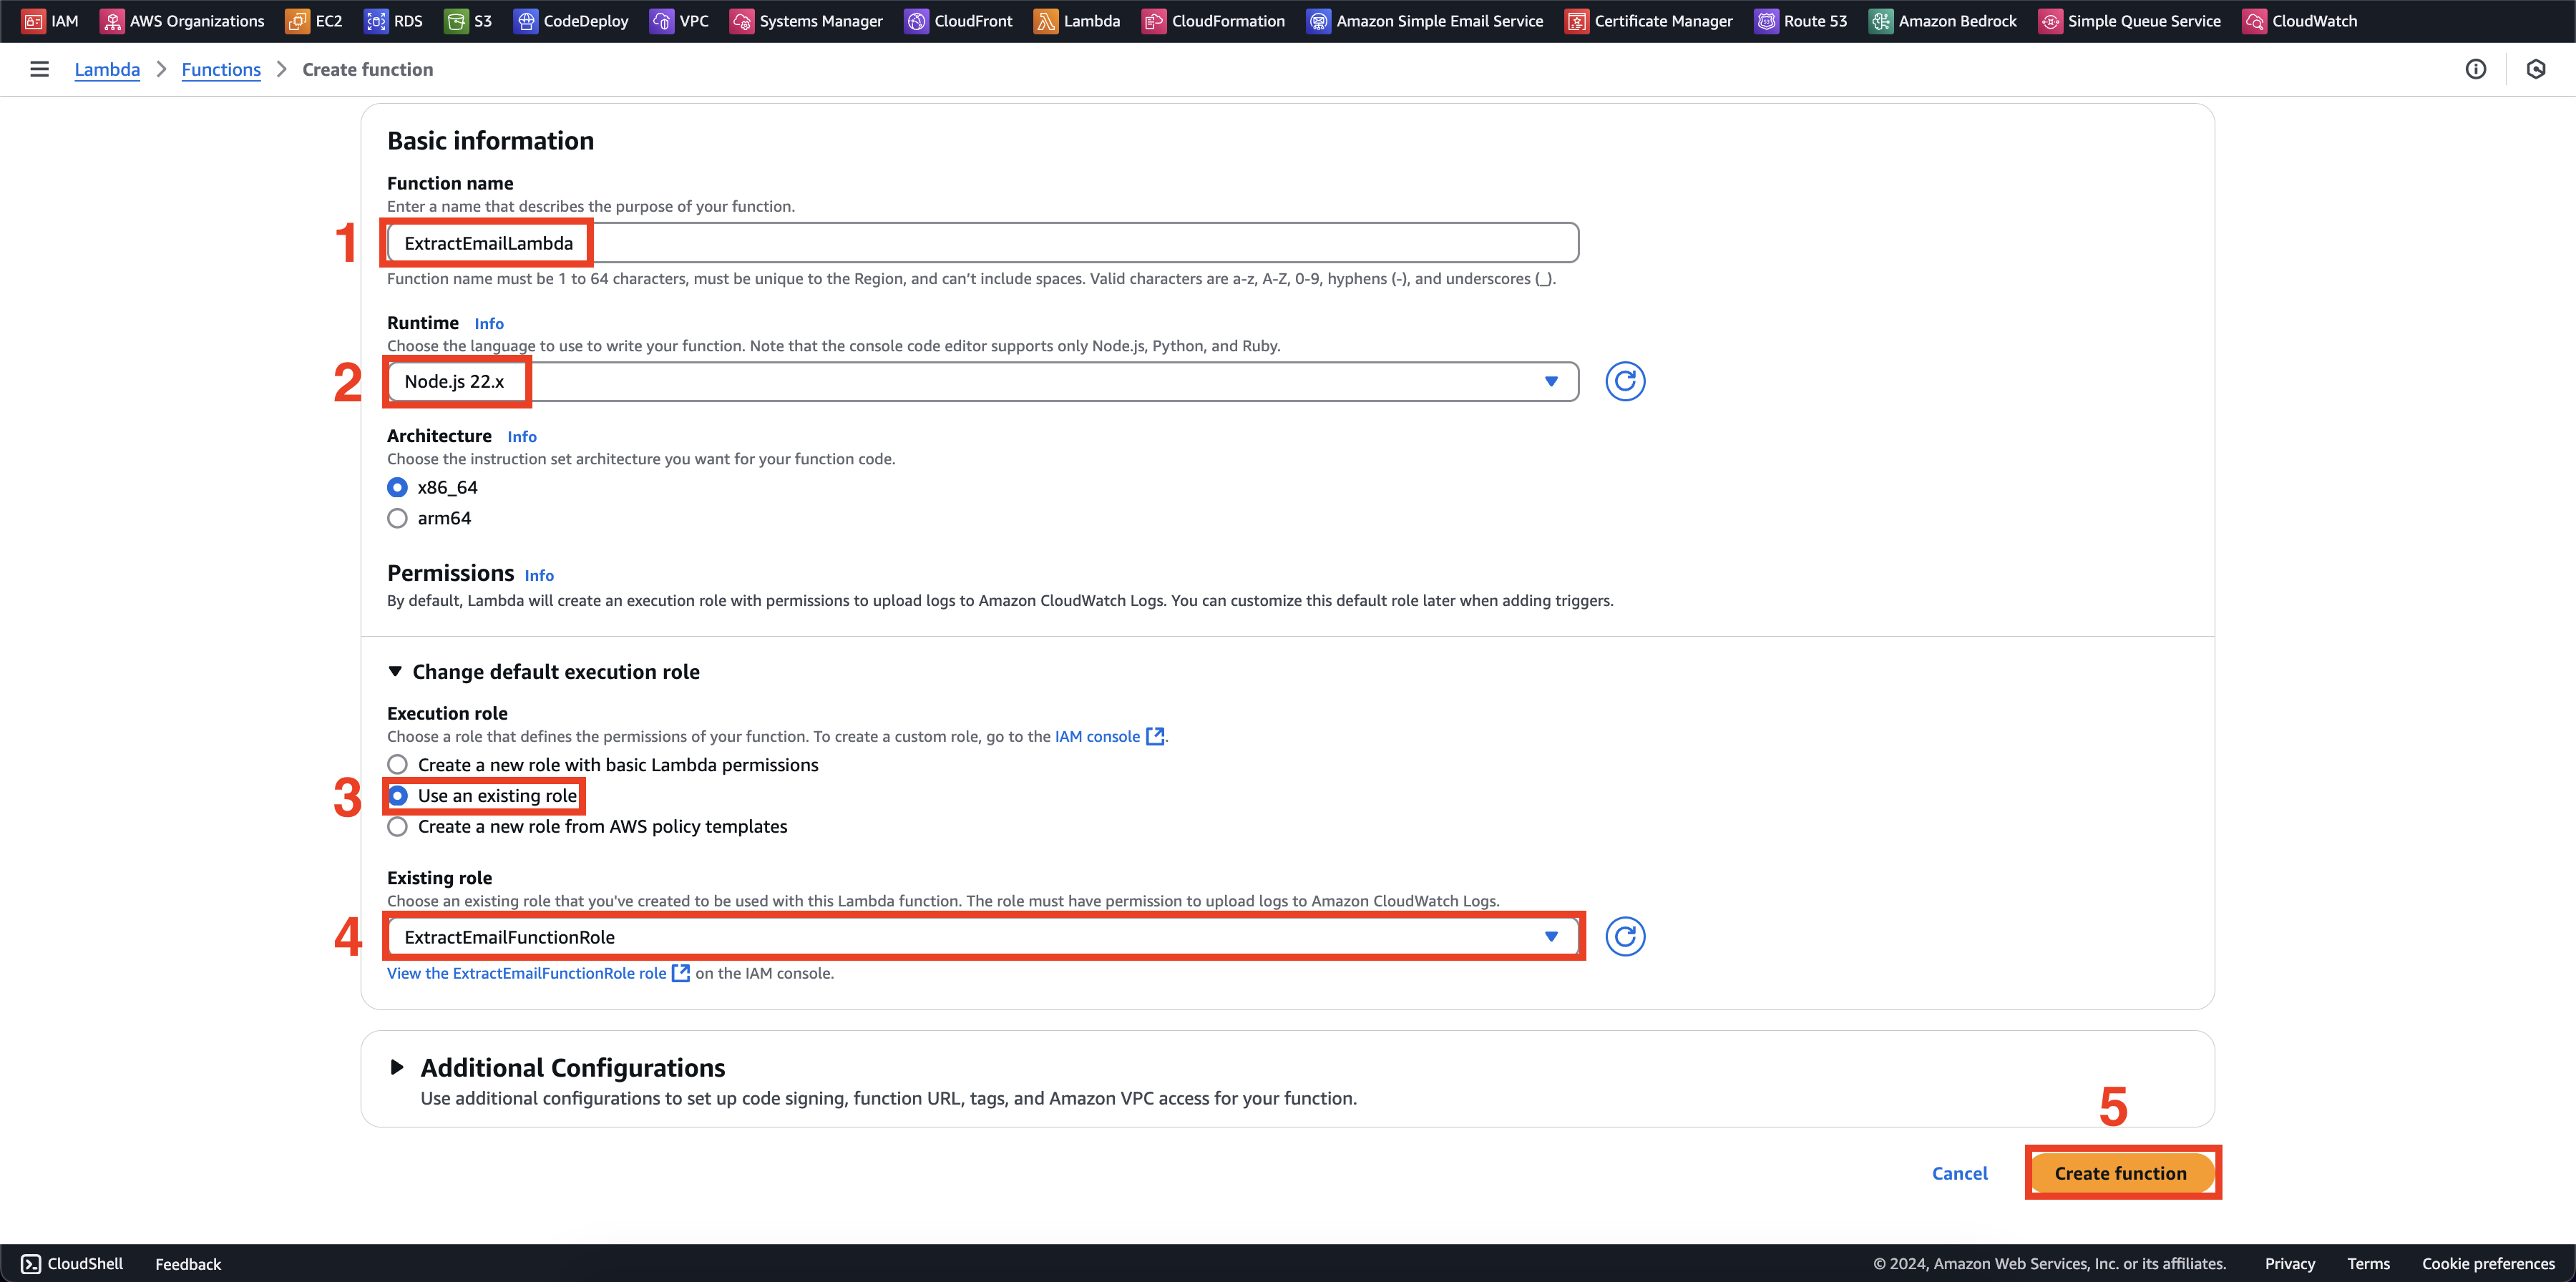
- Ở mục AWS Console, chọn Author from scratch, Function name là
ExtractEmailLambda, nodejs Nodejs 22.x. Chọn role đã tạo trước đóExtractEmailFunctionRolevà chọn Create function
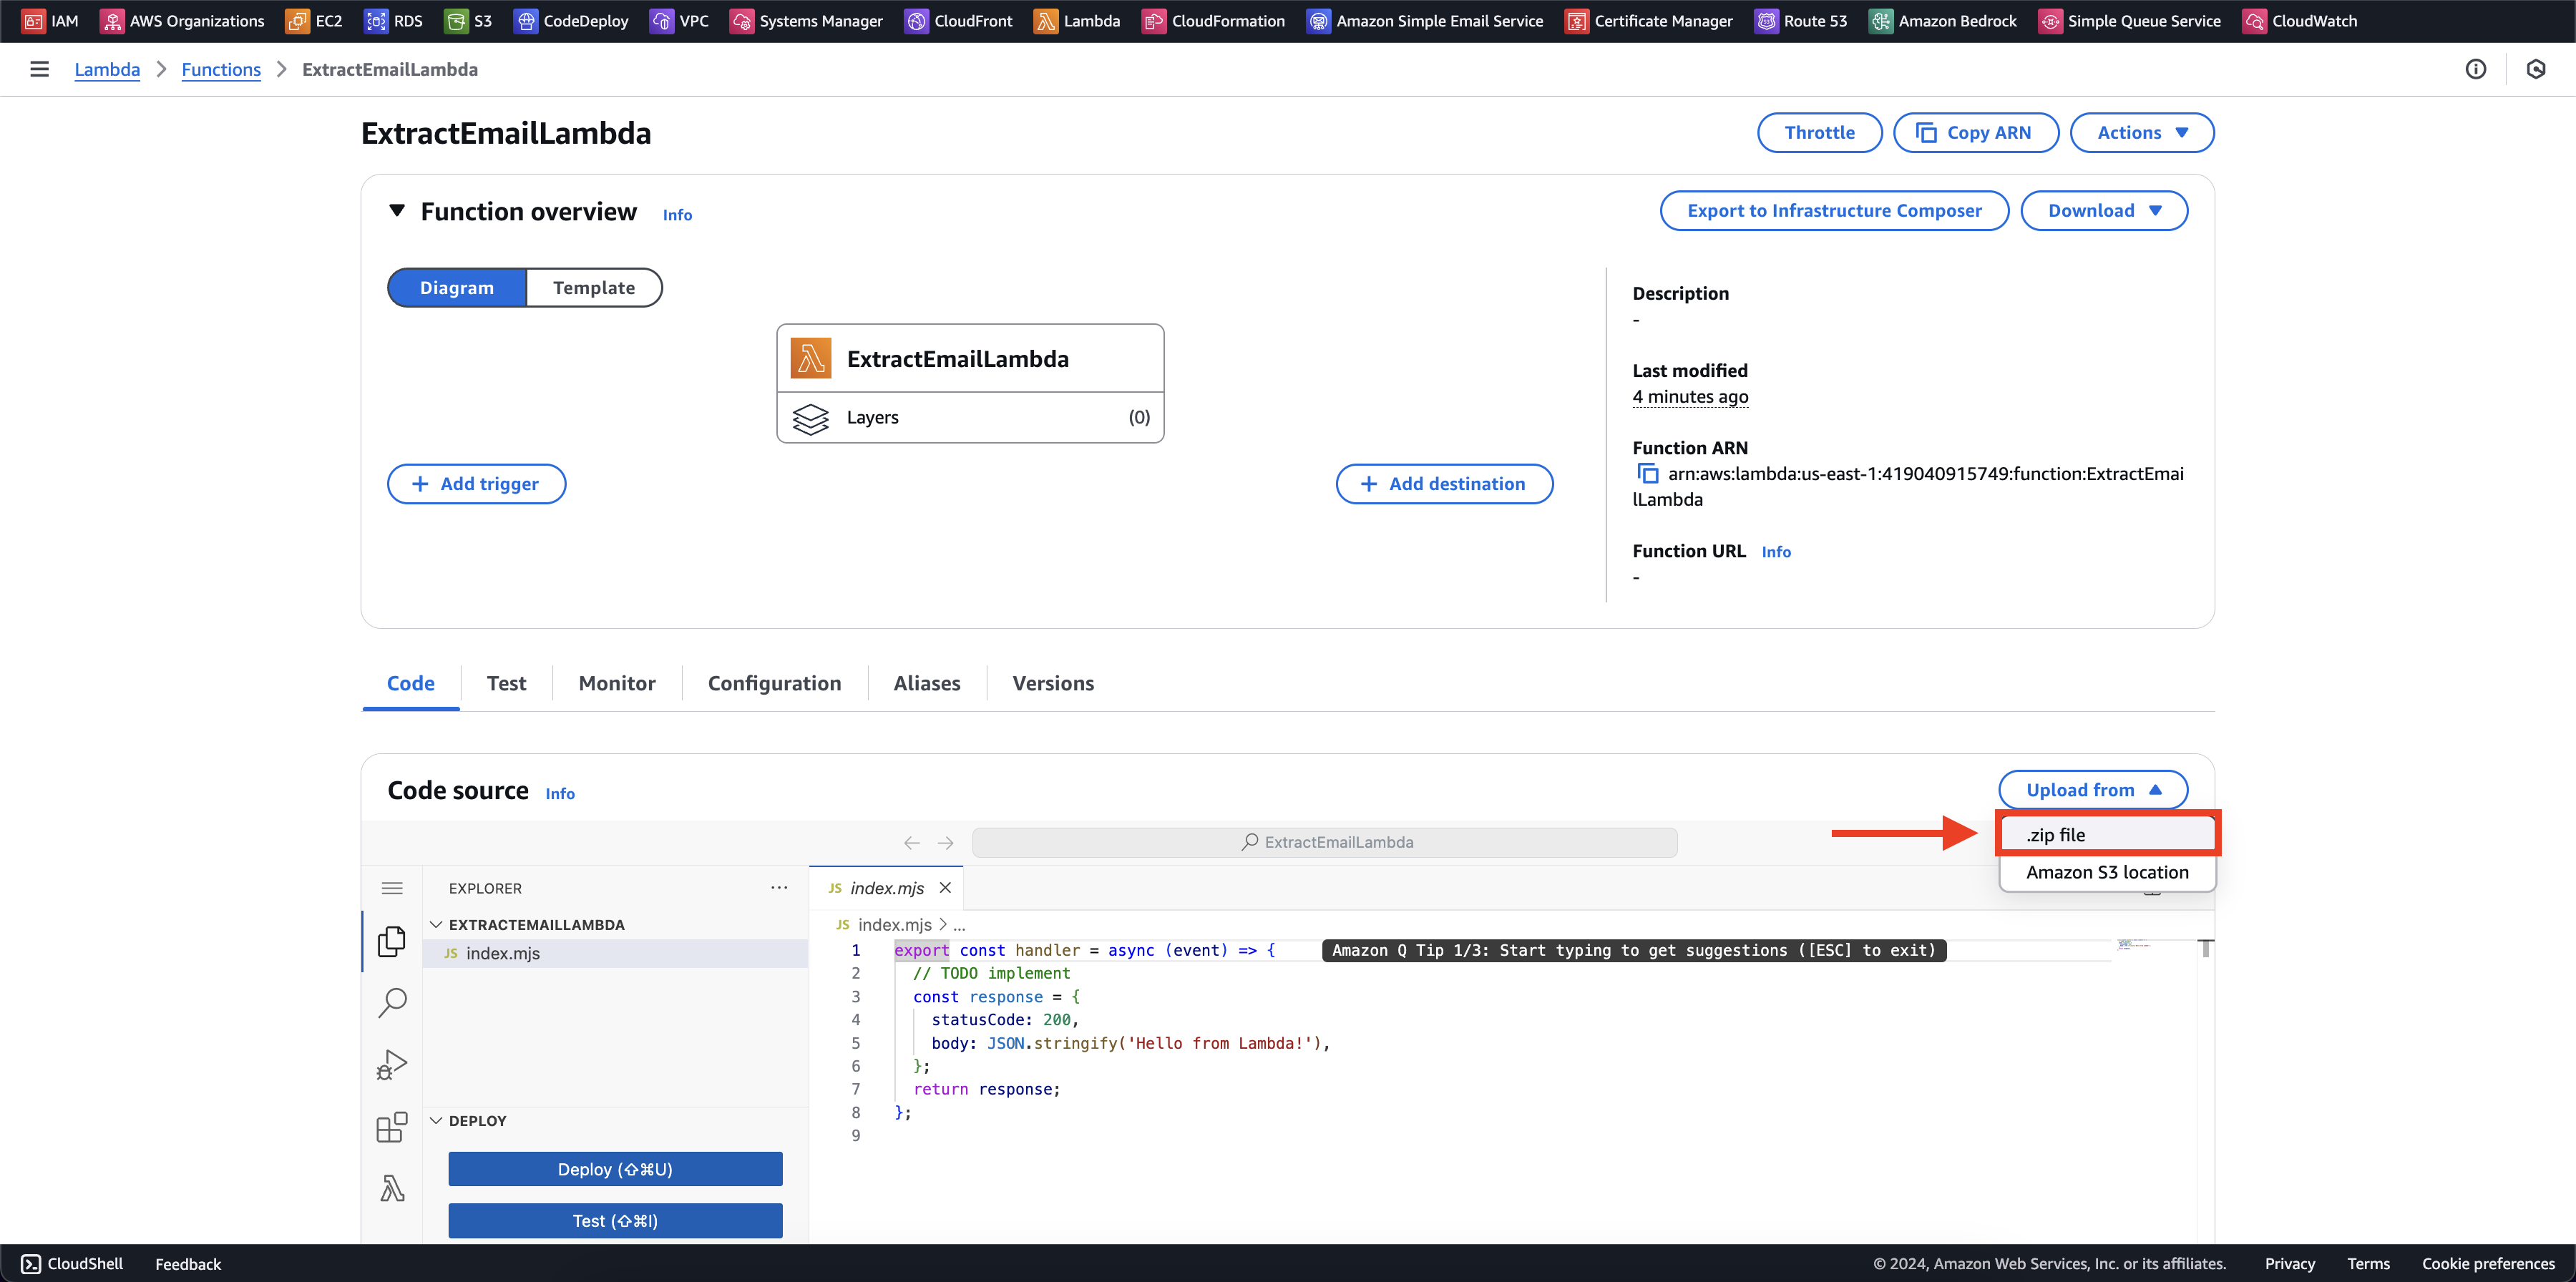
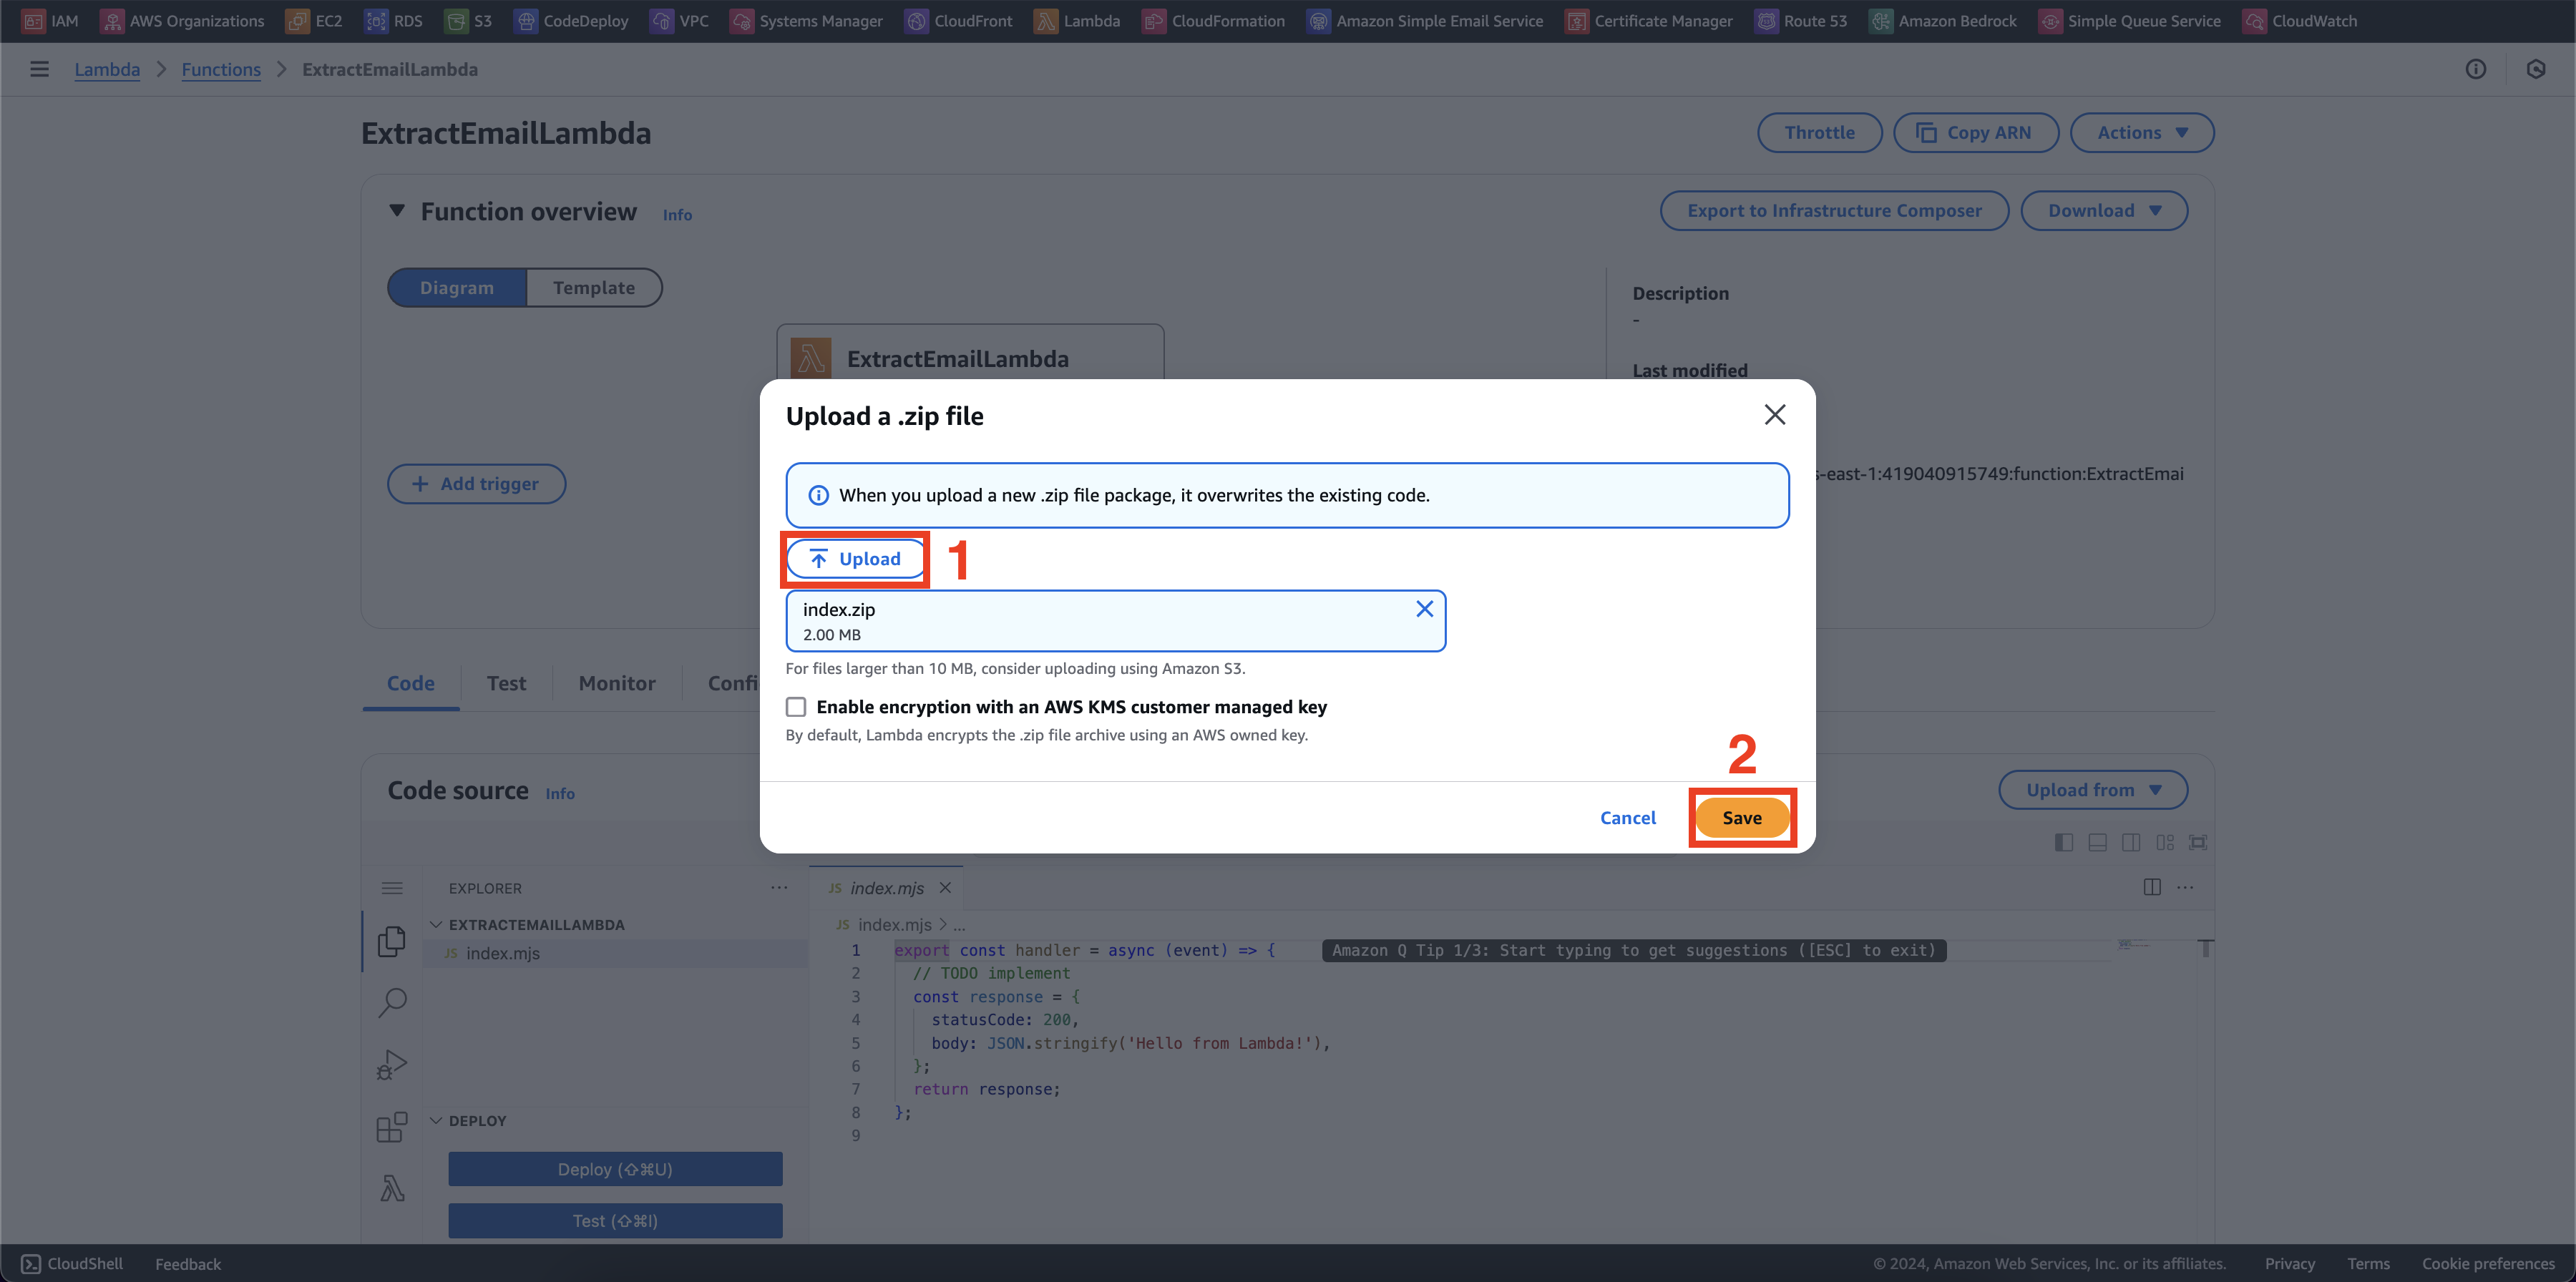
- Tiếp, chúng ta cần upload source code cho function, bạn có thể download tại đây index.zip hoặc bạn có thể tự build tại đây. Sau khi tải về thì chọn Code > Upload from > .zip file
- Chọn Save để tải lên
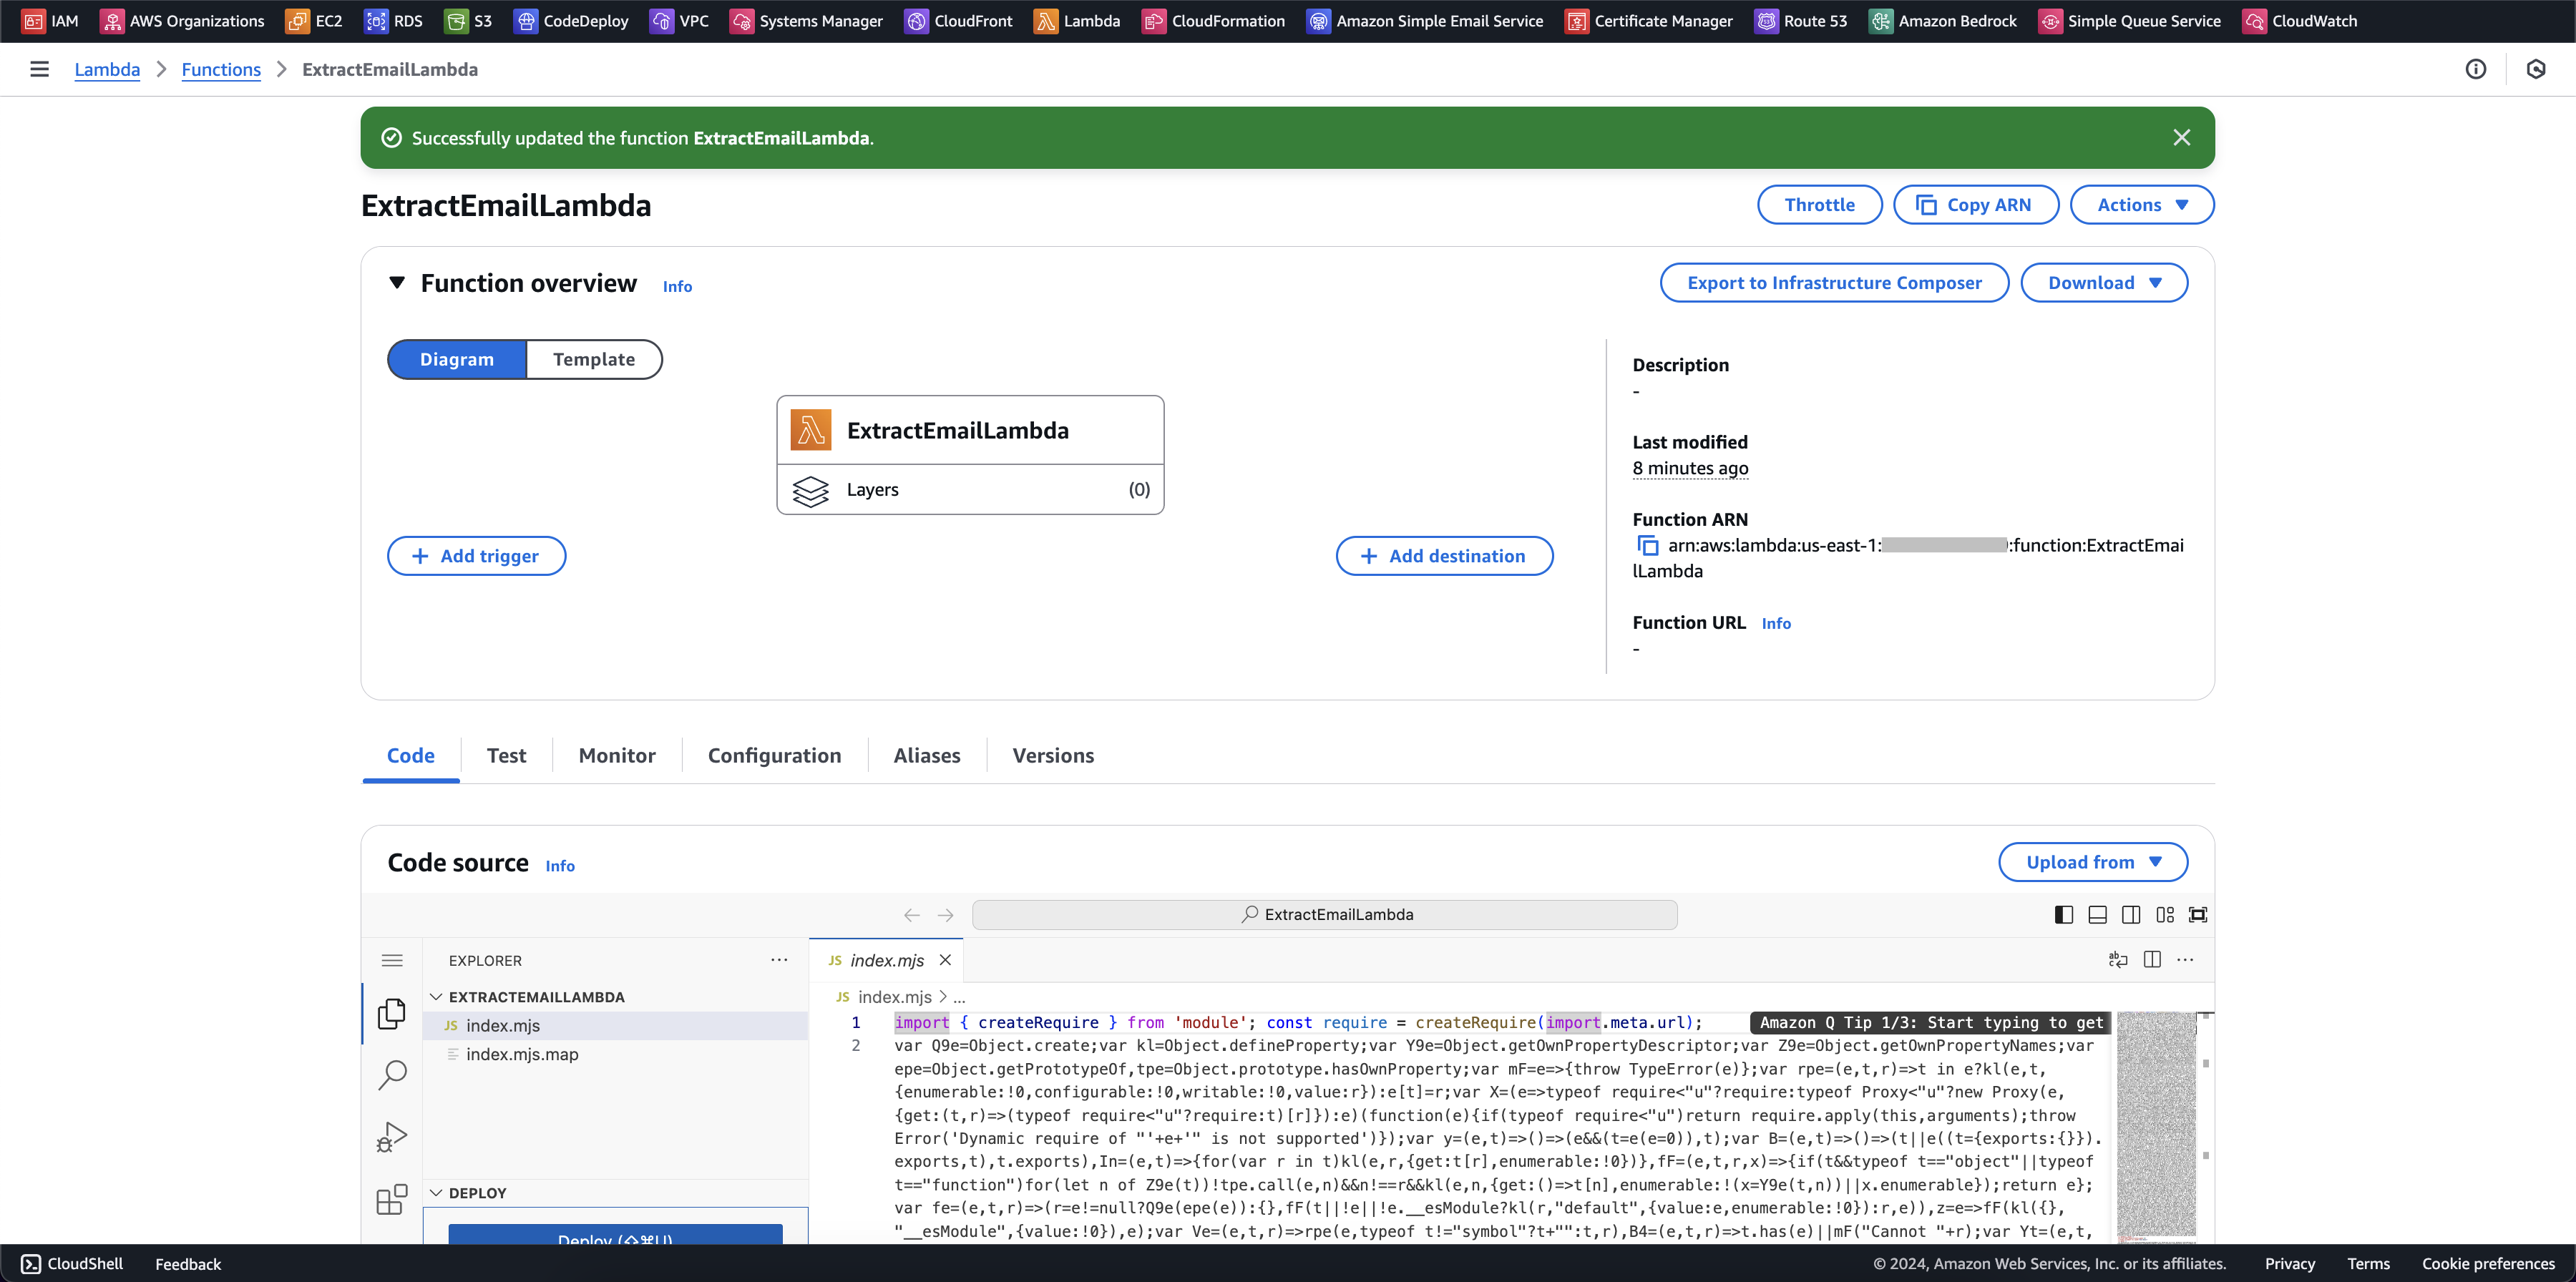
Upload thành công
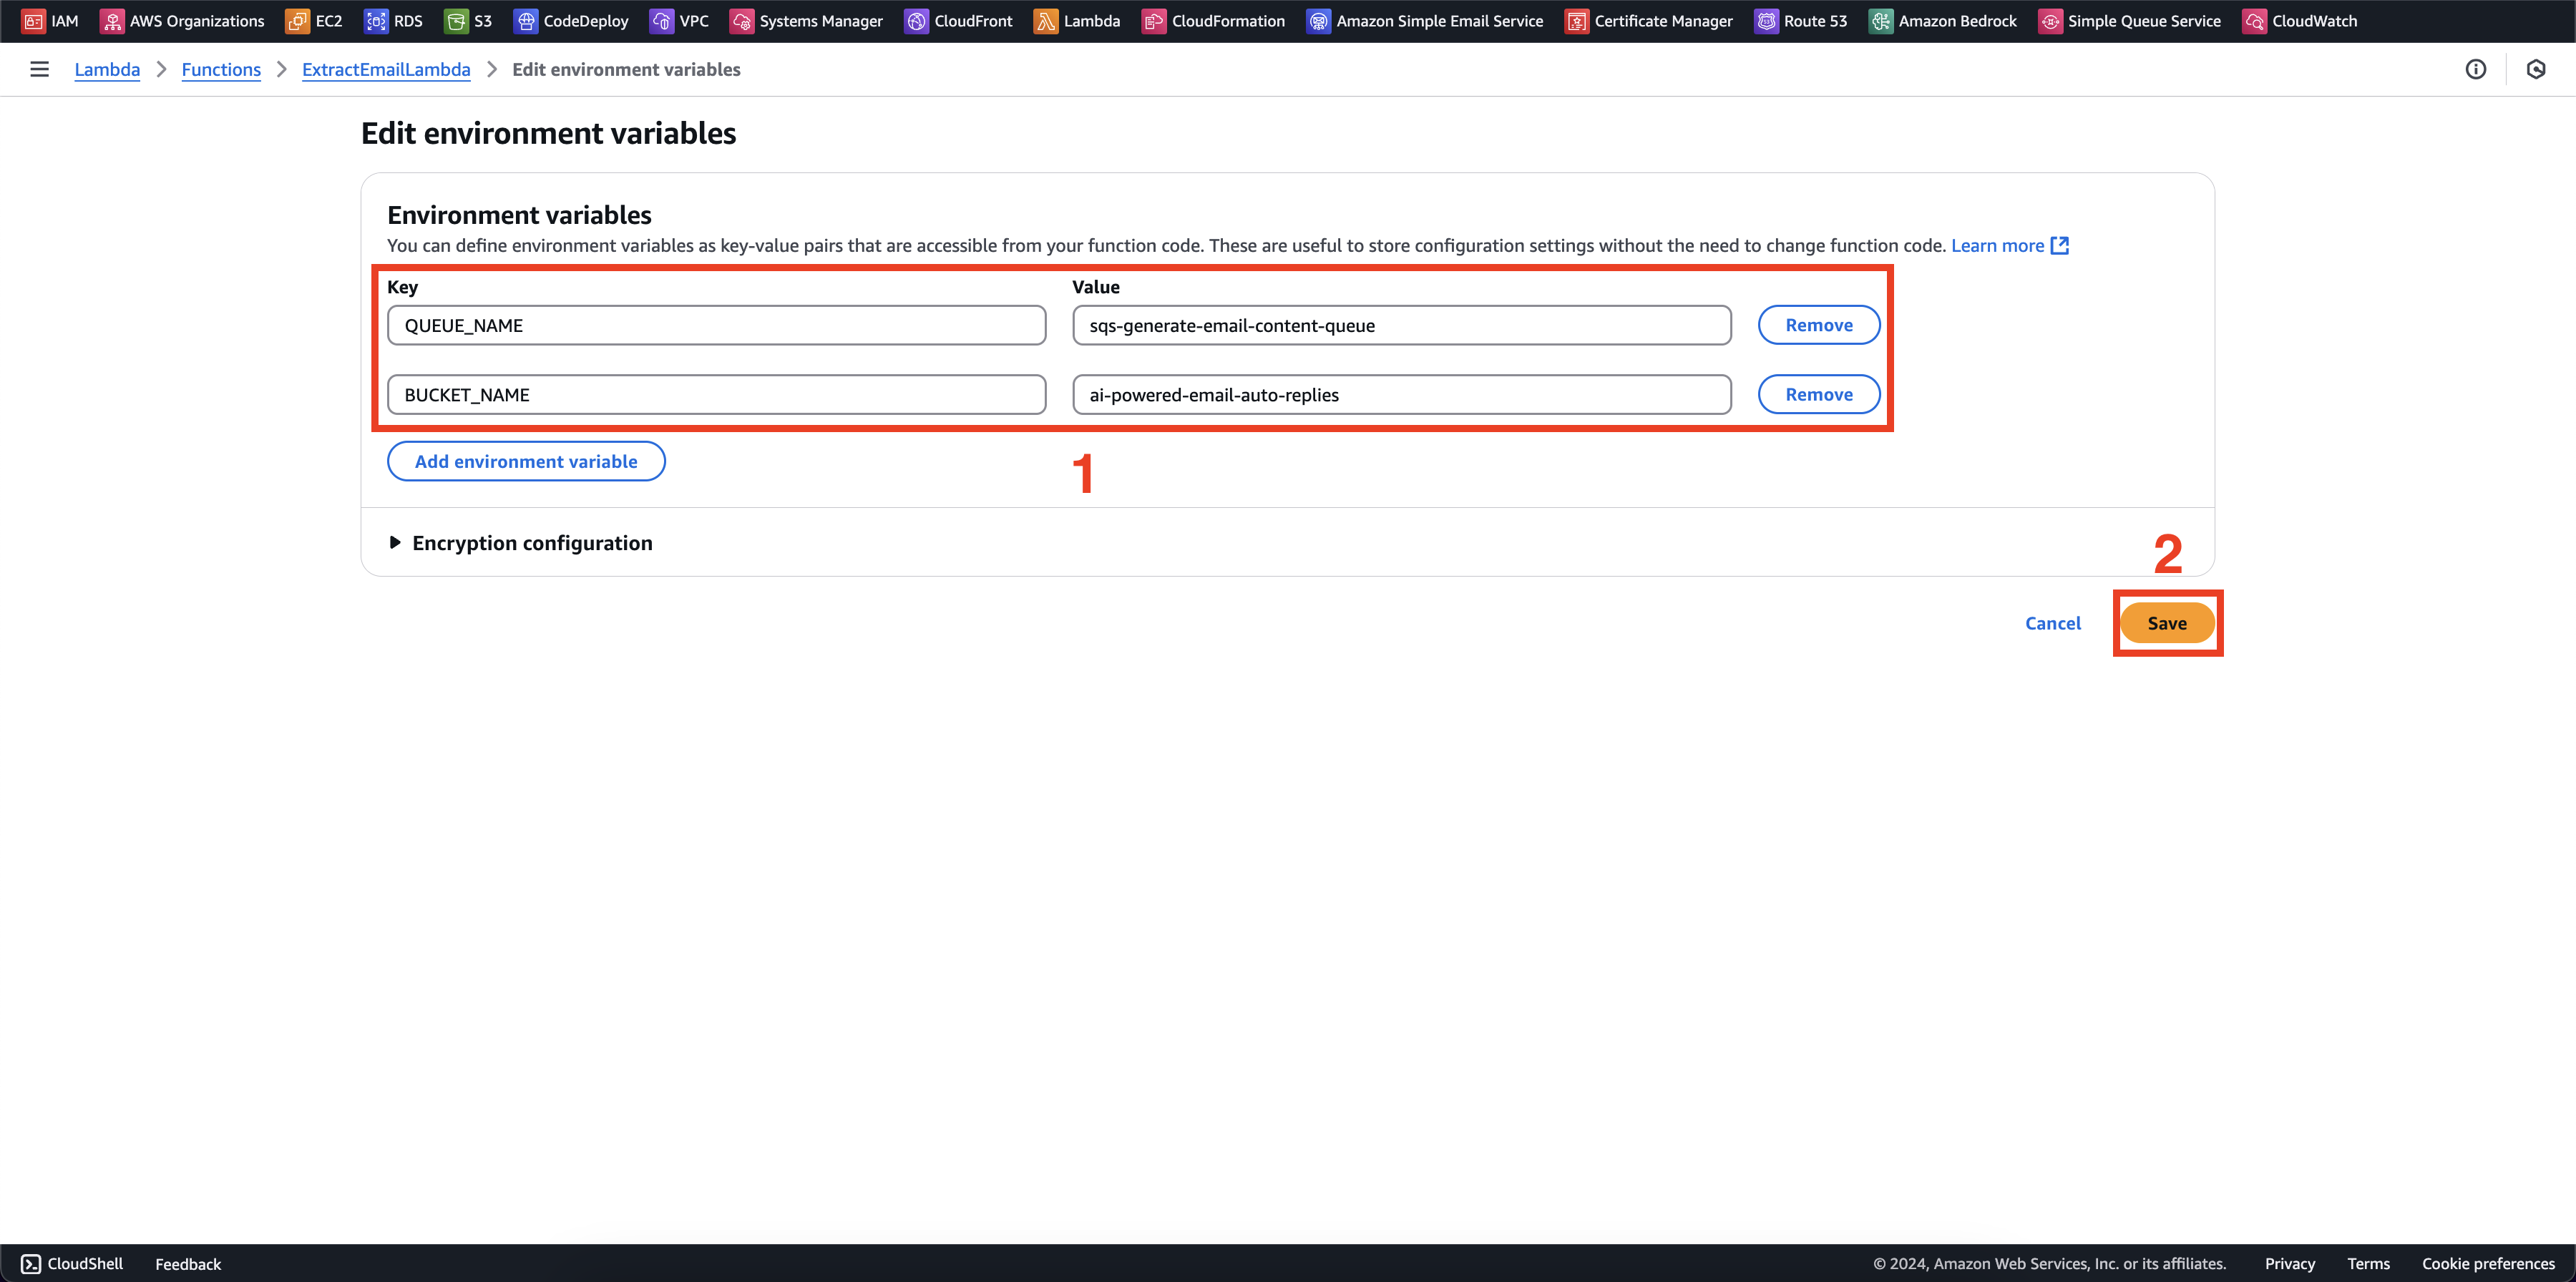
Tiếp theo, chúng ta cần thêm biến môi trường
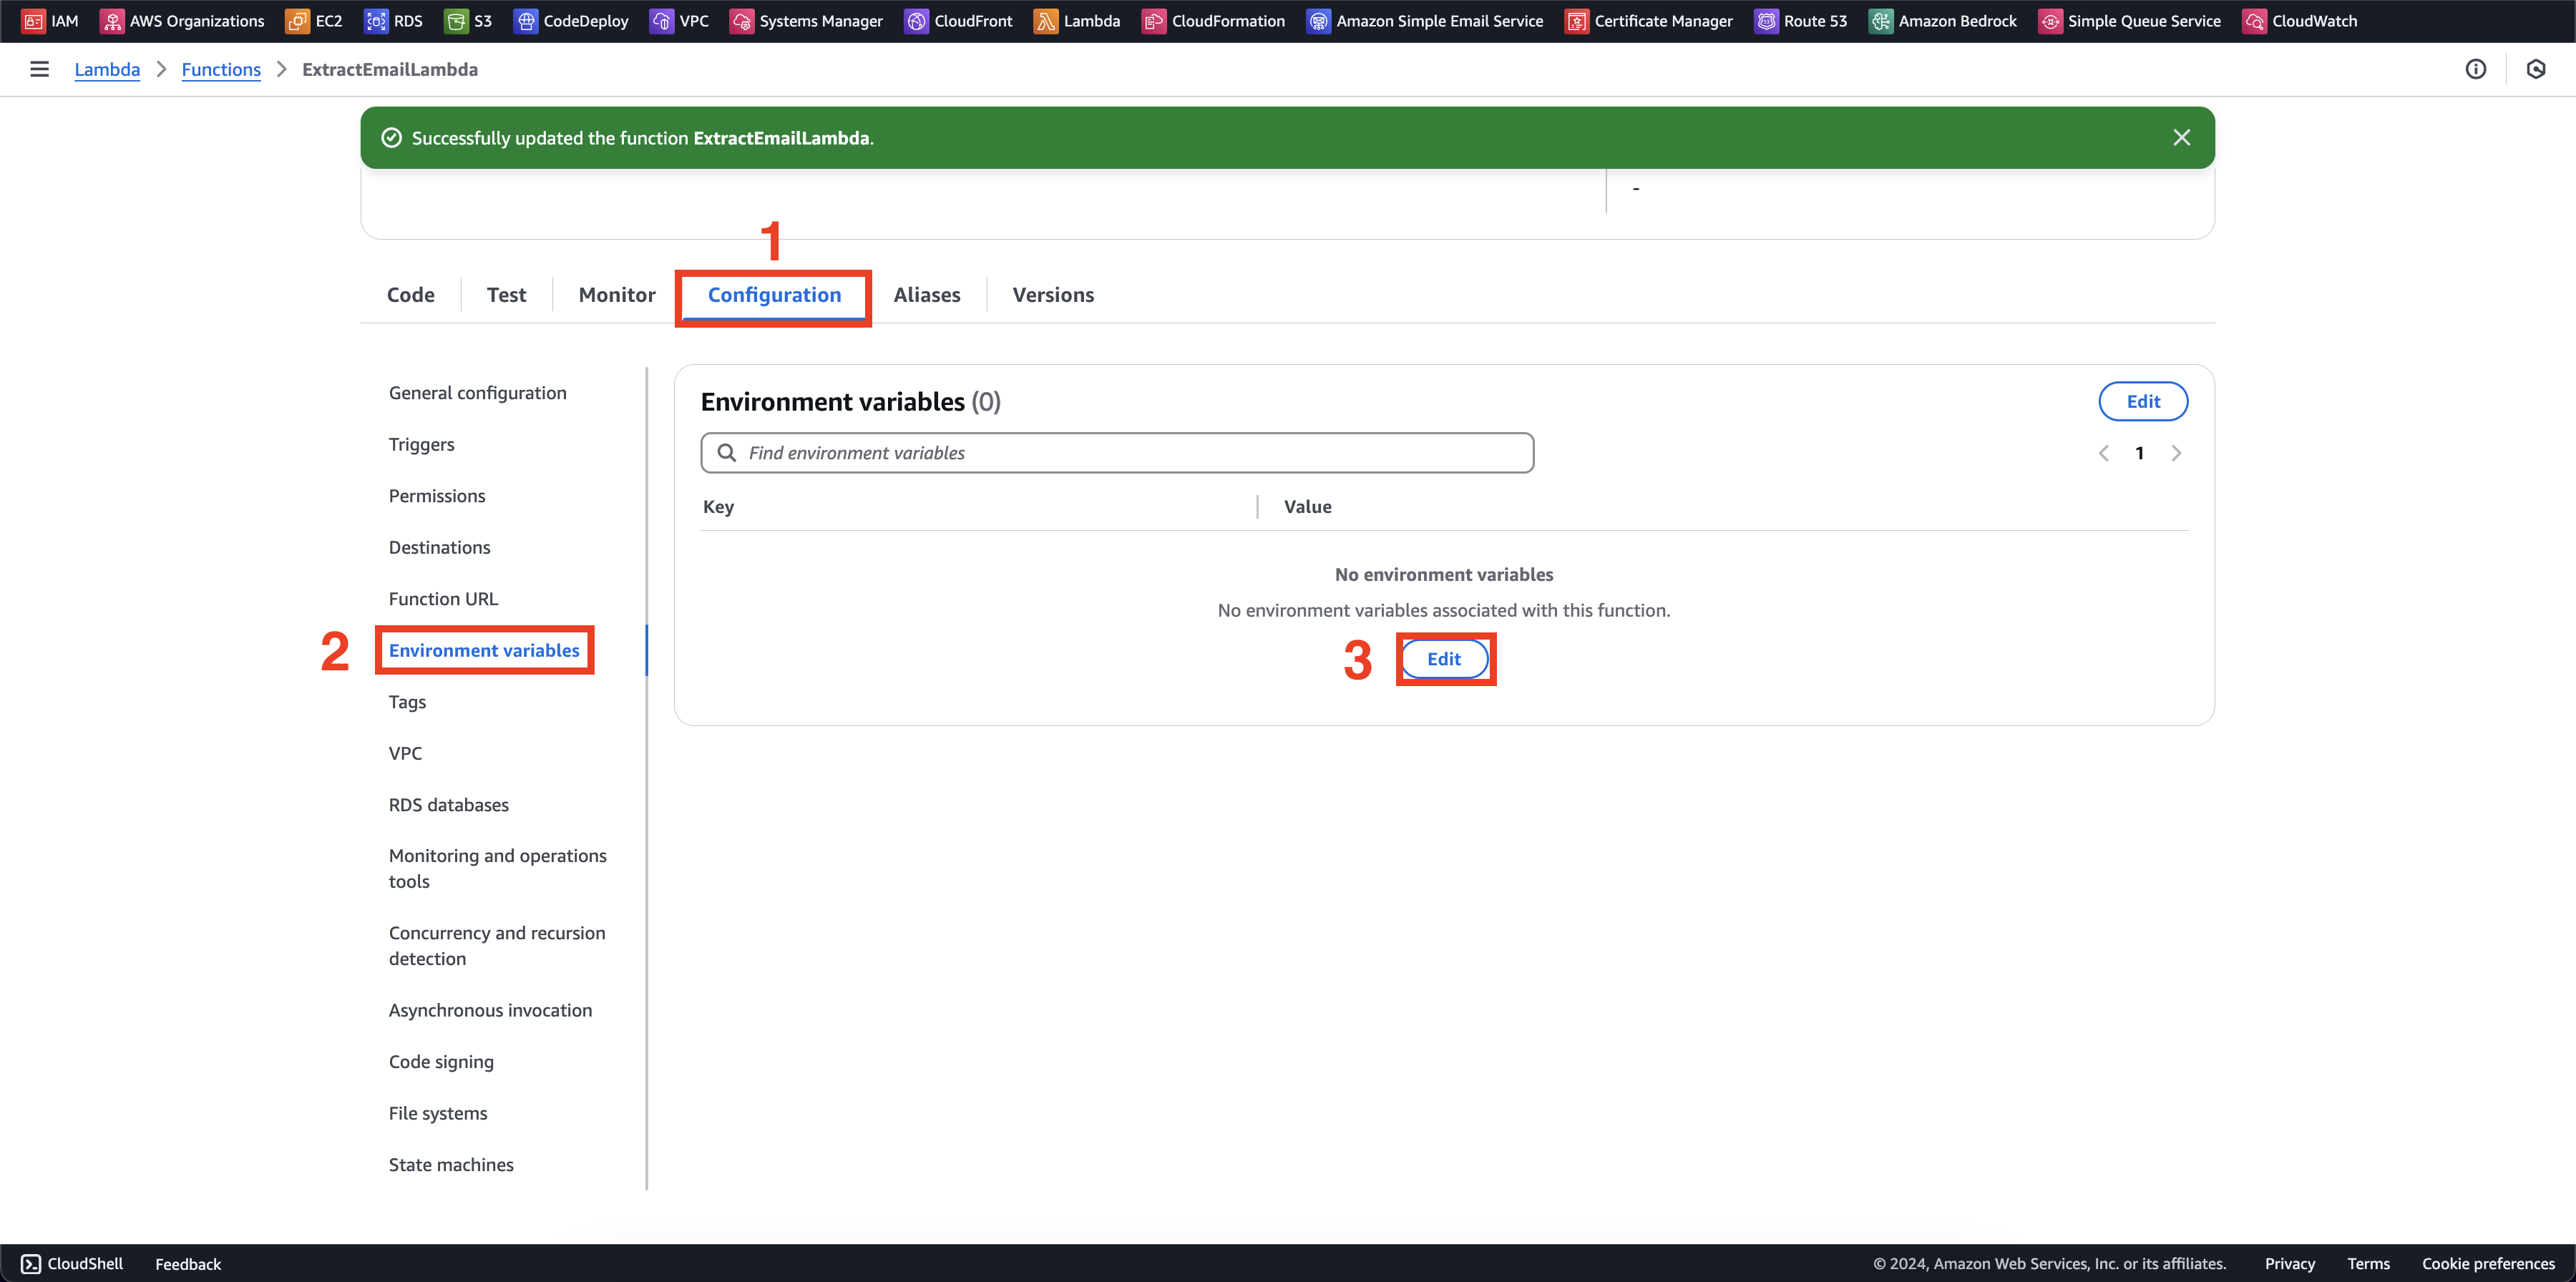
- Chúng ta có 2 giá trị
| Key | Value | Description |
|---|---|---|
QUEUE_NAME | sqs-generate-email-content-queue | Queue này dùng để chứa email tới và gọi function tạo nội dung |
BUCKET_NAME | ai-powered-email-auto-replies | Tên bucket để lấy nội dung email, vì SES không emit nội dung email mà chỉ emit key path (messageId) của email trên S3 |
Chọn Save
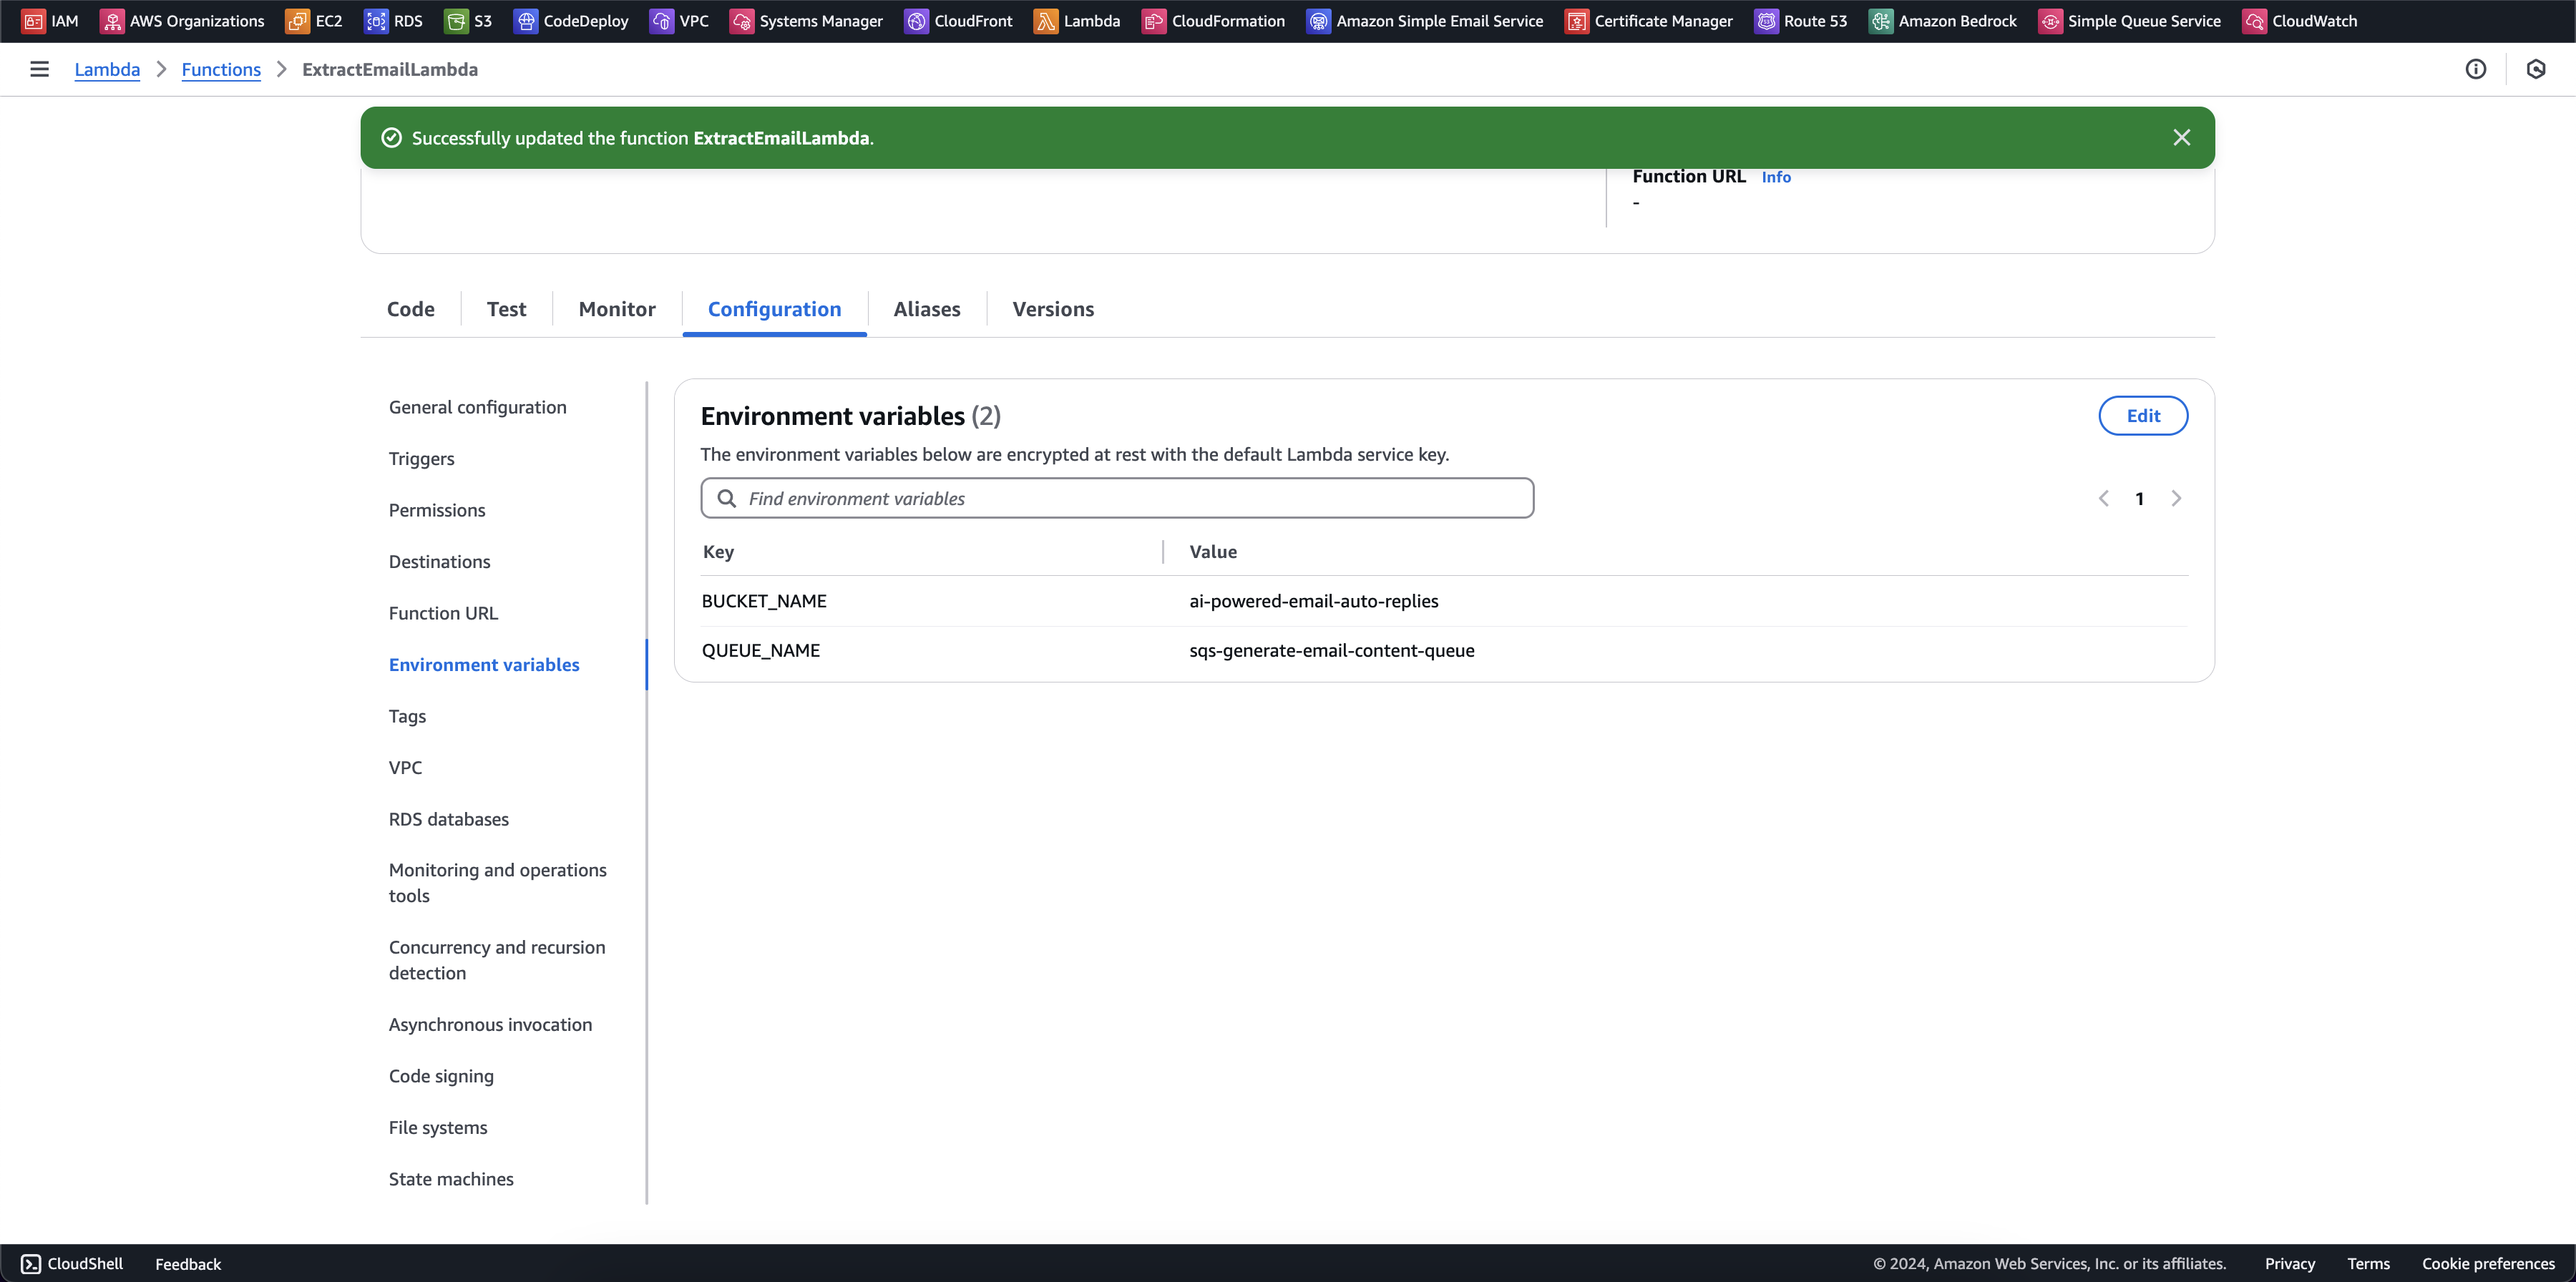
- Cập nhật thành công
Thông tin chi tiết
| Configuration | Value | Description |
|---|---|---|
| function_name | ExtractEmailLambda | The unique name identifier for the Lambda function |
| role | ExtractEmailFunctionRole | IAM role that defines the permissions and access policies for the function |
| runtime | nodejs20.x | The execution environment and version for the Lambda function (Node.js 20) |
| handler | index.handler | The entry point for the function |
| memory_size | 128 | Amount of memory allocated to the function in MB (128MB) |
| timeout | 30 | Maximum execution time allowed for the function in seconds |
- Nhận event data từ SES và lấy dữ liệu từ S3
// Helper function to extract email data from SES event
const extractEmailData = async (event: SESEvent) => {
  const sesRecord = event.Records[0].ses;
  const messageId = sesRecord.mail.messageId;
  const emailData = {
    sender: sesRecord.mail.source,
    key: messageId,
  };

  // Get email content from S3
  const getObjectCommand = new GetObjectCommand({
    Bucket: env.bucketName,
    Key: `received-email/${messageId}`
  });

  const response = await s3Client.send(getObjectCommand);
  const emailContent = await response.Body?.transformToString();

  // Parsing MIME type to JSON object
  const { text, subject } = await simpleParser(emailContent);
  return {
    ...emailData,
    subject,
    content: text || "No email data"
  };
};
- Gửi data qua message SQS
const body = await extractEmailData(event);
const command = new GetQueueUrlCommand({ // GetQueueUrlRequest
    QueueName: env.queueName, // required
});
const queueUrlResponse = await sqsClient.send(command);
const params = {
    QueueUrl: queueUrlResponse.QueueUrl,
    MessageBody: JSON.stringify(body),
};
await sqsClient.send(new SendMessageCommand(params));
Full source code
import { Handler, SESEvent } from 'aws-lambda';
import { GetQueueUrlCommand, SQSClient, SendMessageCommand } from "@aws-sdk/client-sqs";
import { GetObjectCommand, S3Client } from "@aws-sdk/client-s3";
import { Logger } from '@aws-lambda-powertools/logger';
import * as mailparser from 'mailparser';

require('dotenv').config();

const simpleParser = mailparser.simpleParser;
const logger = new Logger();

const env = {
  queueName: process.env.QUEUE_NAME || "",
  bucketName: process.env.BUCKET_NAME || ""
}

const sqsClient = new SQSClient();
const s3Client = new S3Client();

// Helper function to extract email data from SES event
const extractEmailData = async (event: SESEvent) => {
  const sesRecord = event.Records[0].ses;
  const messageId = sesRecord.mail.messageId;
  const emailData = {
    sender: sesRecord.mail.source,
    key: messageId,
  };
  // logger.info("Email Data: ", JSON.stringify(emailData, null, 2));

  // Get email content from S3
  const getObjectCommand = new GetObjectCommand({
    Bucket: env.bucketName,
    Key: `received-email/${messageId}`
  });

  const response = await s3Client.send(getObjectCommand);
  const emailContent = await response.Body?.transformToString();
  const { text, subject } = await simpleParser(emailContent);
  return {
    ...emailData,
    subject,
    content: text || "No email data"
  };
};

export const handler: Handler = async (event: SESEvent): Promise<void> => {
  try {
    const body = await extractEmailData(event);
    // logger.info({
    //     message: "Extracted email data",
    //     body: body
    // });
    const command = new GetQueueUrlCommand({ // GetQueueUrlRequest
      QueueName: env.queueName, // required
    });
    const queueUrlResponse = await sqsClient.send(command);
    const params = {
      QueueUrl: queueUrlResponse.QueueUrl,
      MessageBody: JSON.stringify(body),
    };
    await sqsClient.send(new SendMessageCommand(params));
  }
  catch (error) {
    logger.error(error as string);
  }
};
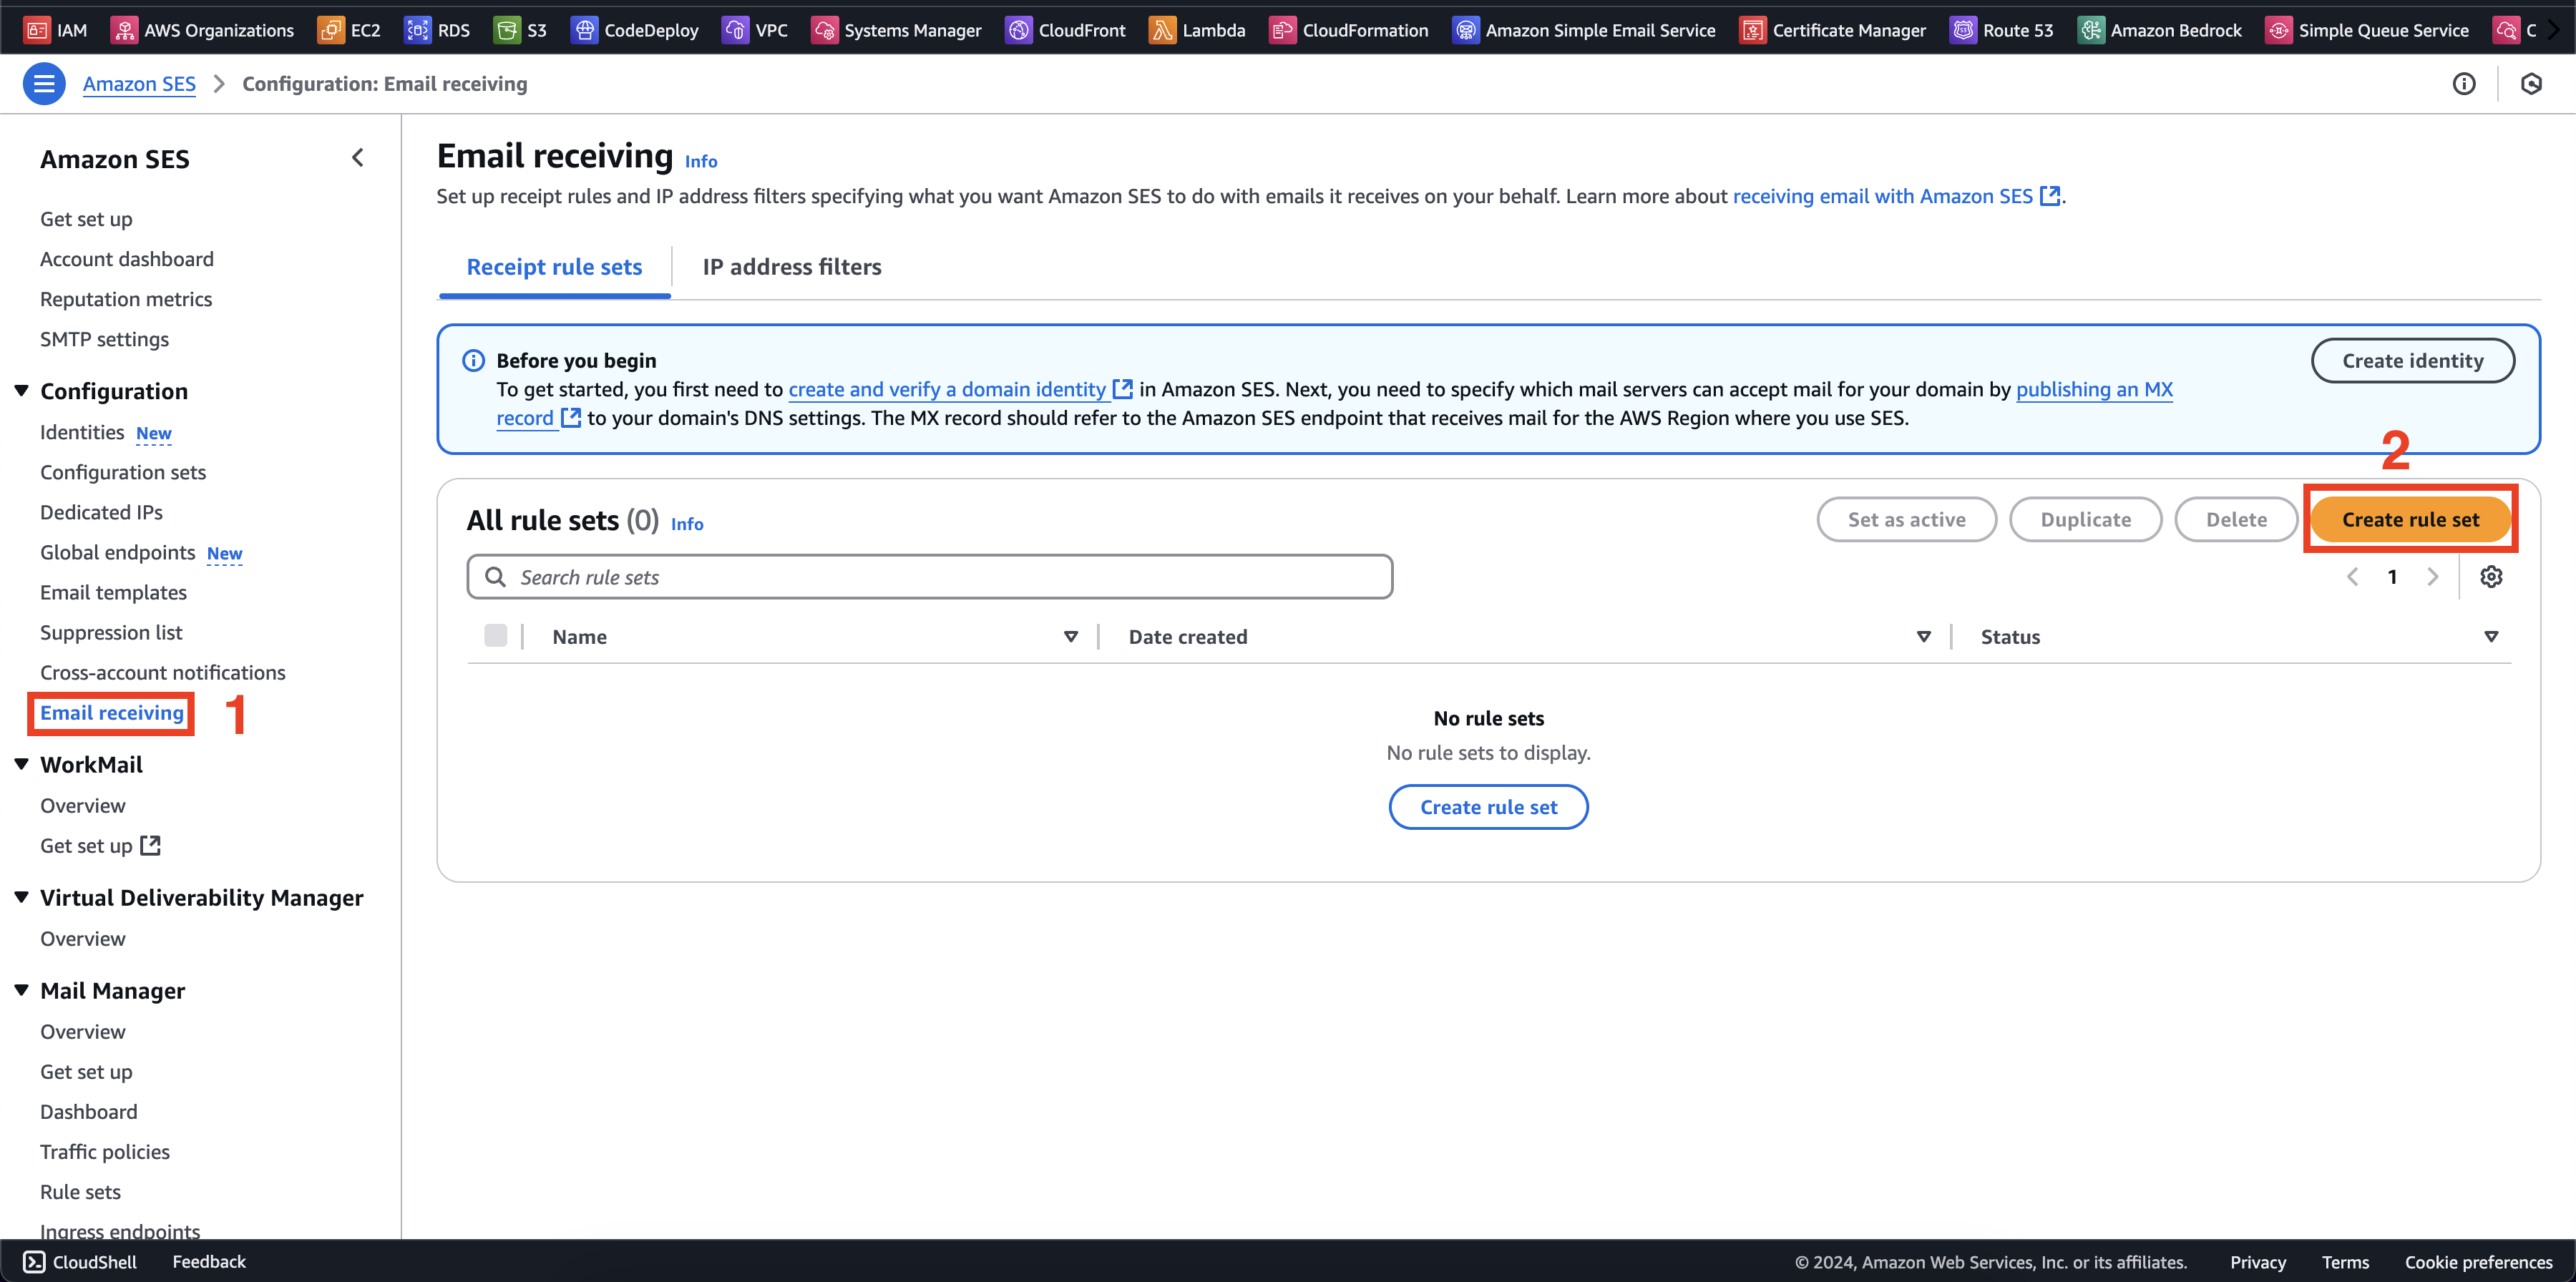
Tạo SES rule để trigger Extract Email function
- Vào SES dashboard sau đó vào phần Configuration > Email receiving > Create rule set
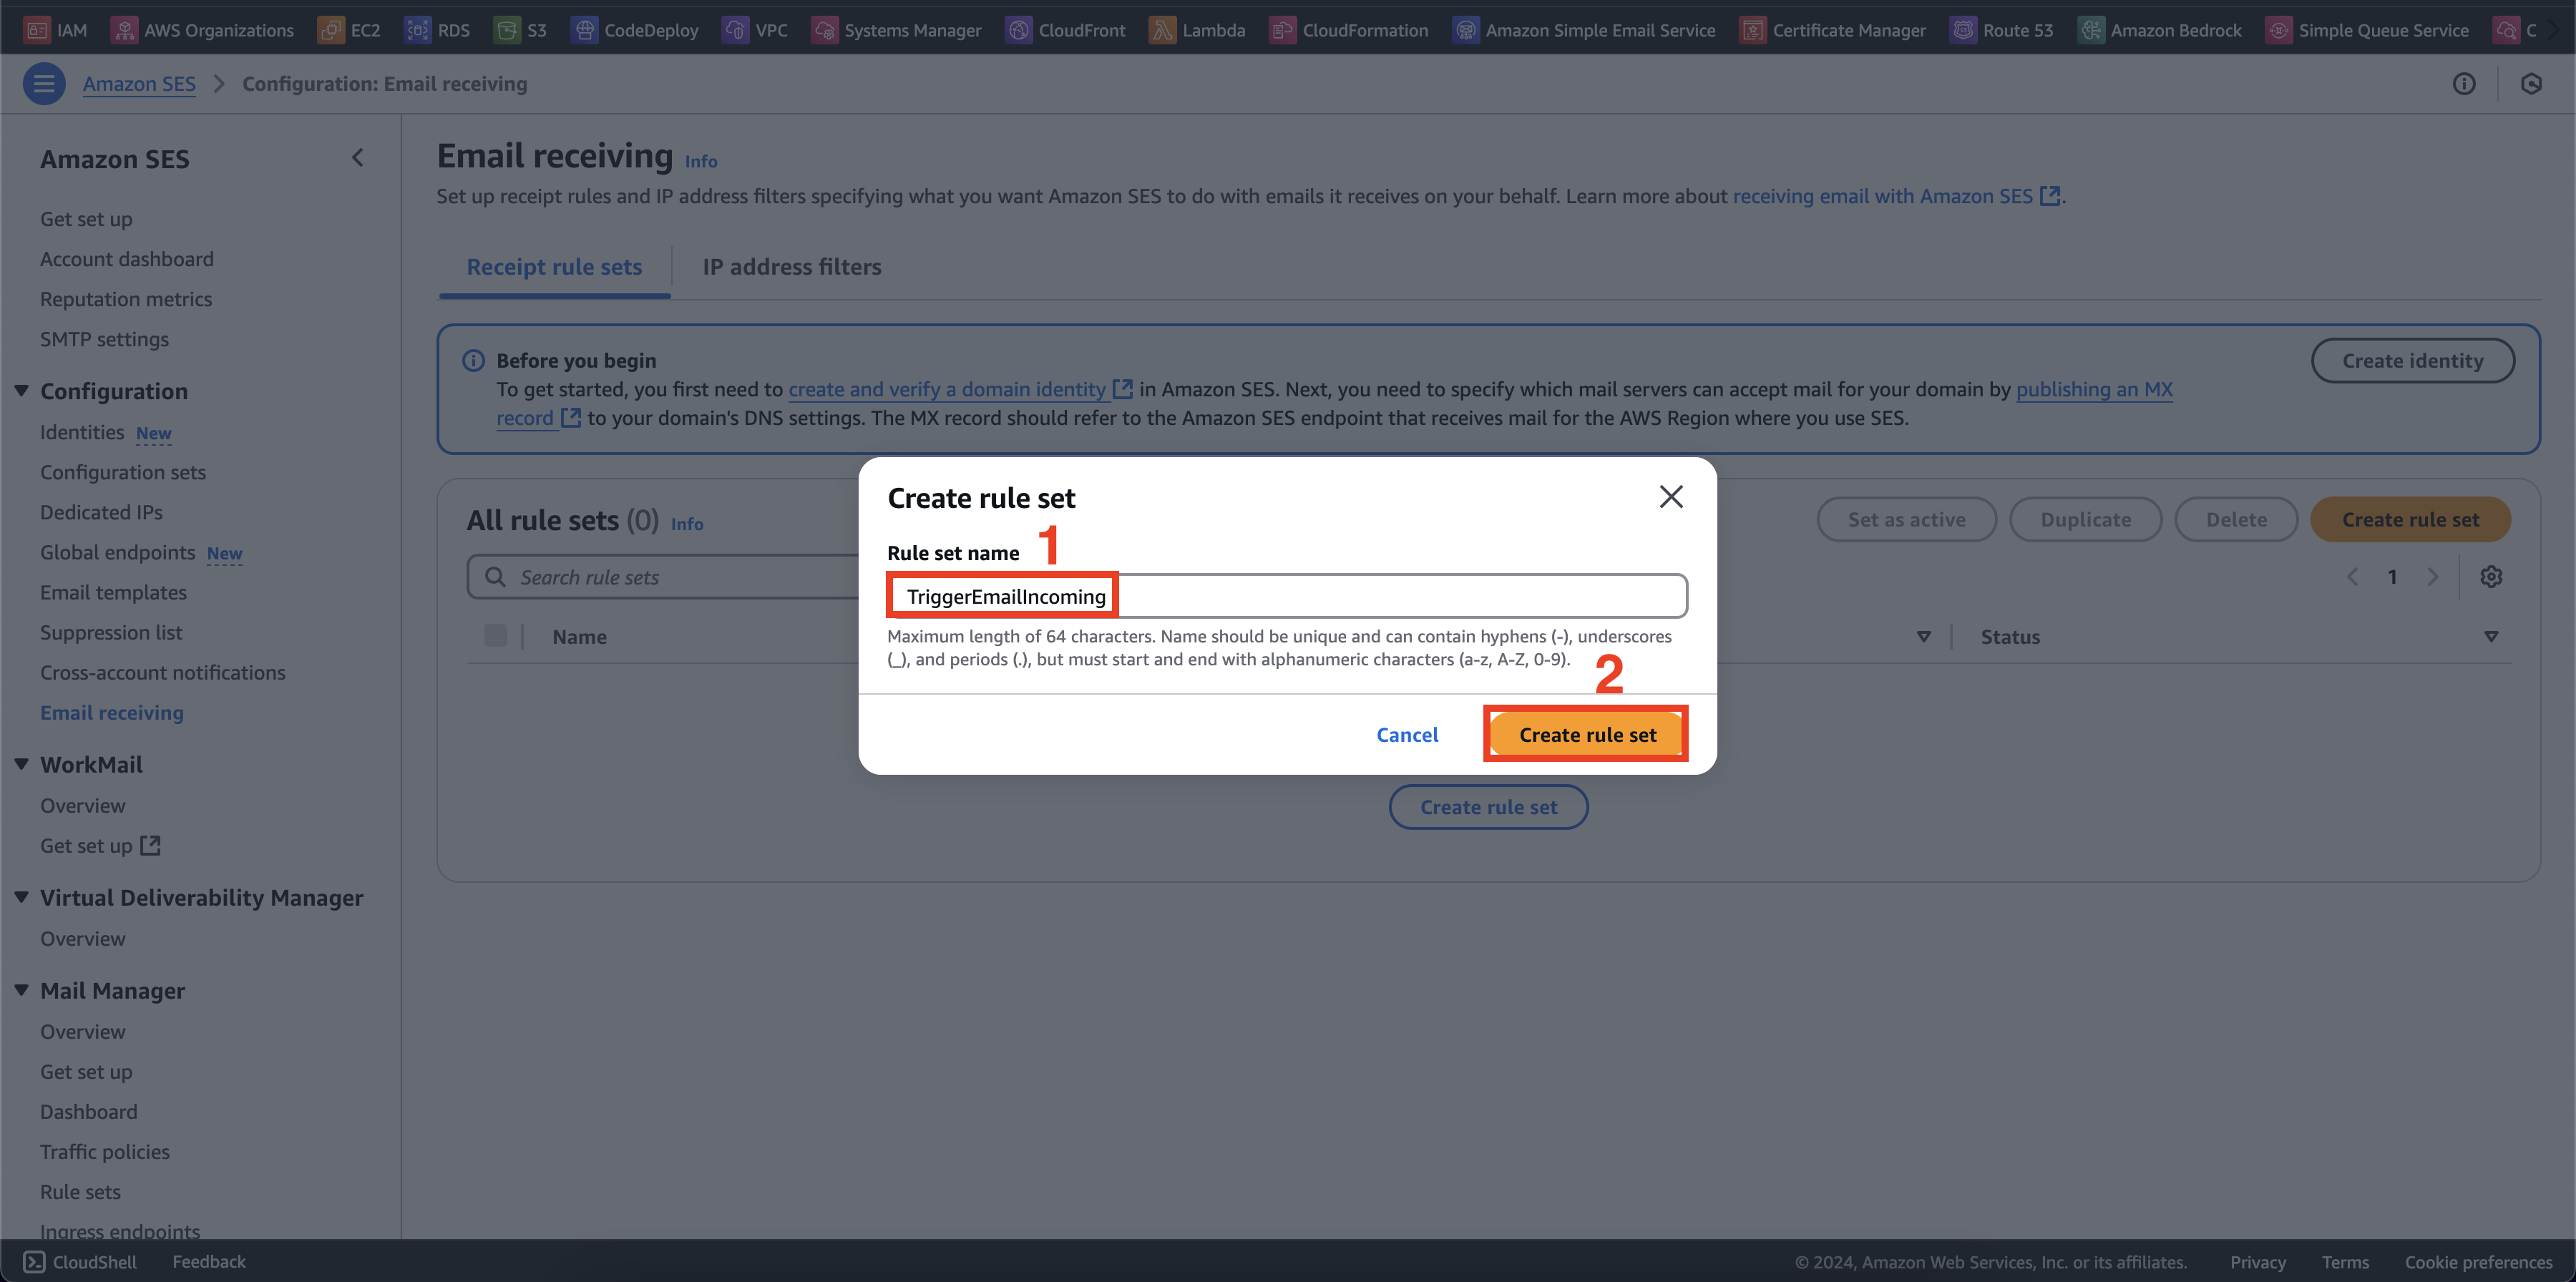
- Thêm tên rule
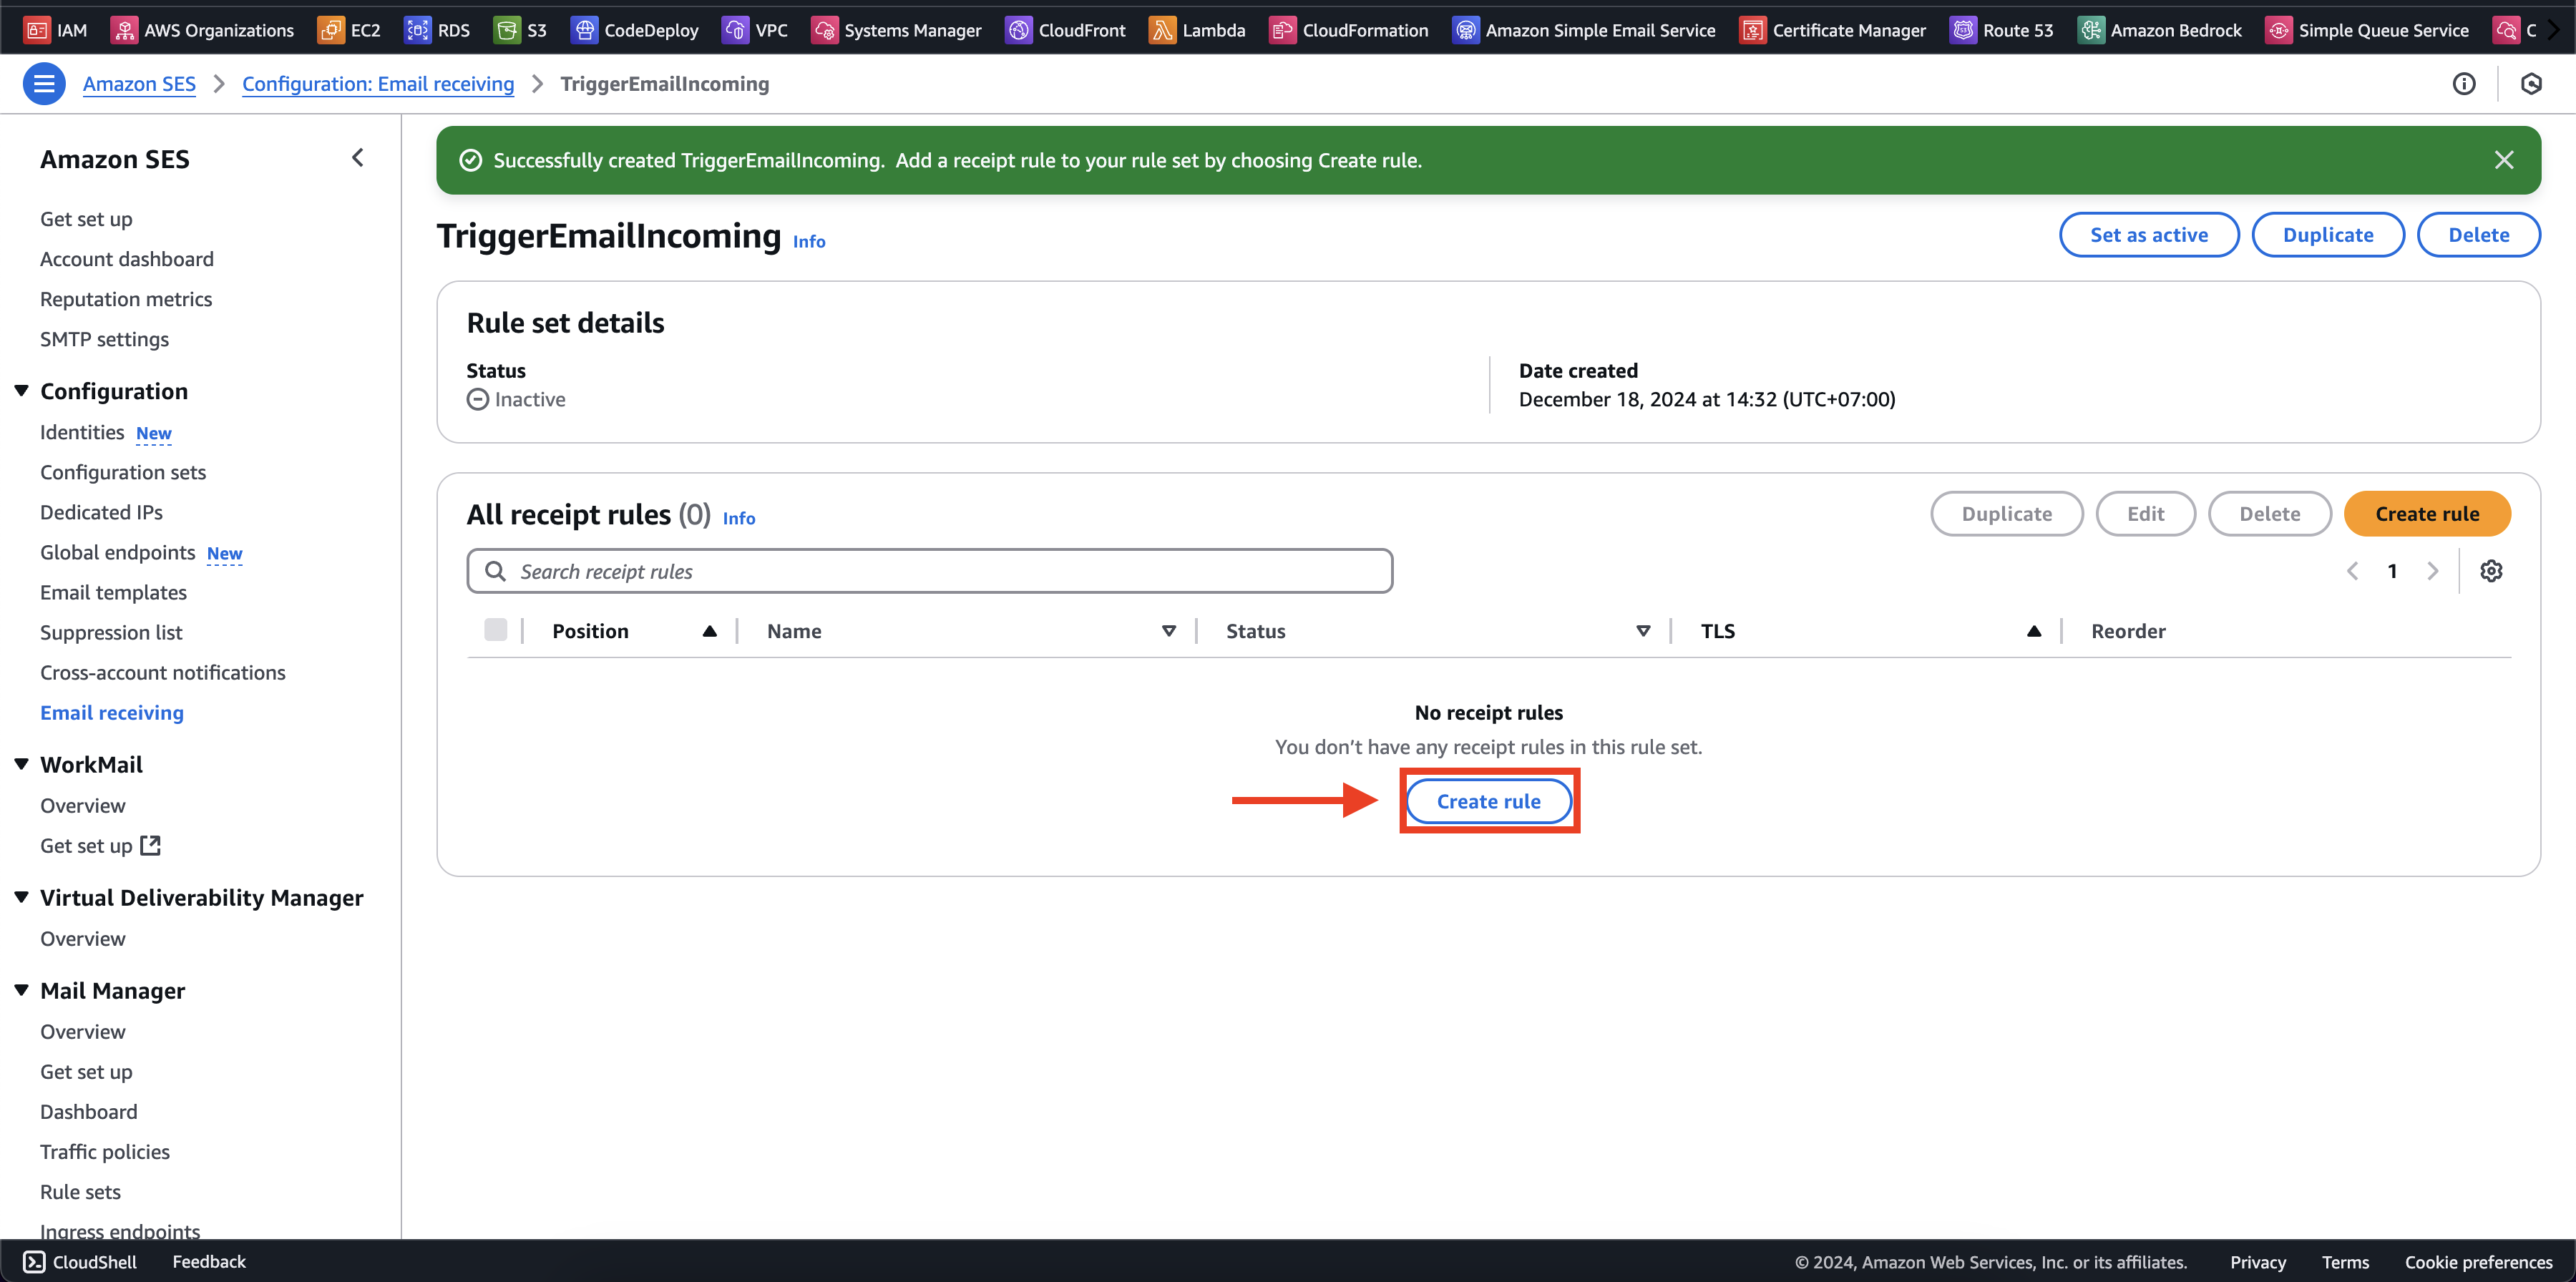
TriggerEmailIncomingvà chọn Create rule set
- Chọn tiếp “Create rule”
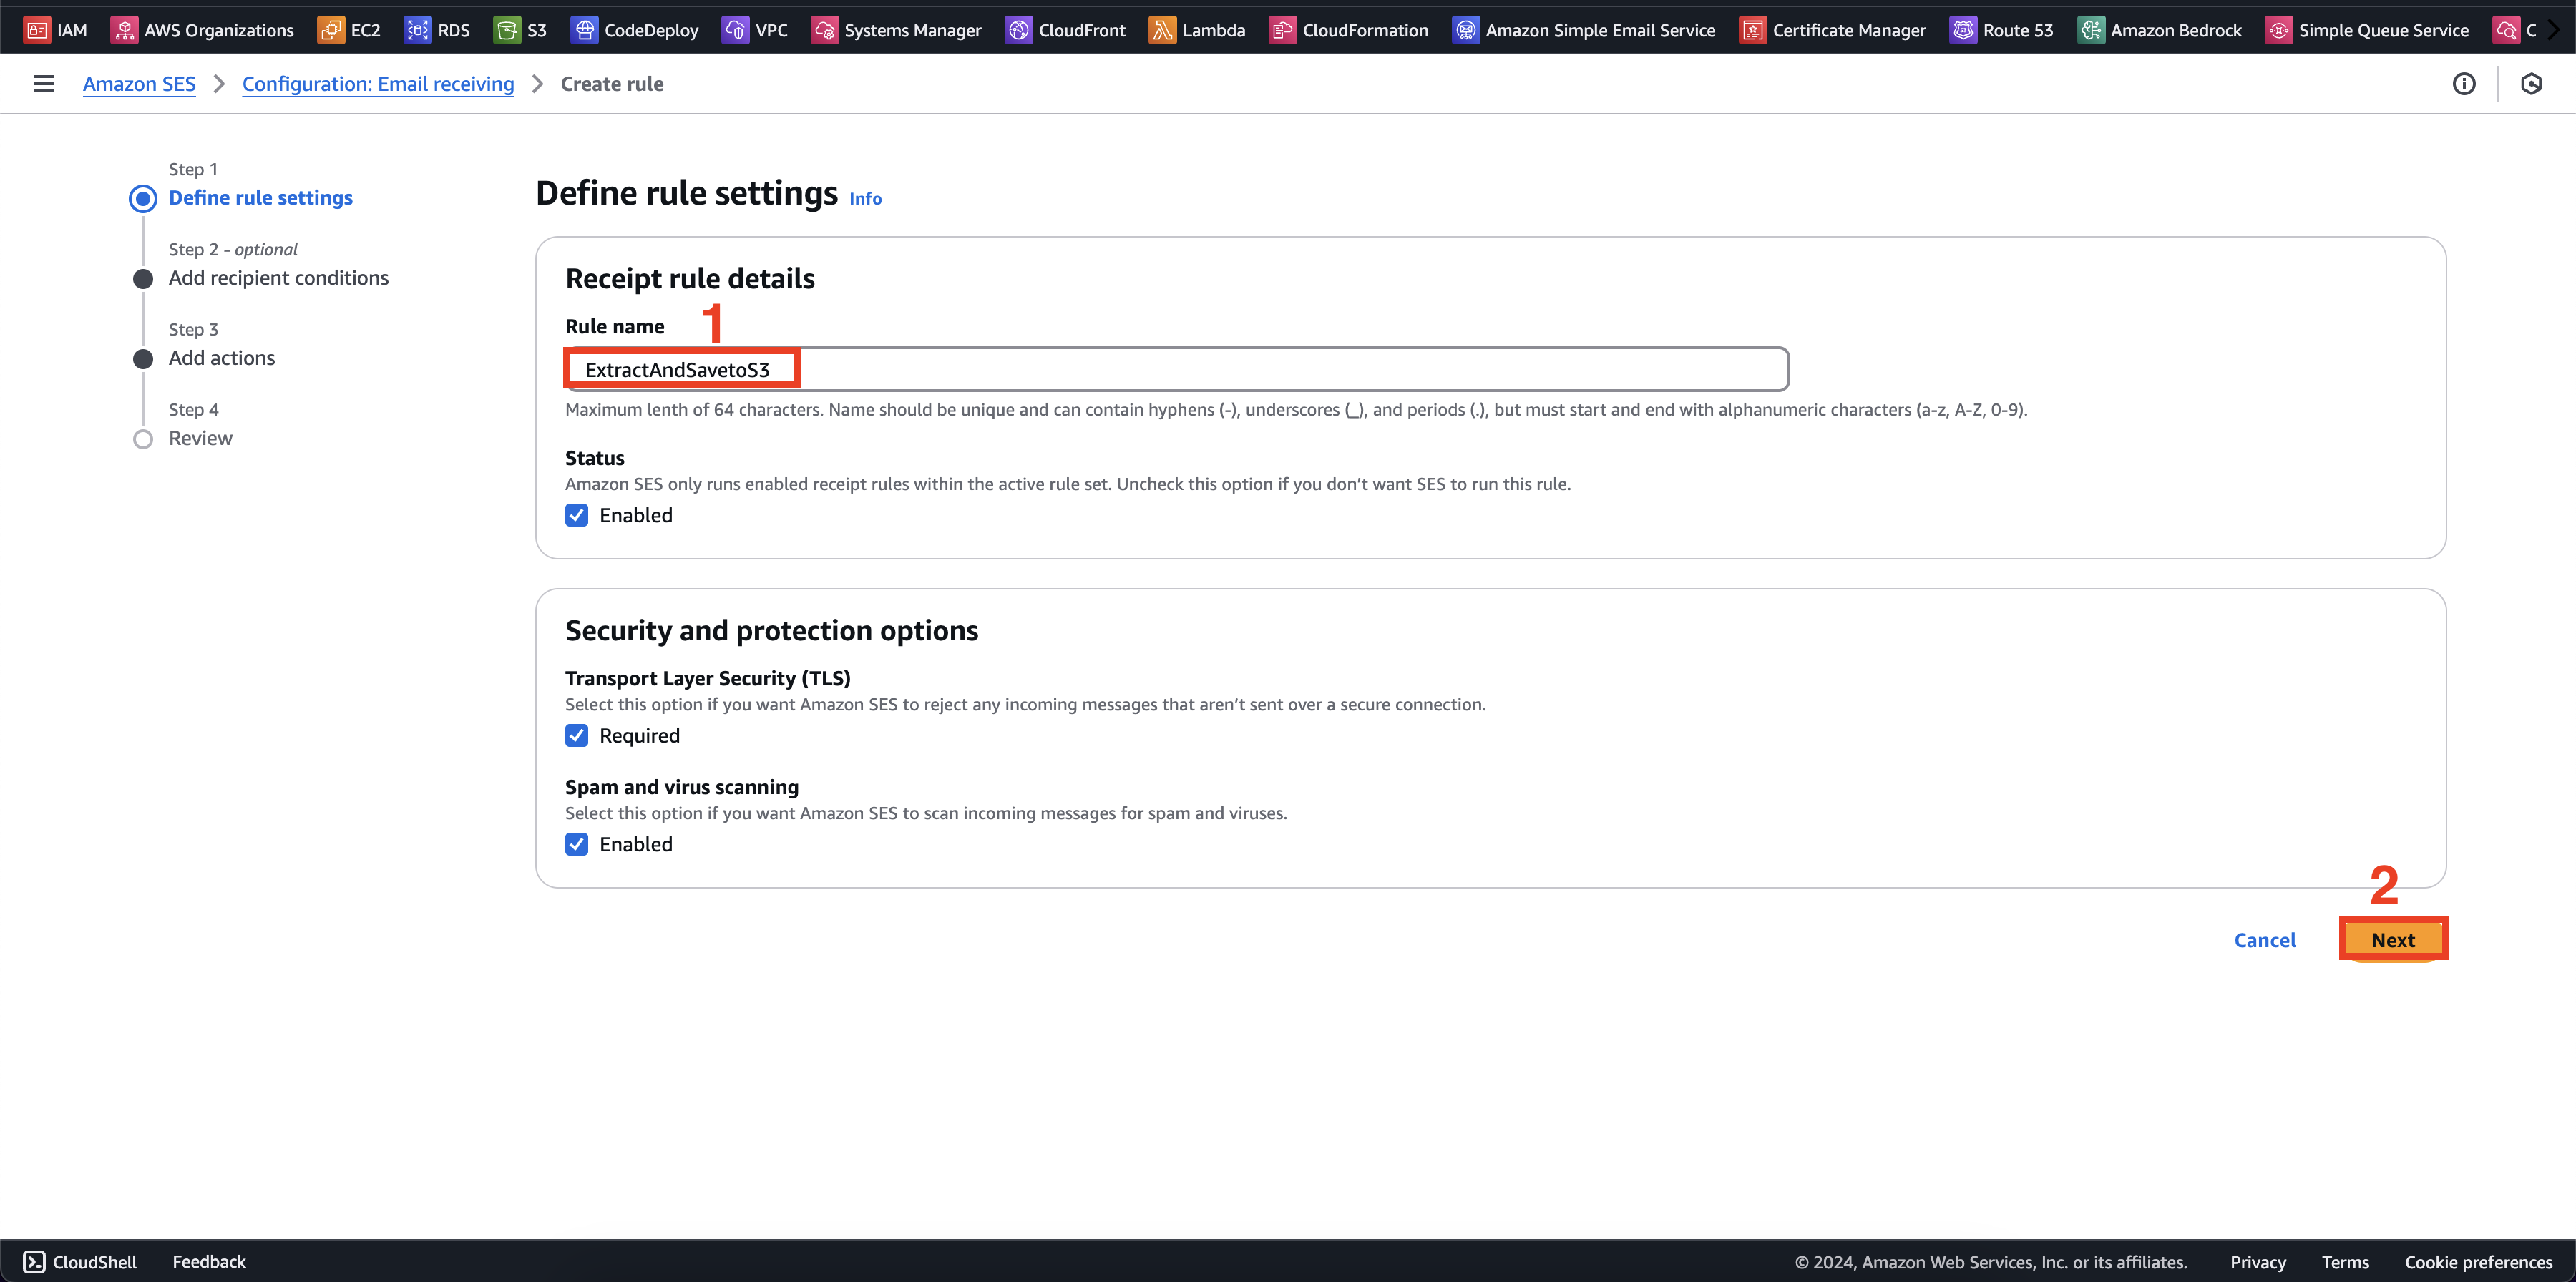
- Nhập
ExtractAndSaveToS3và chọn Next
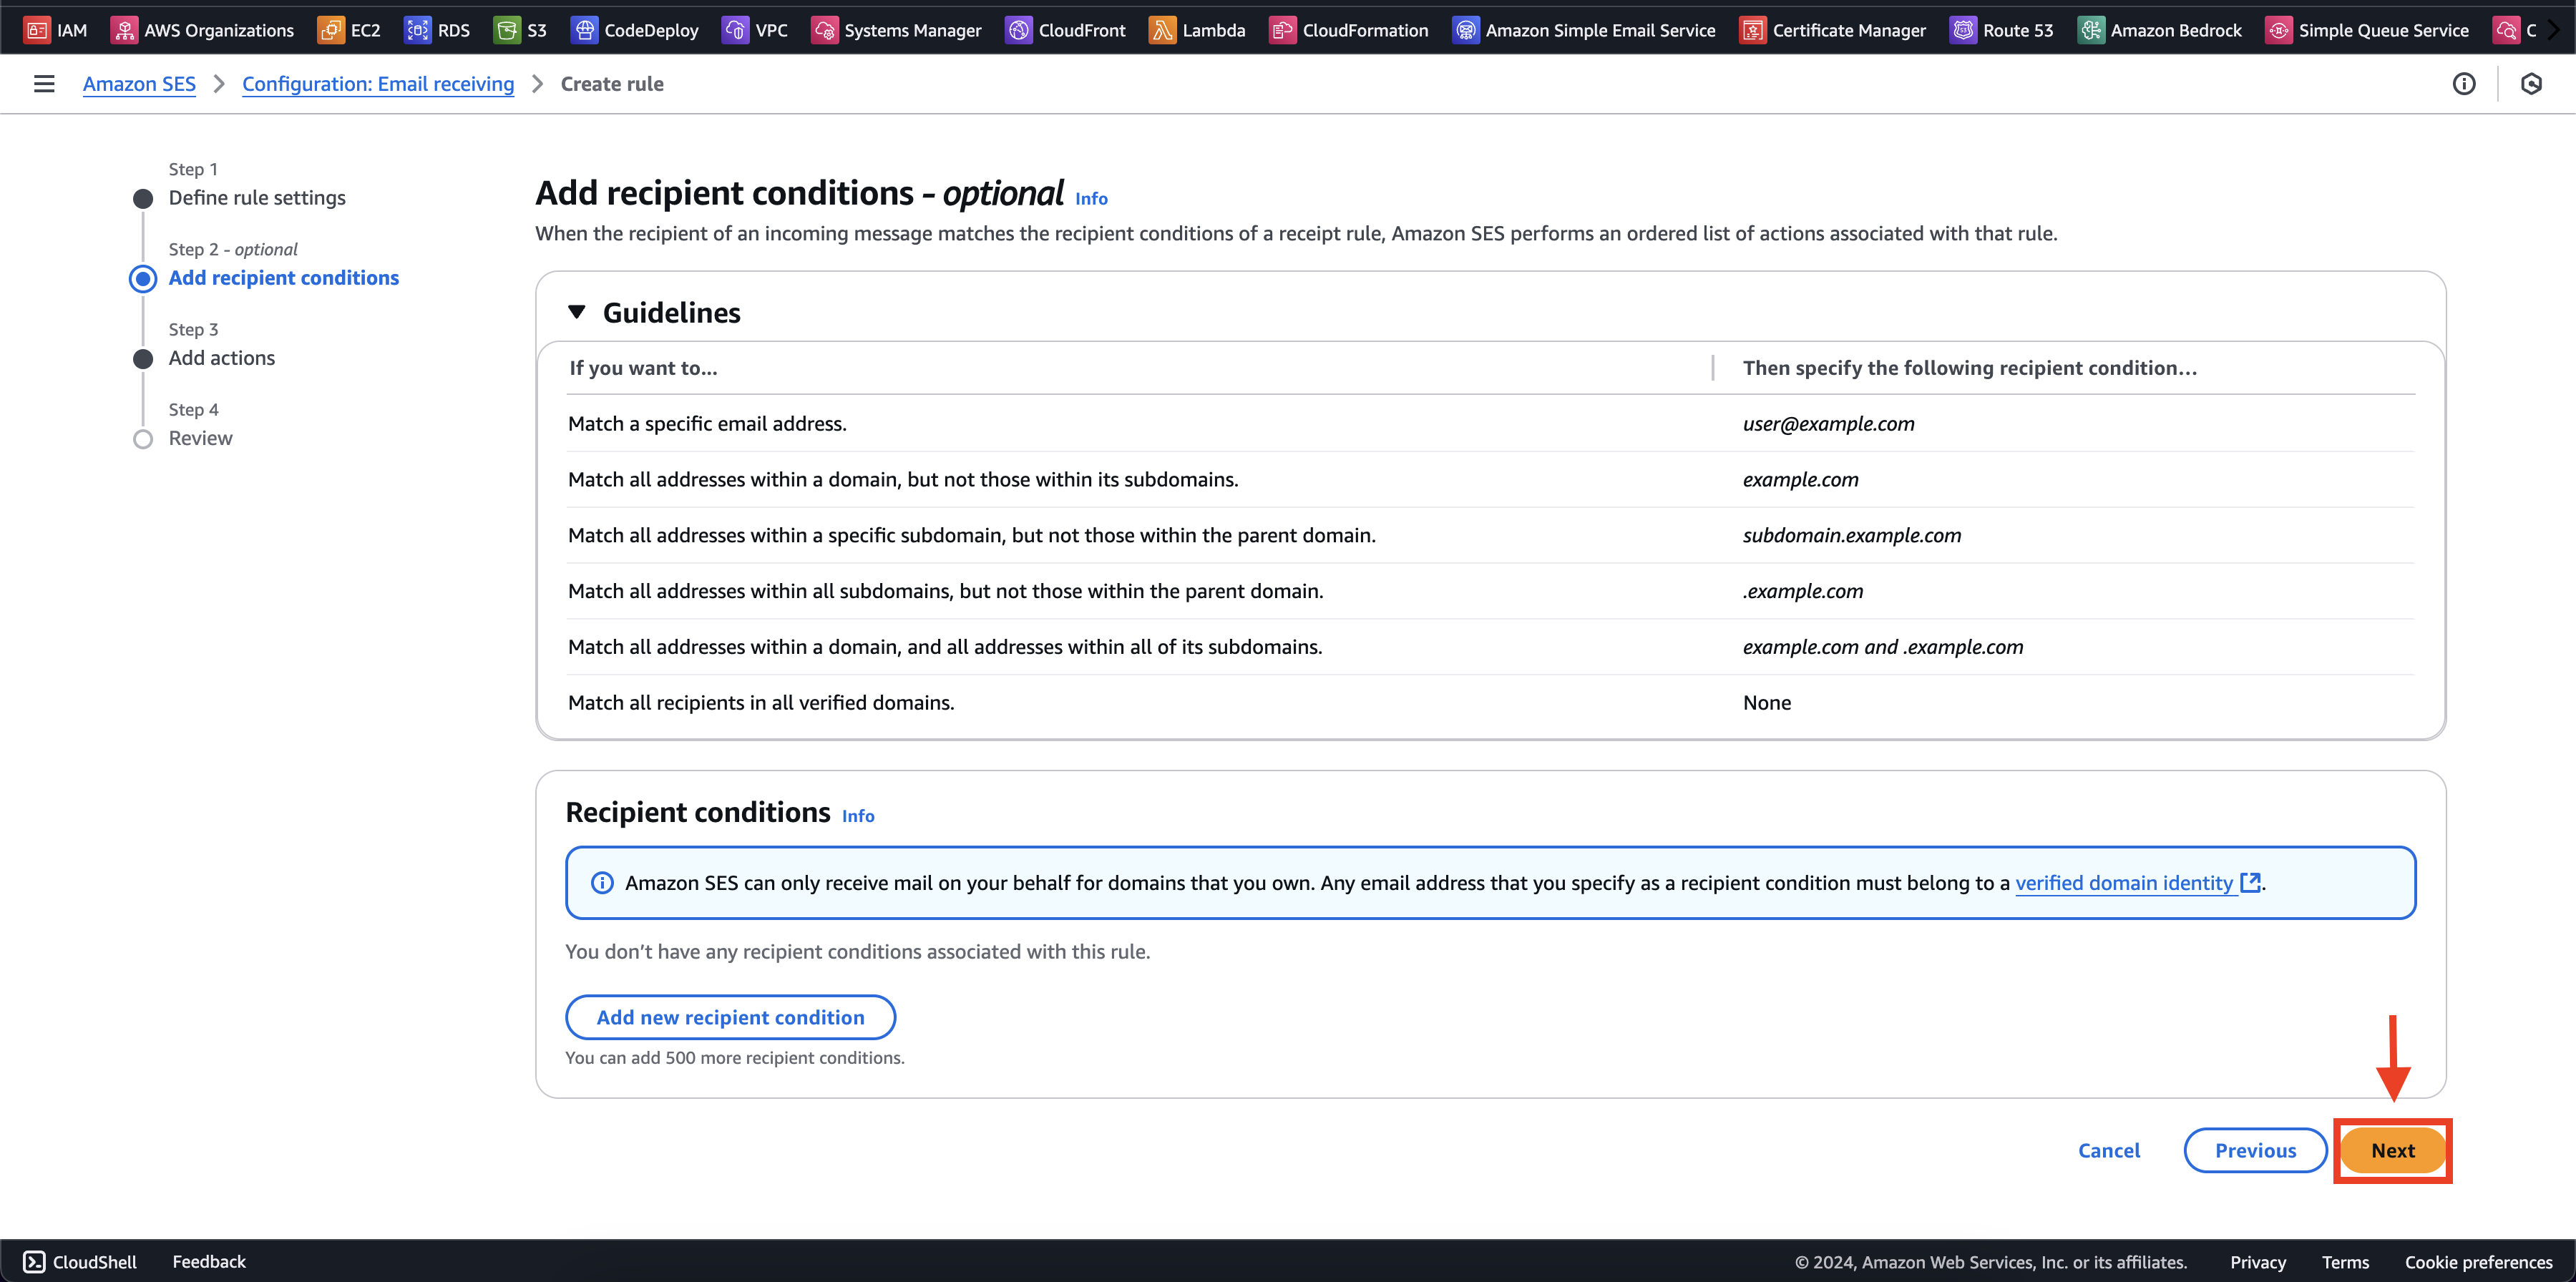
- Như bạn có thể thấy Recipient conditions giống như Guidelines, để đơn giản thì tôi chỉ muốn trigger lambda function và lưu nội dung vào S3. Khi đó tôi chọn Next
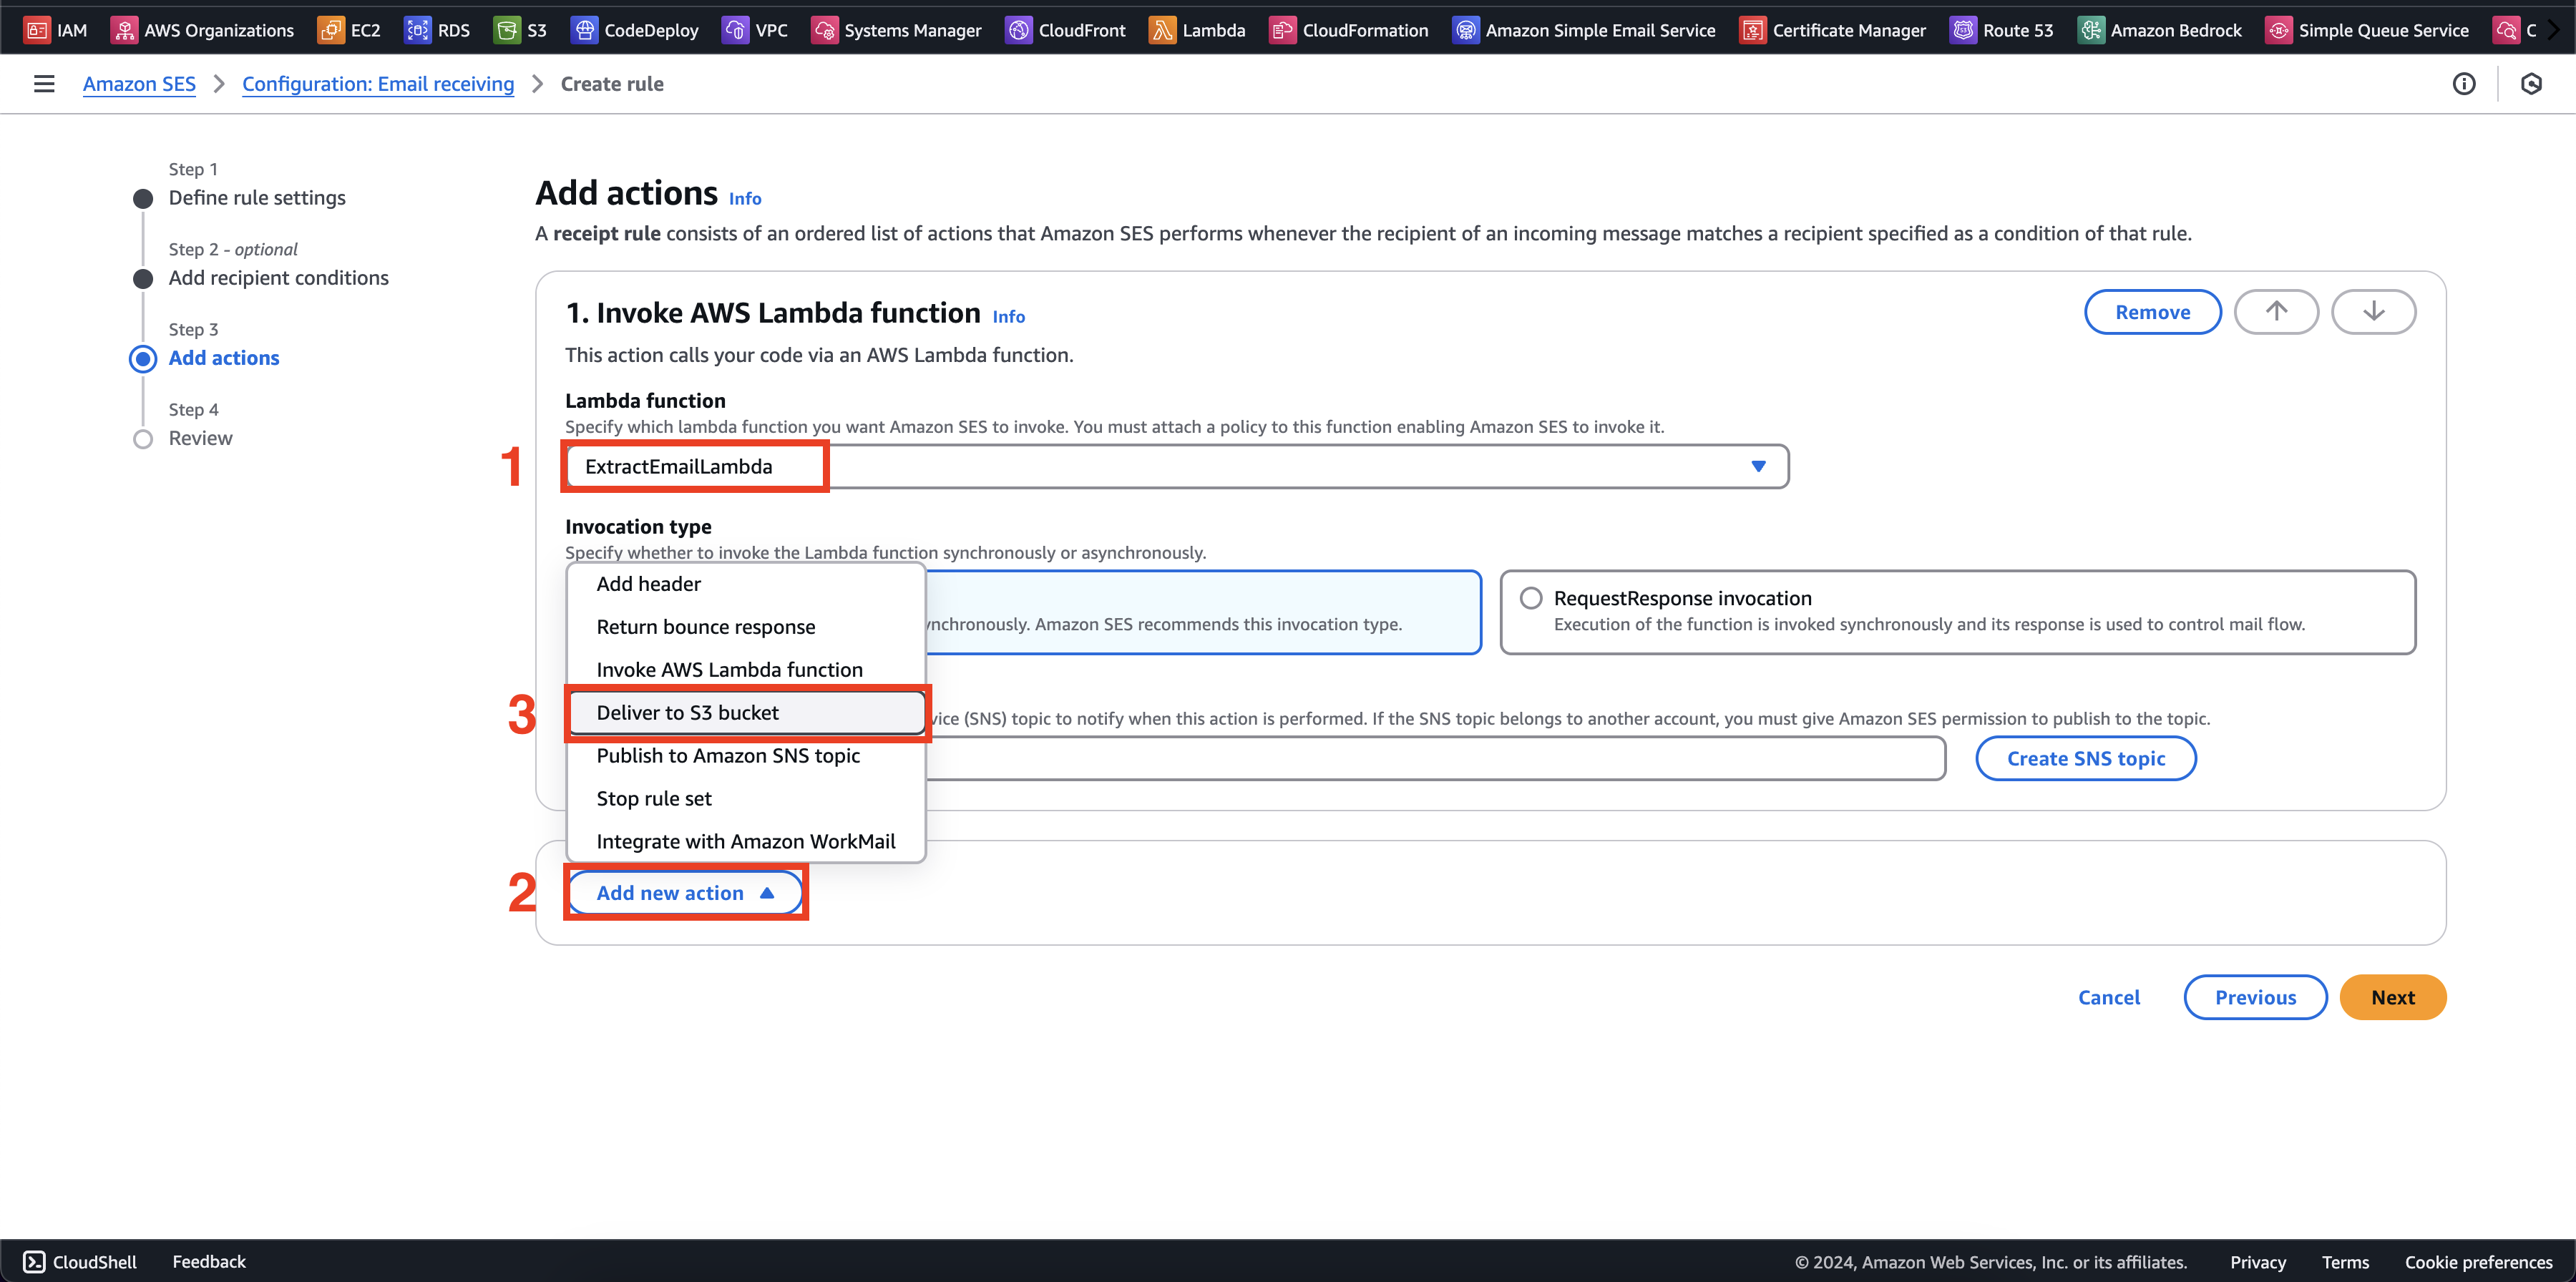
- Chọn Add new action > Invoke AWS lambda function
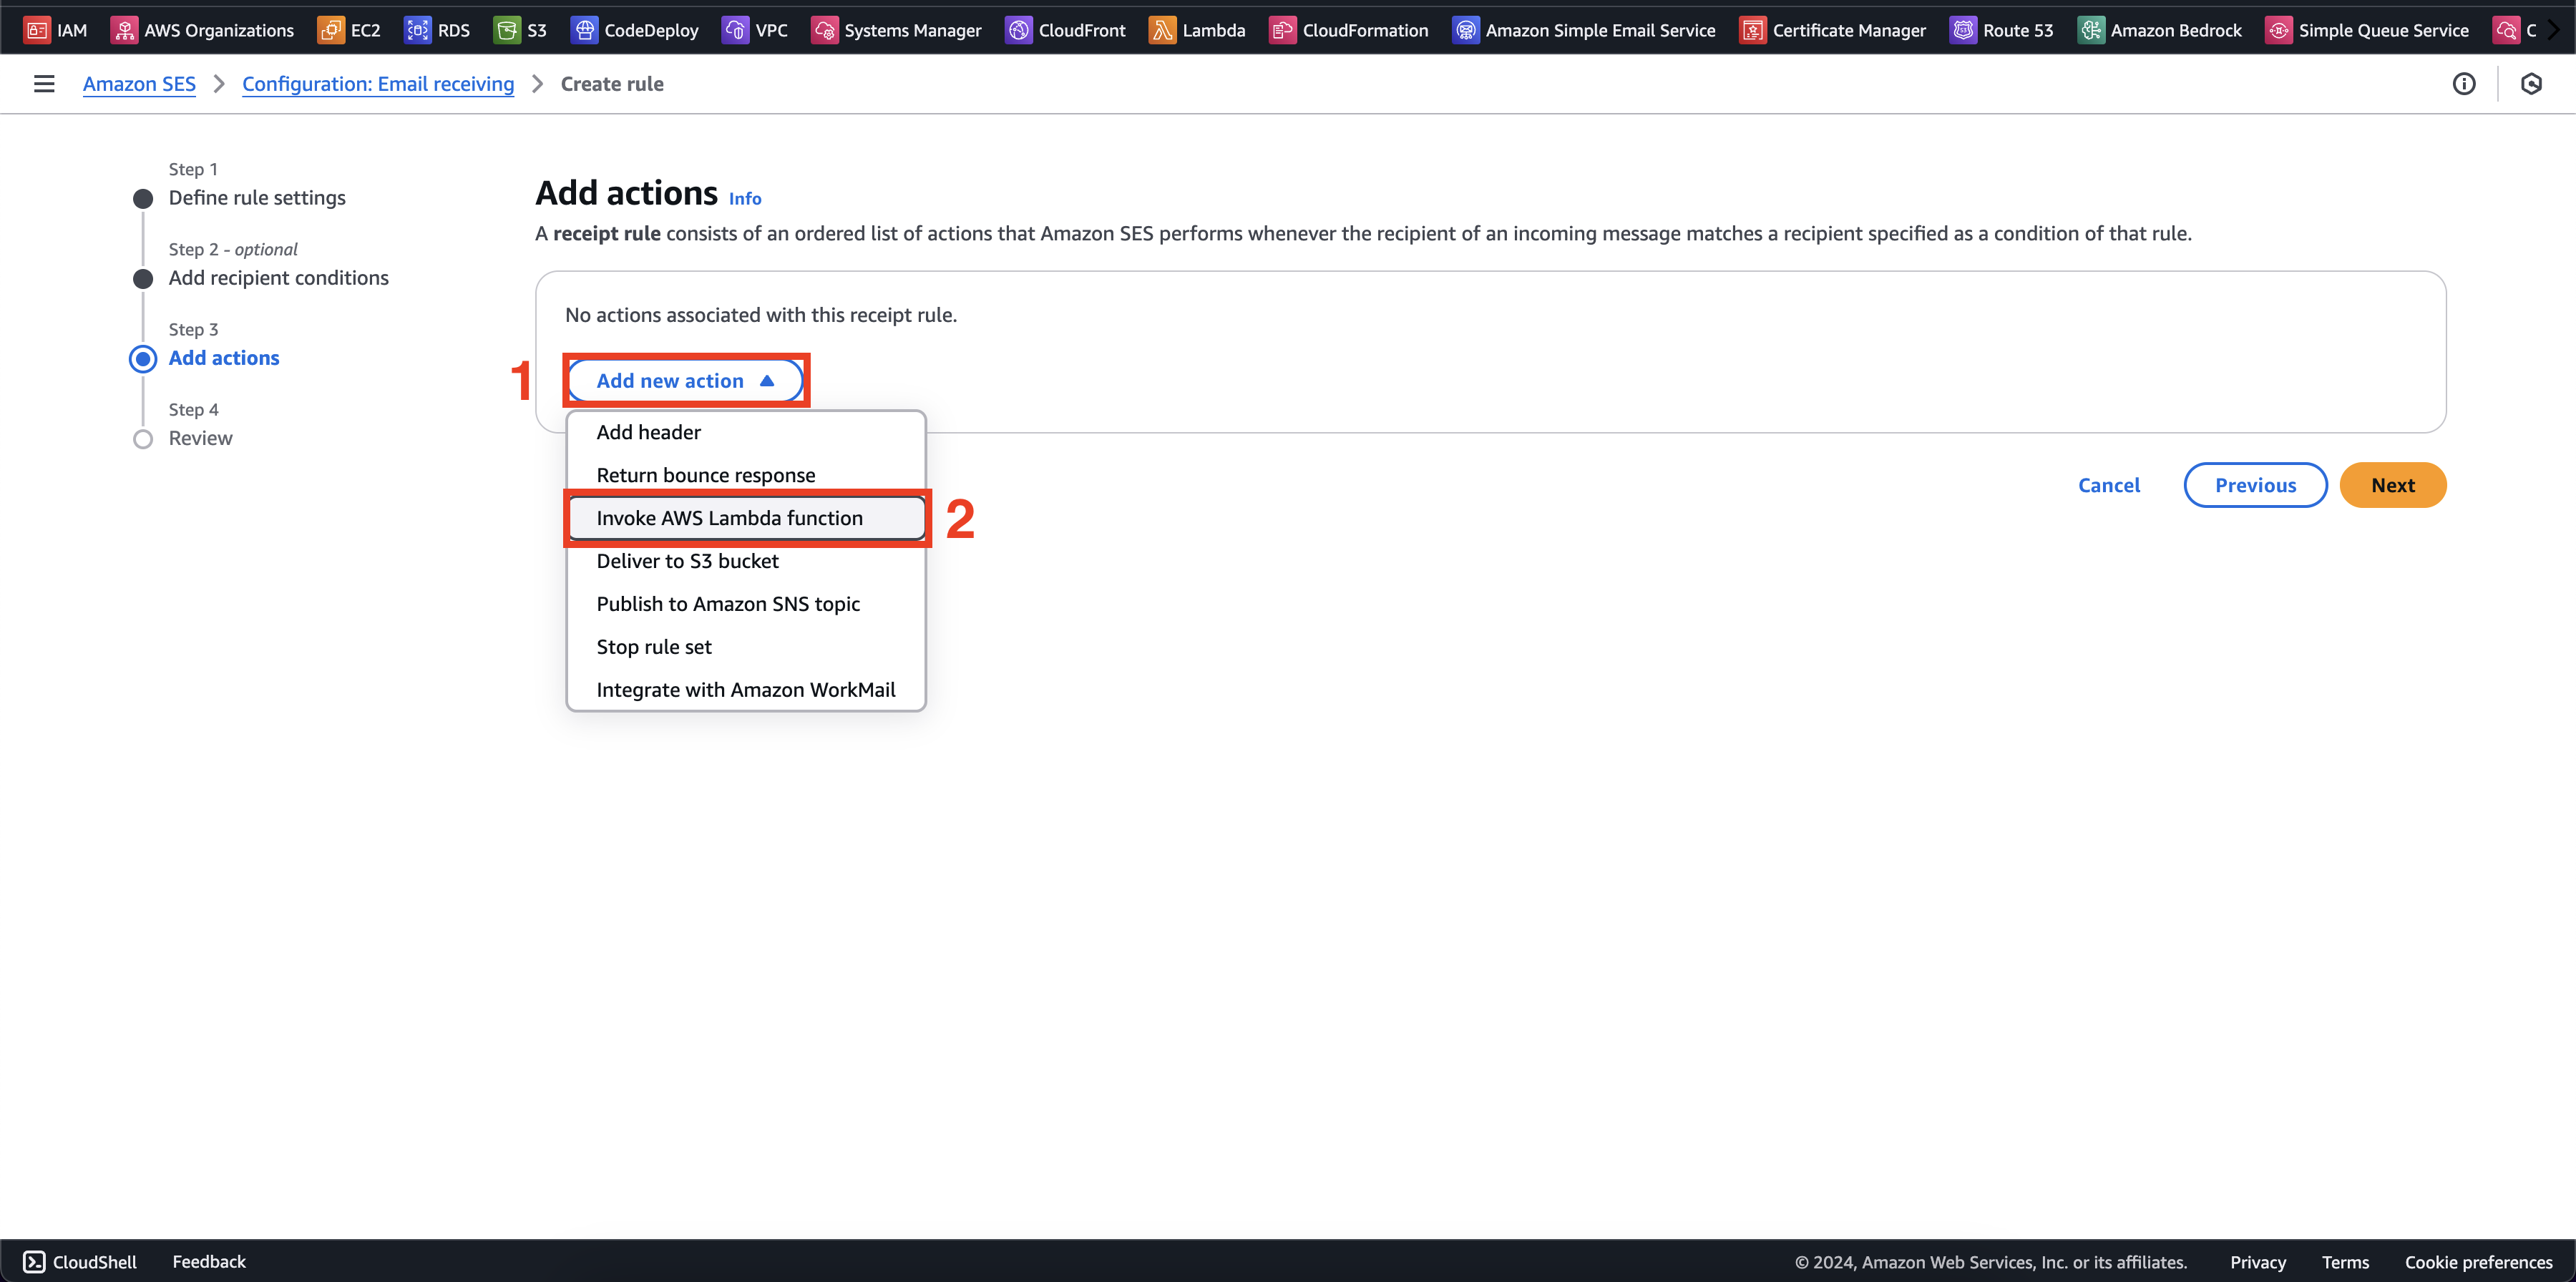
- Chọn
ExtractEmailLambdavà thêm action khác là thêm vào S3
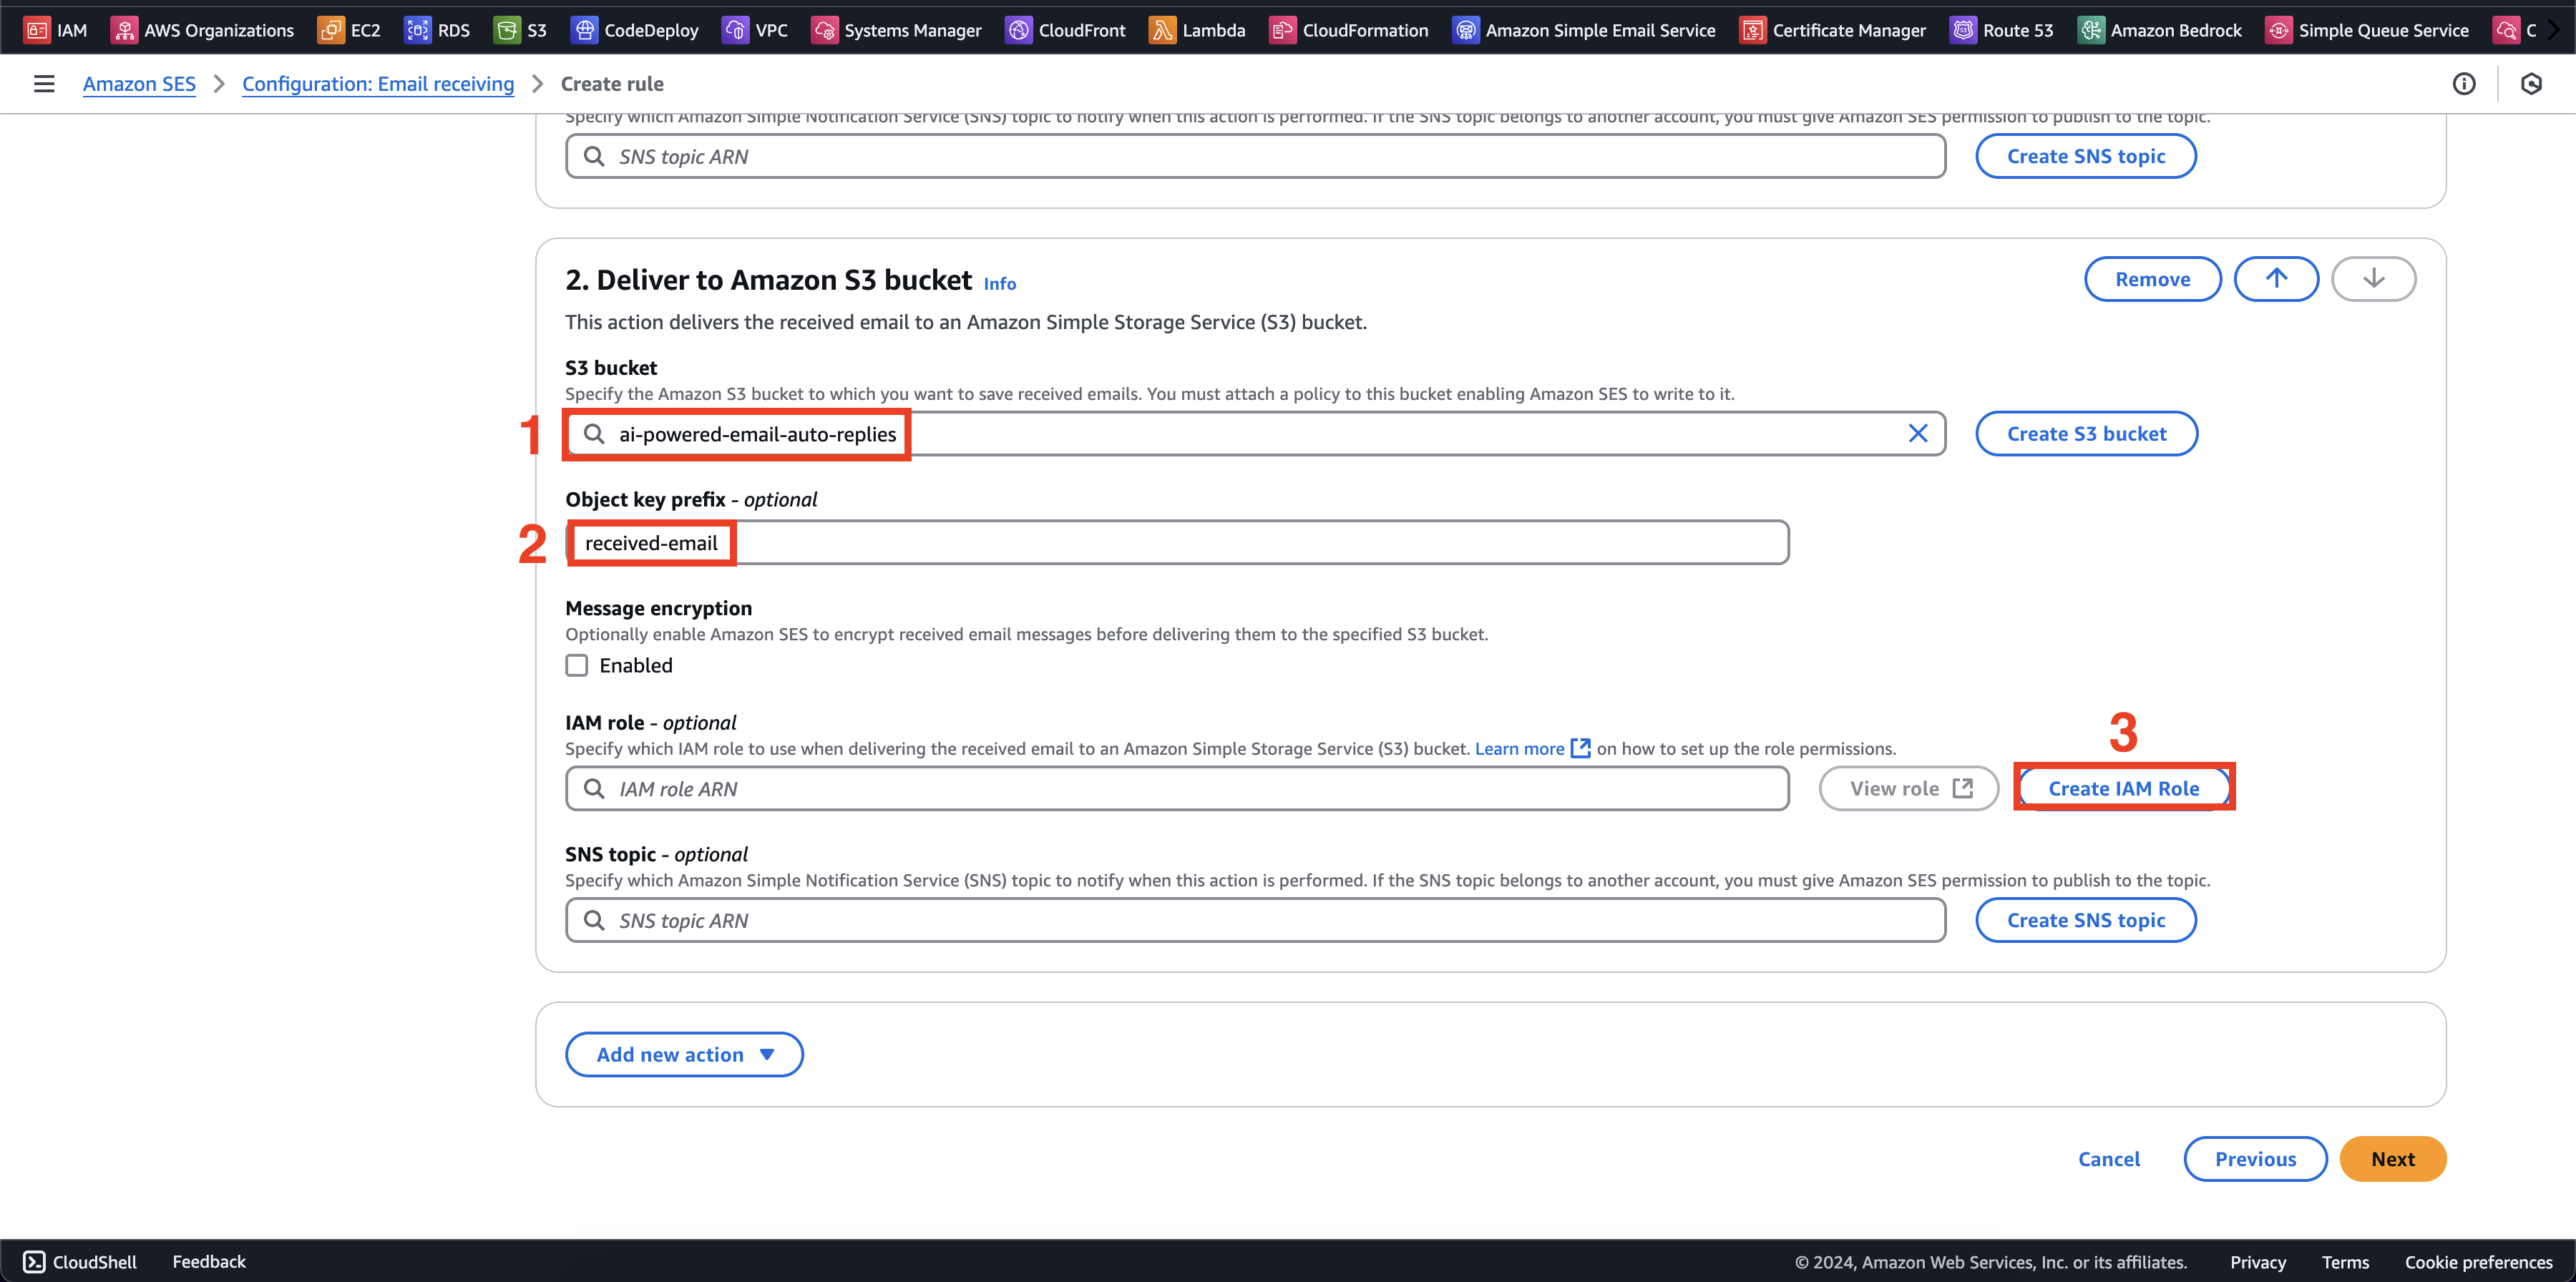
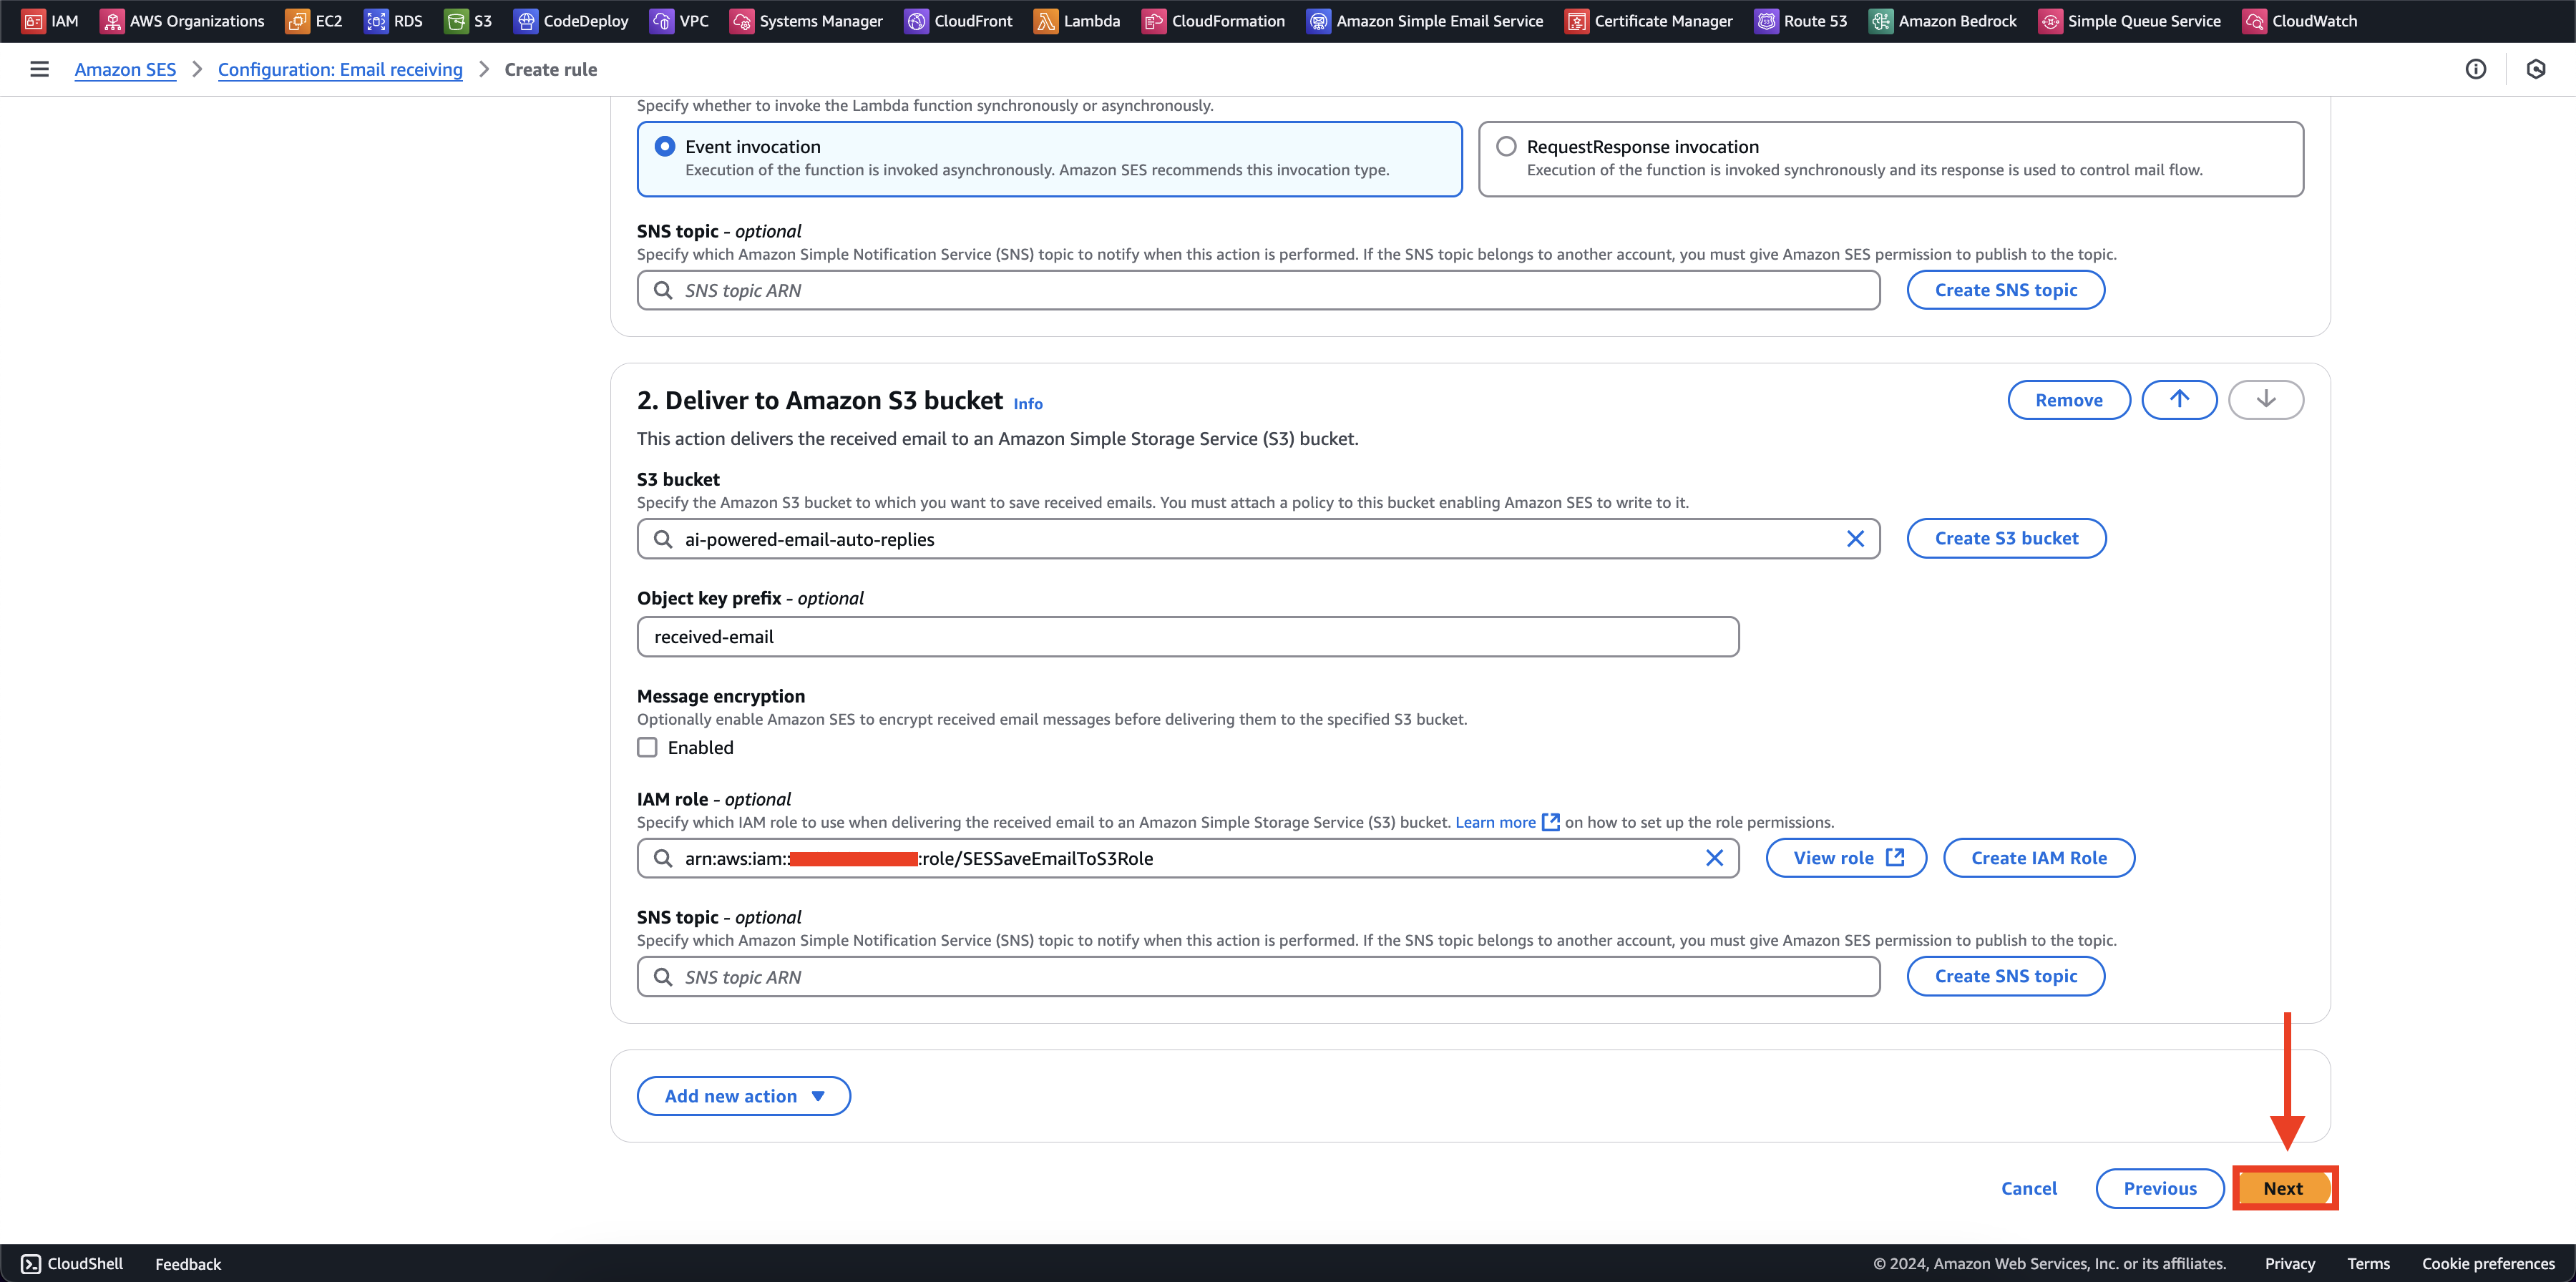
- Tiếp theo chúng ta chọn thư mục đã tạo
received-email. Chúng ta cũng cần thêm policies để SES có thể thêm nội dung email vào S3, choose Create IAM Role
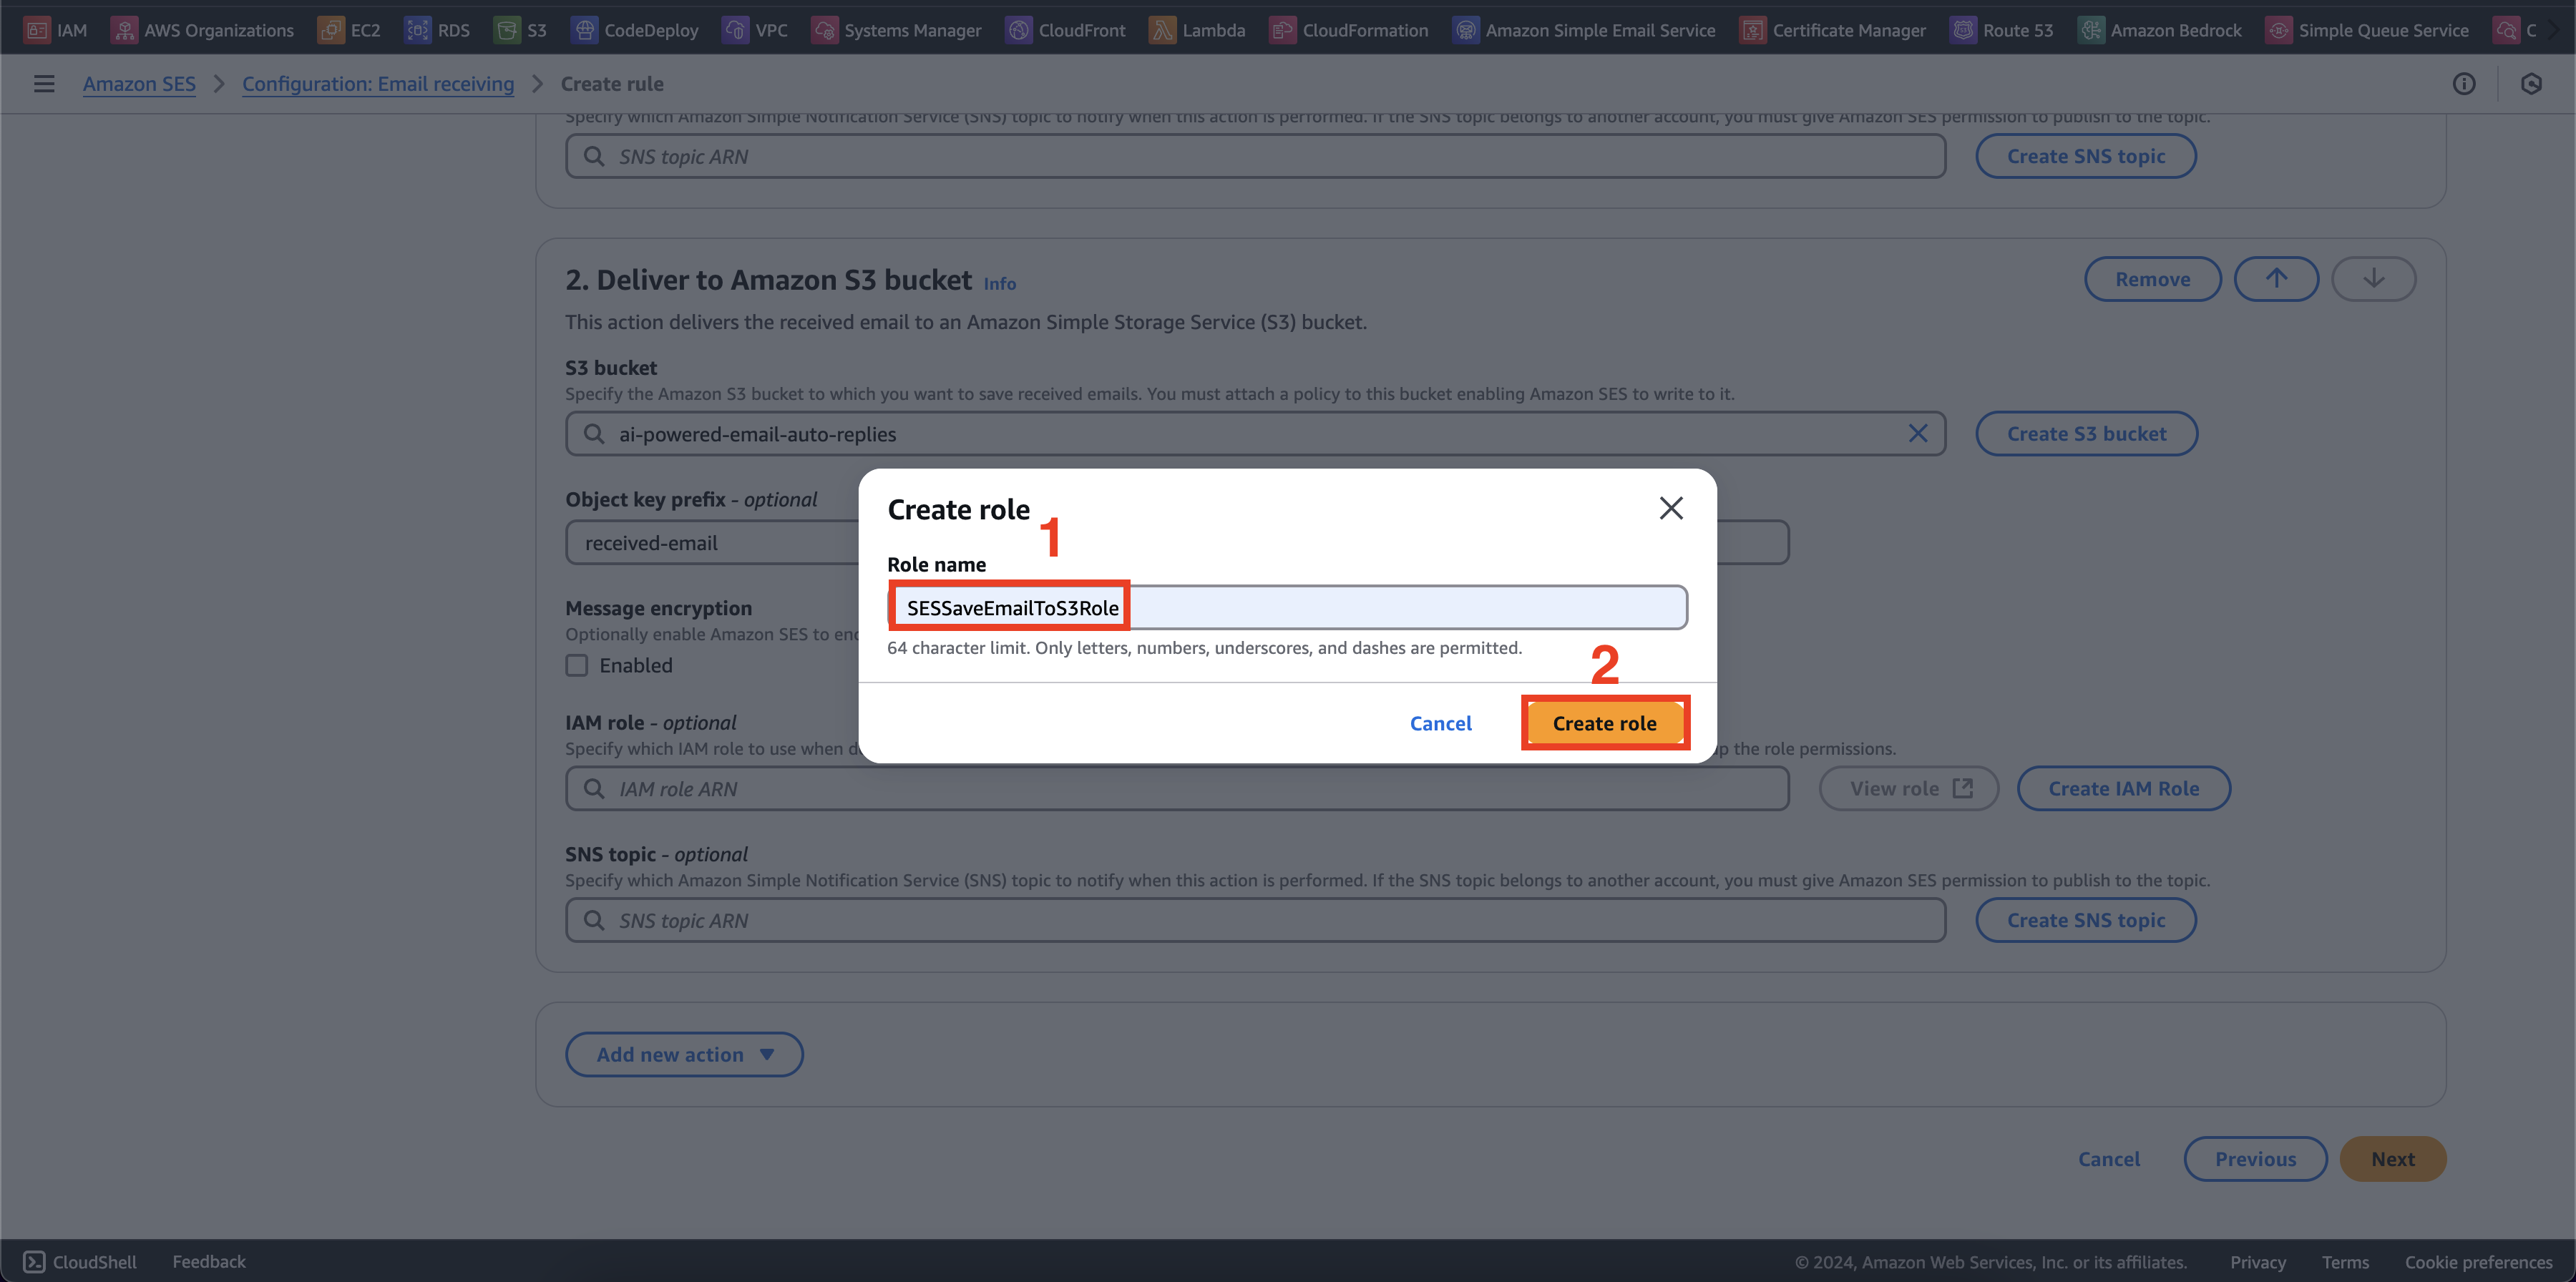
- Thêm role name
SESSaveEmailToS3Rolevà Create role
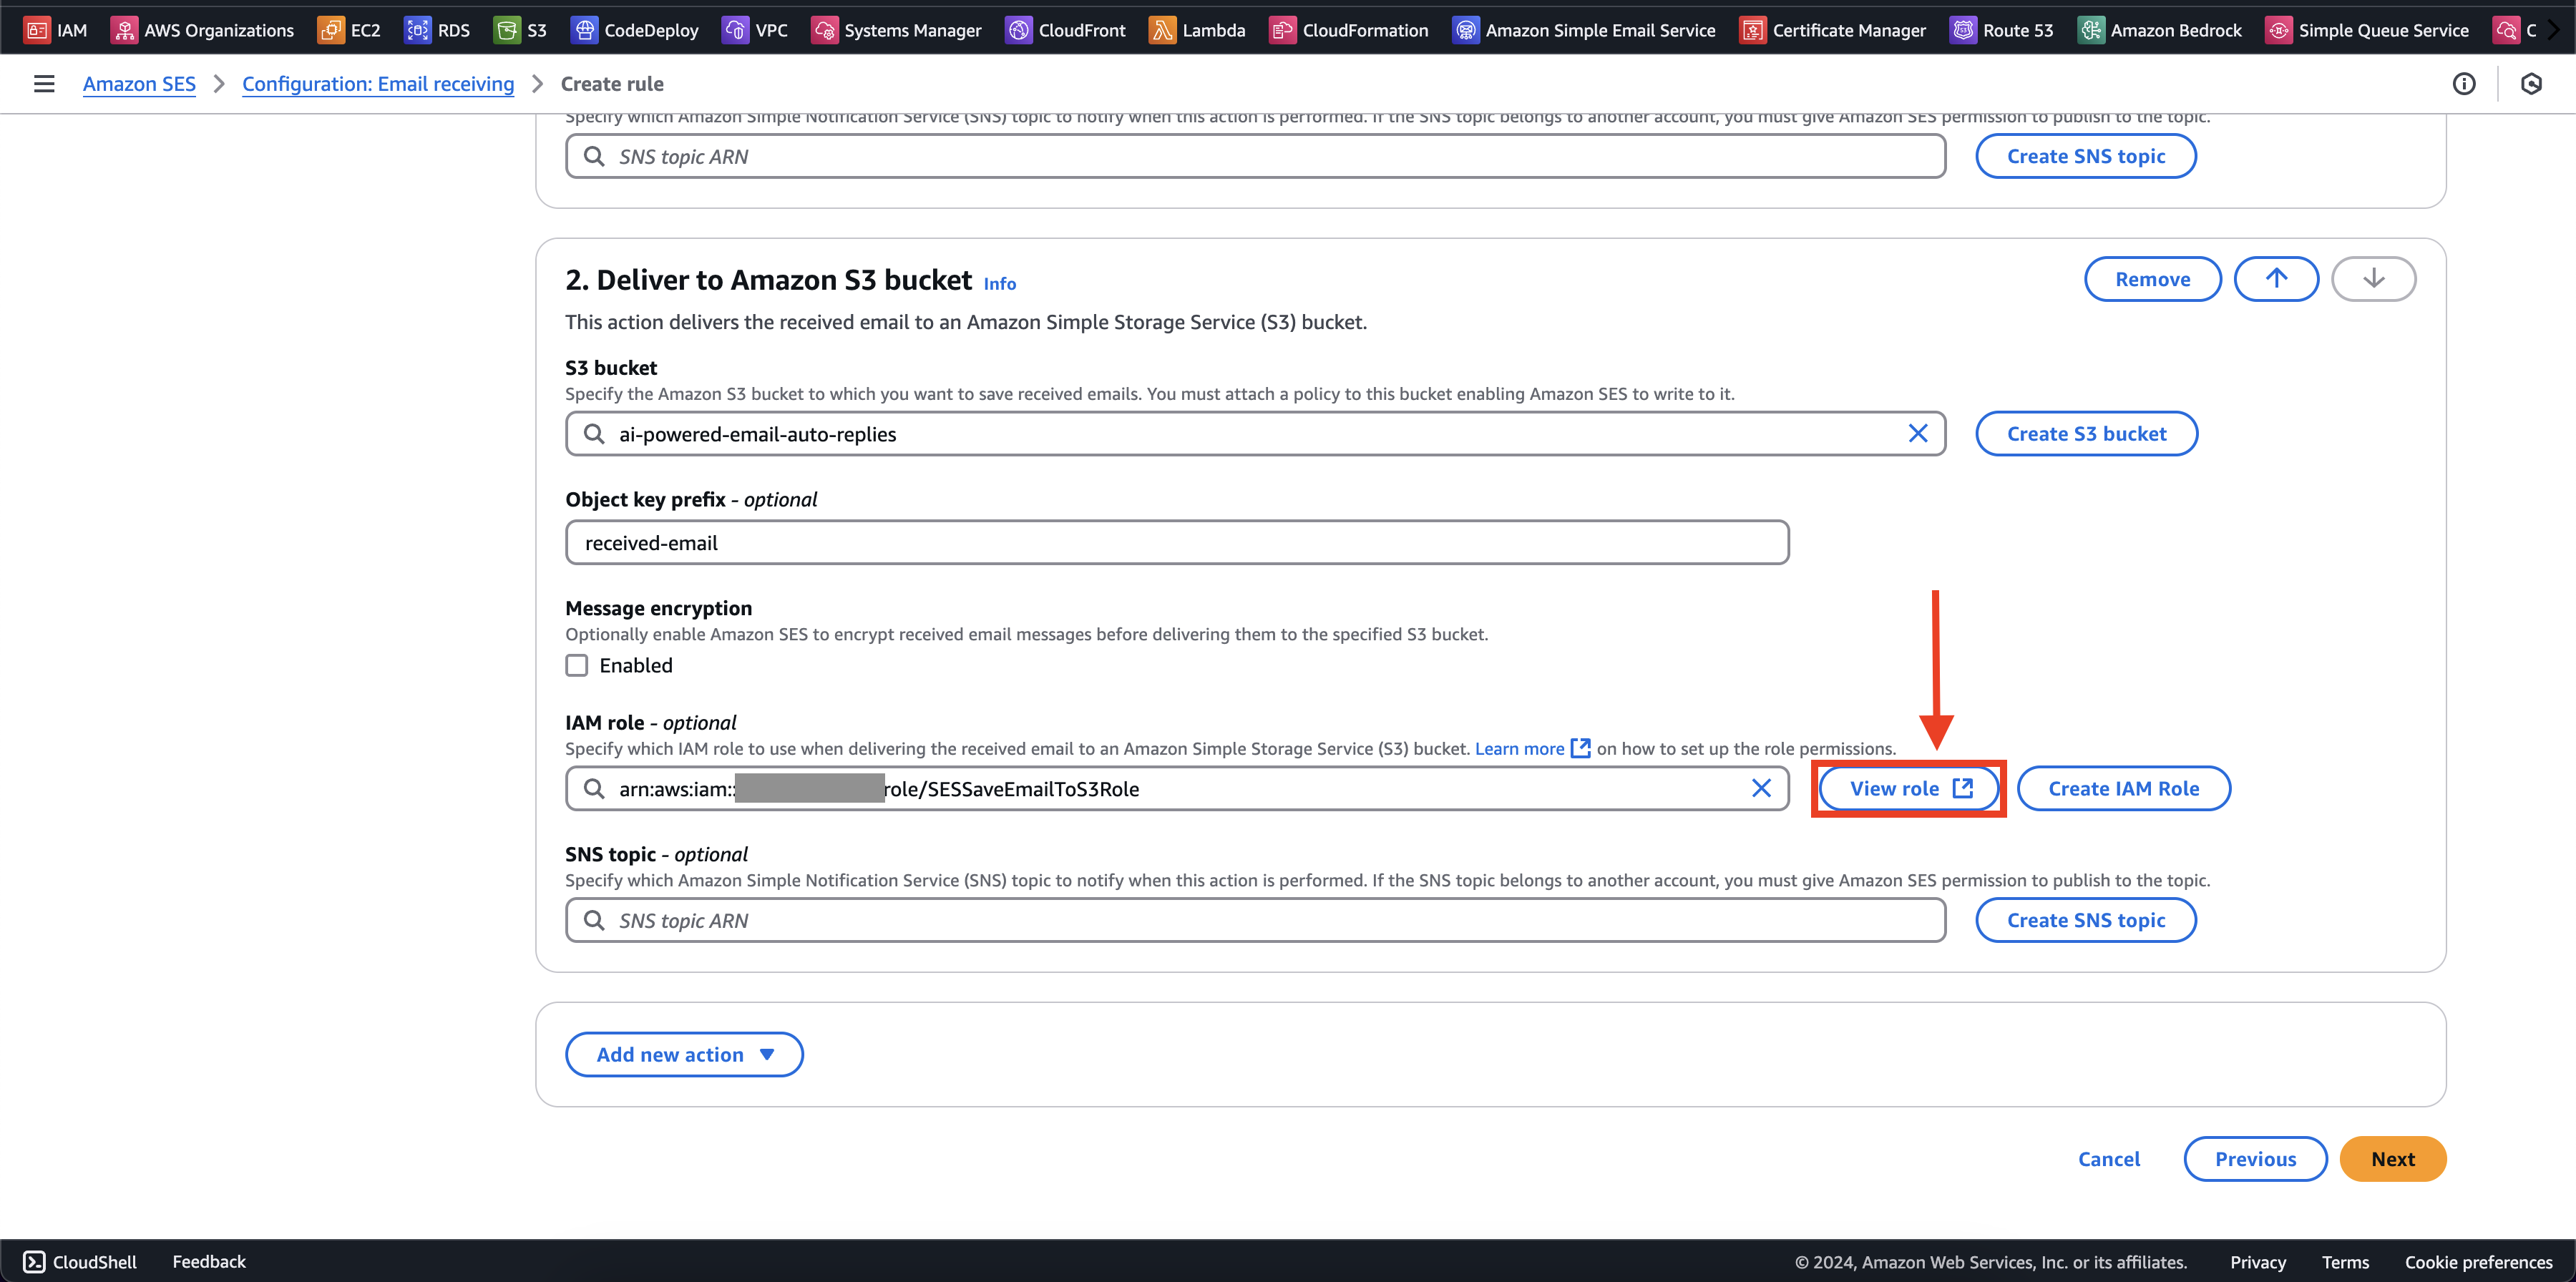
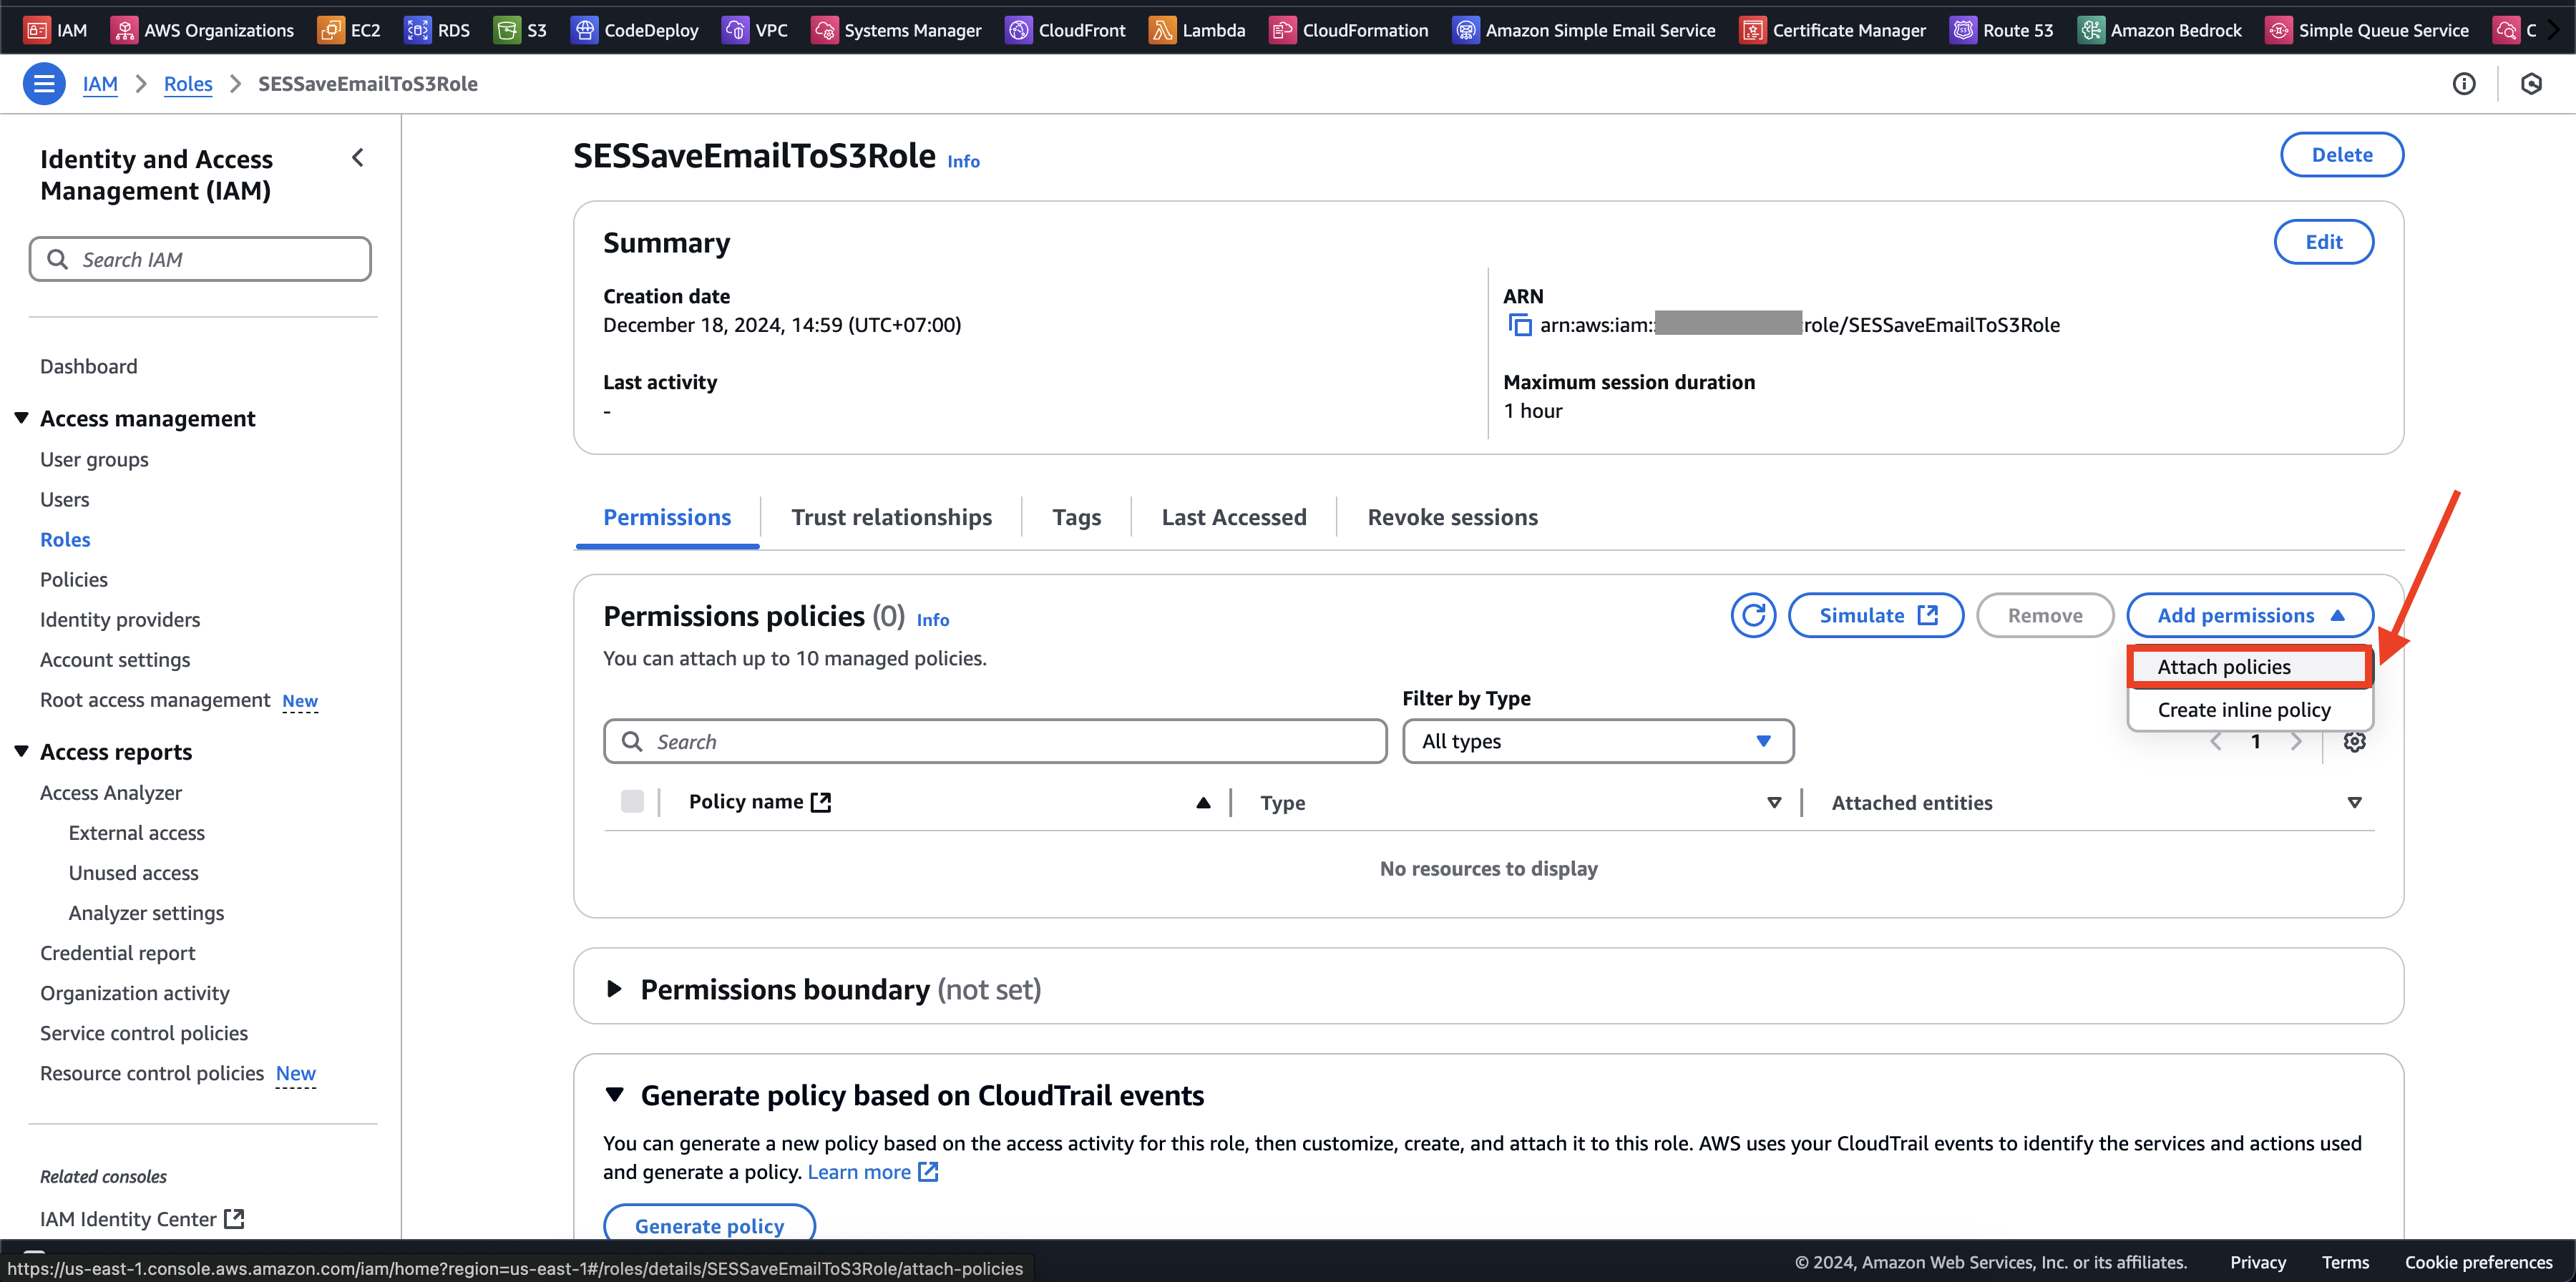
- Chúng ta cần thêm vào policies đã tạo ở bước 4.4, chọn View role
- Chúng ta sẽ attach policies này vào. Chọn Attach policies
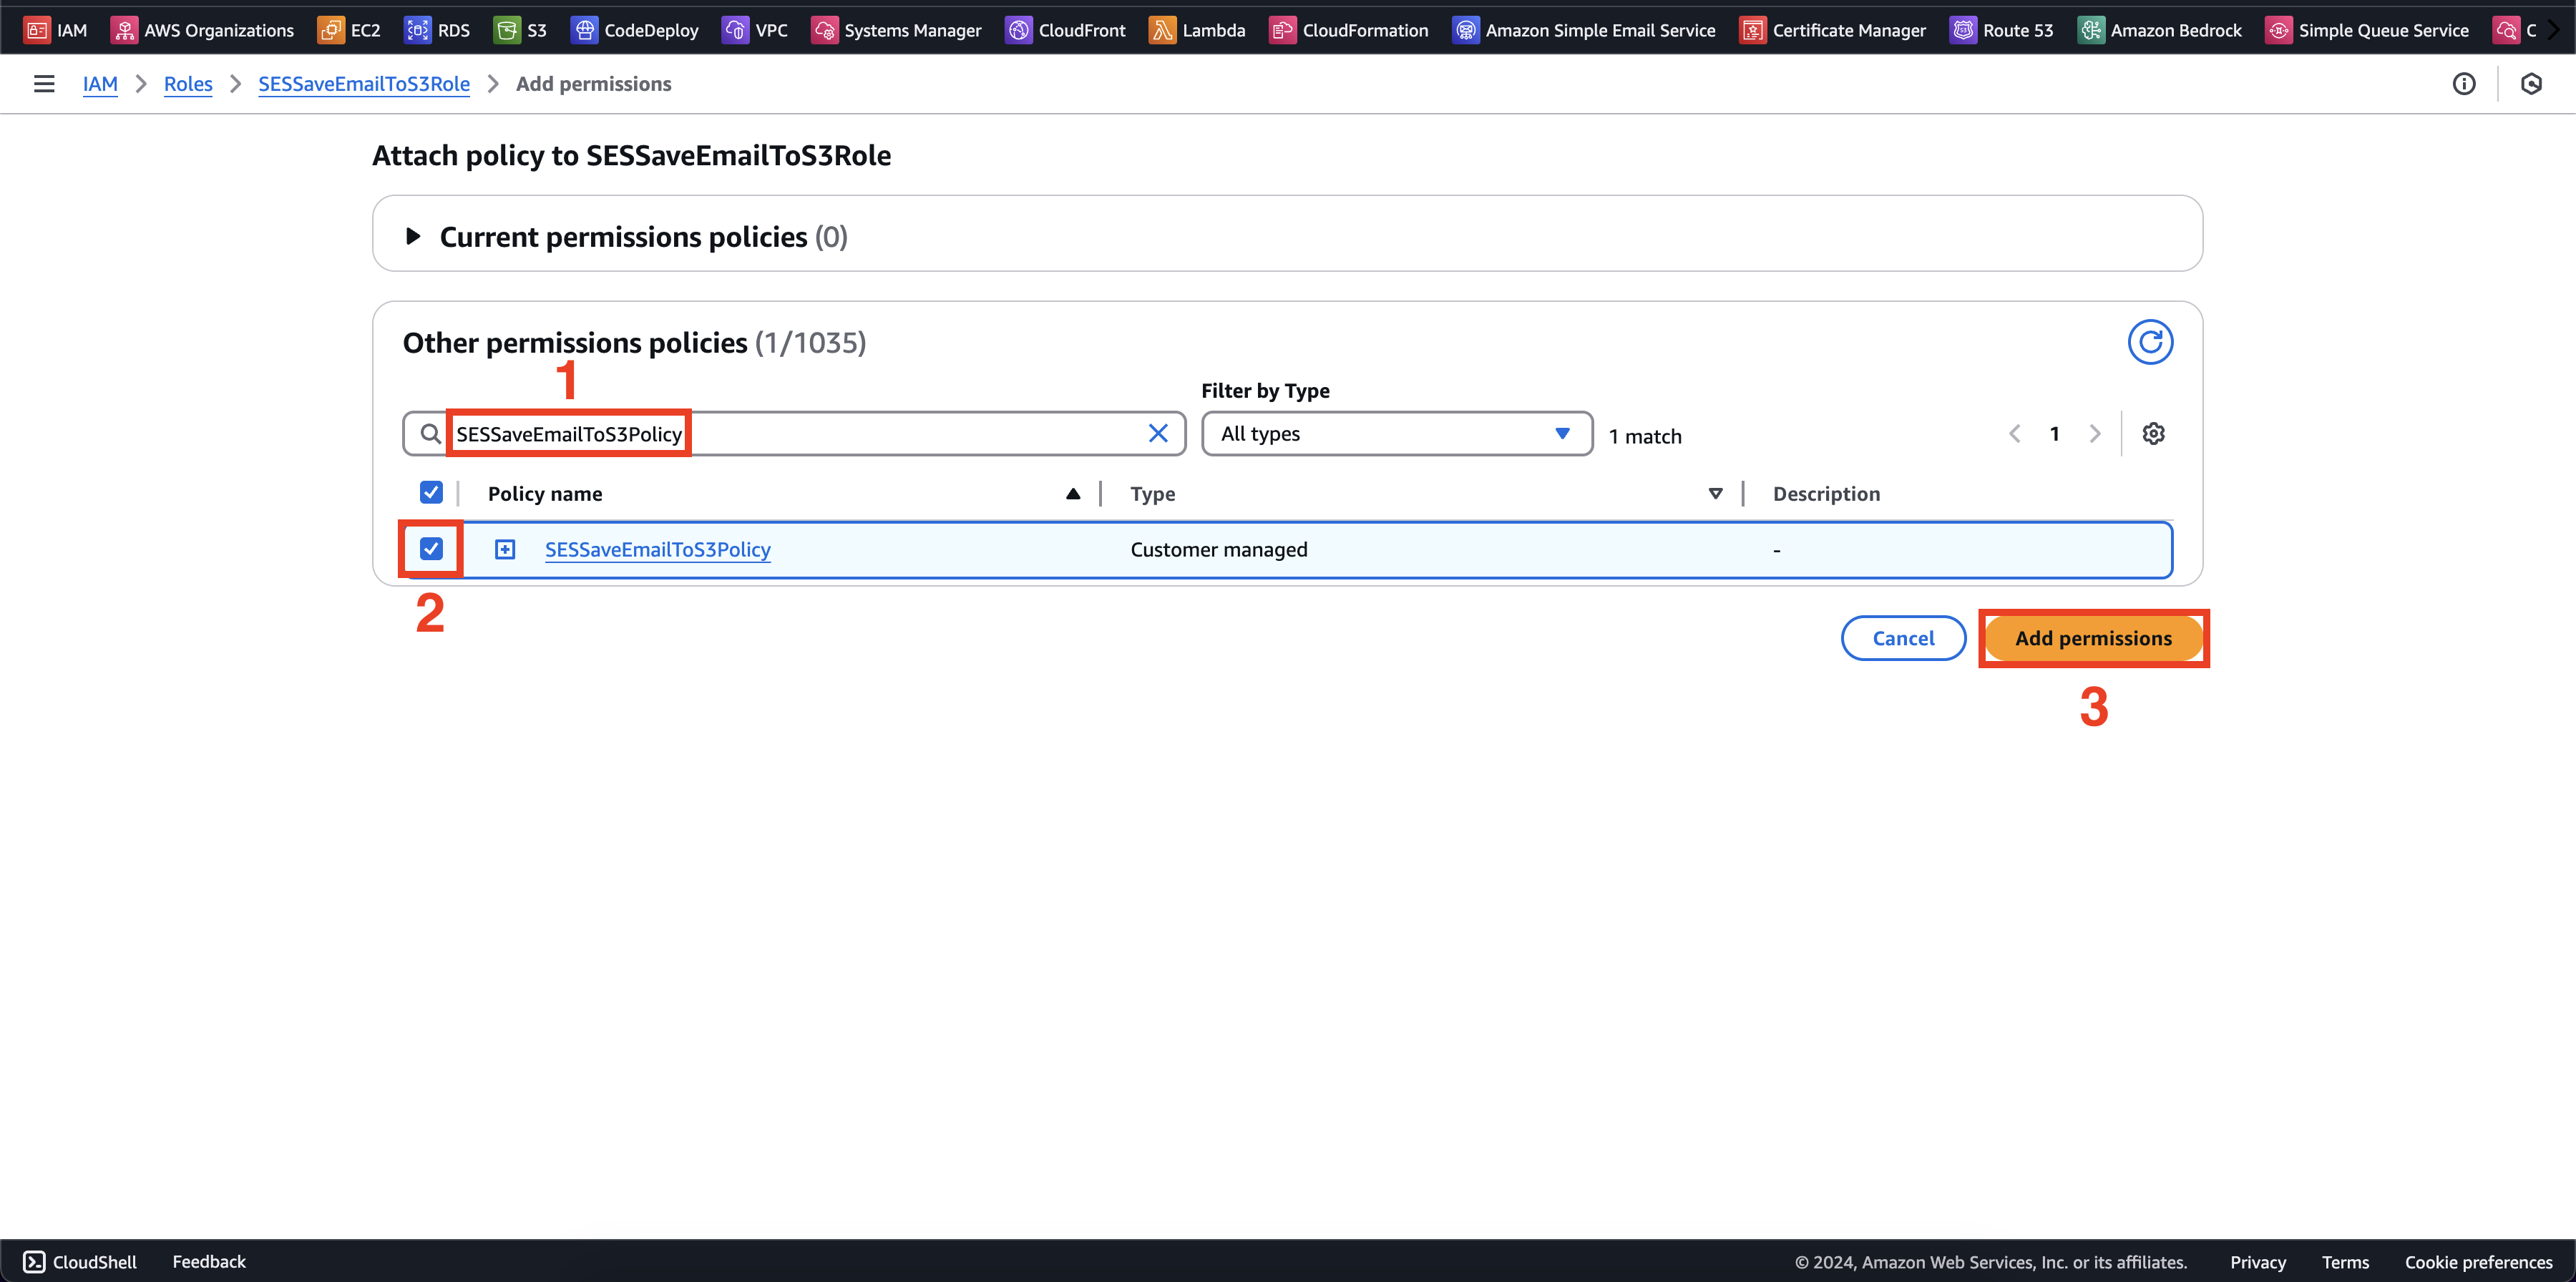
- Tìm kiếm từ khoá
SESSaveEmailToS3Policy> SESSaveEmailToS3Policy > Add permissions
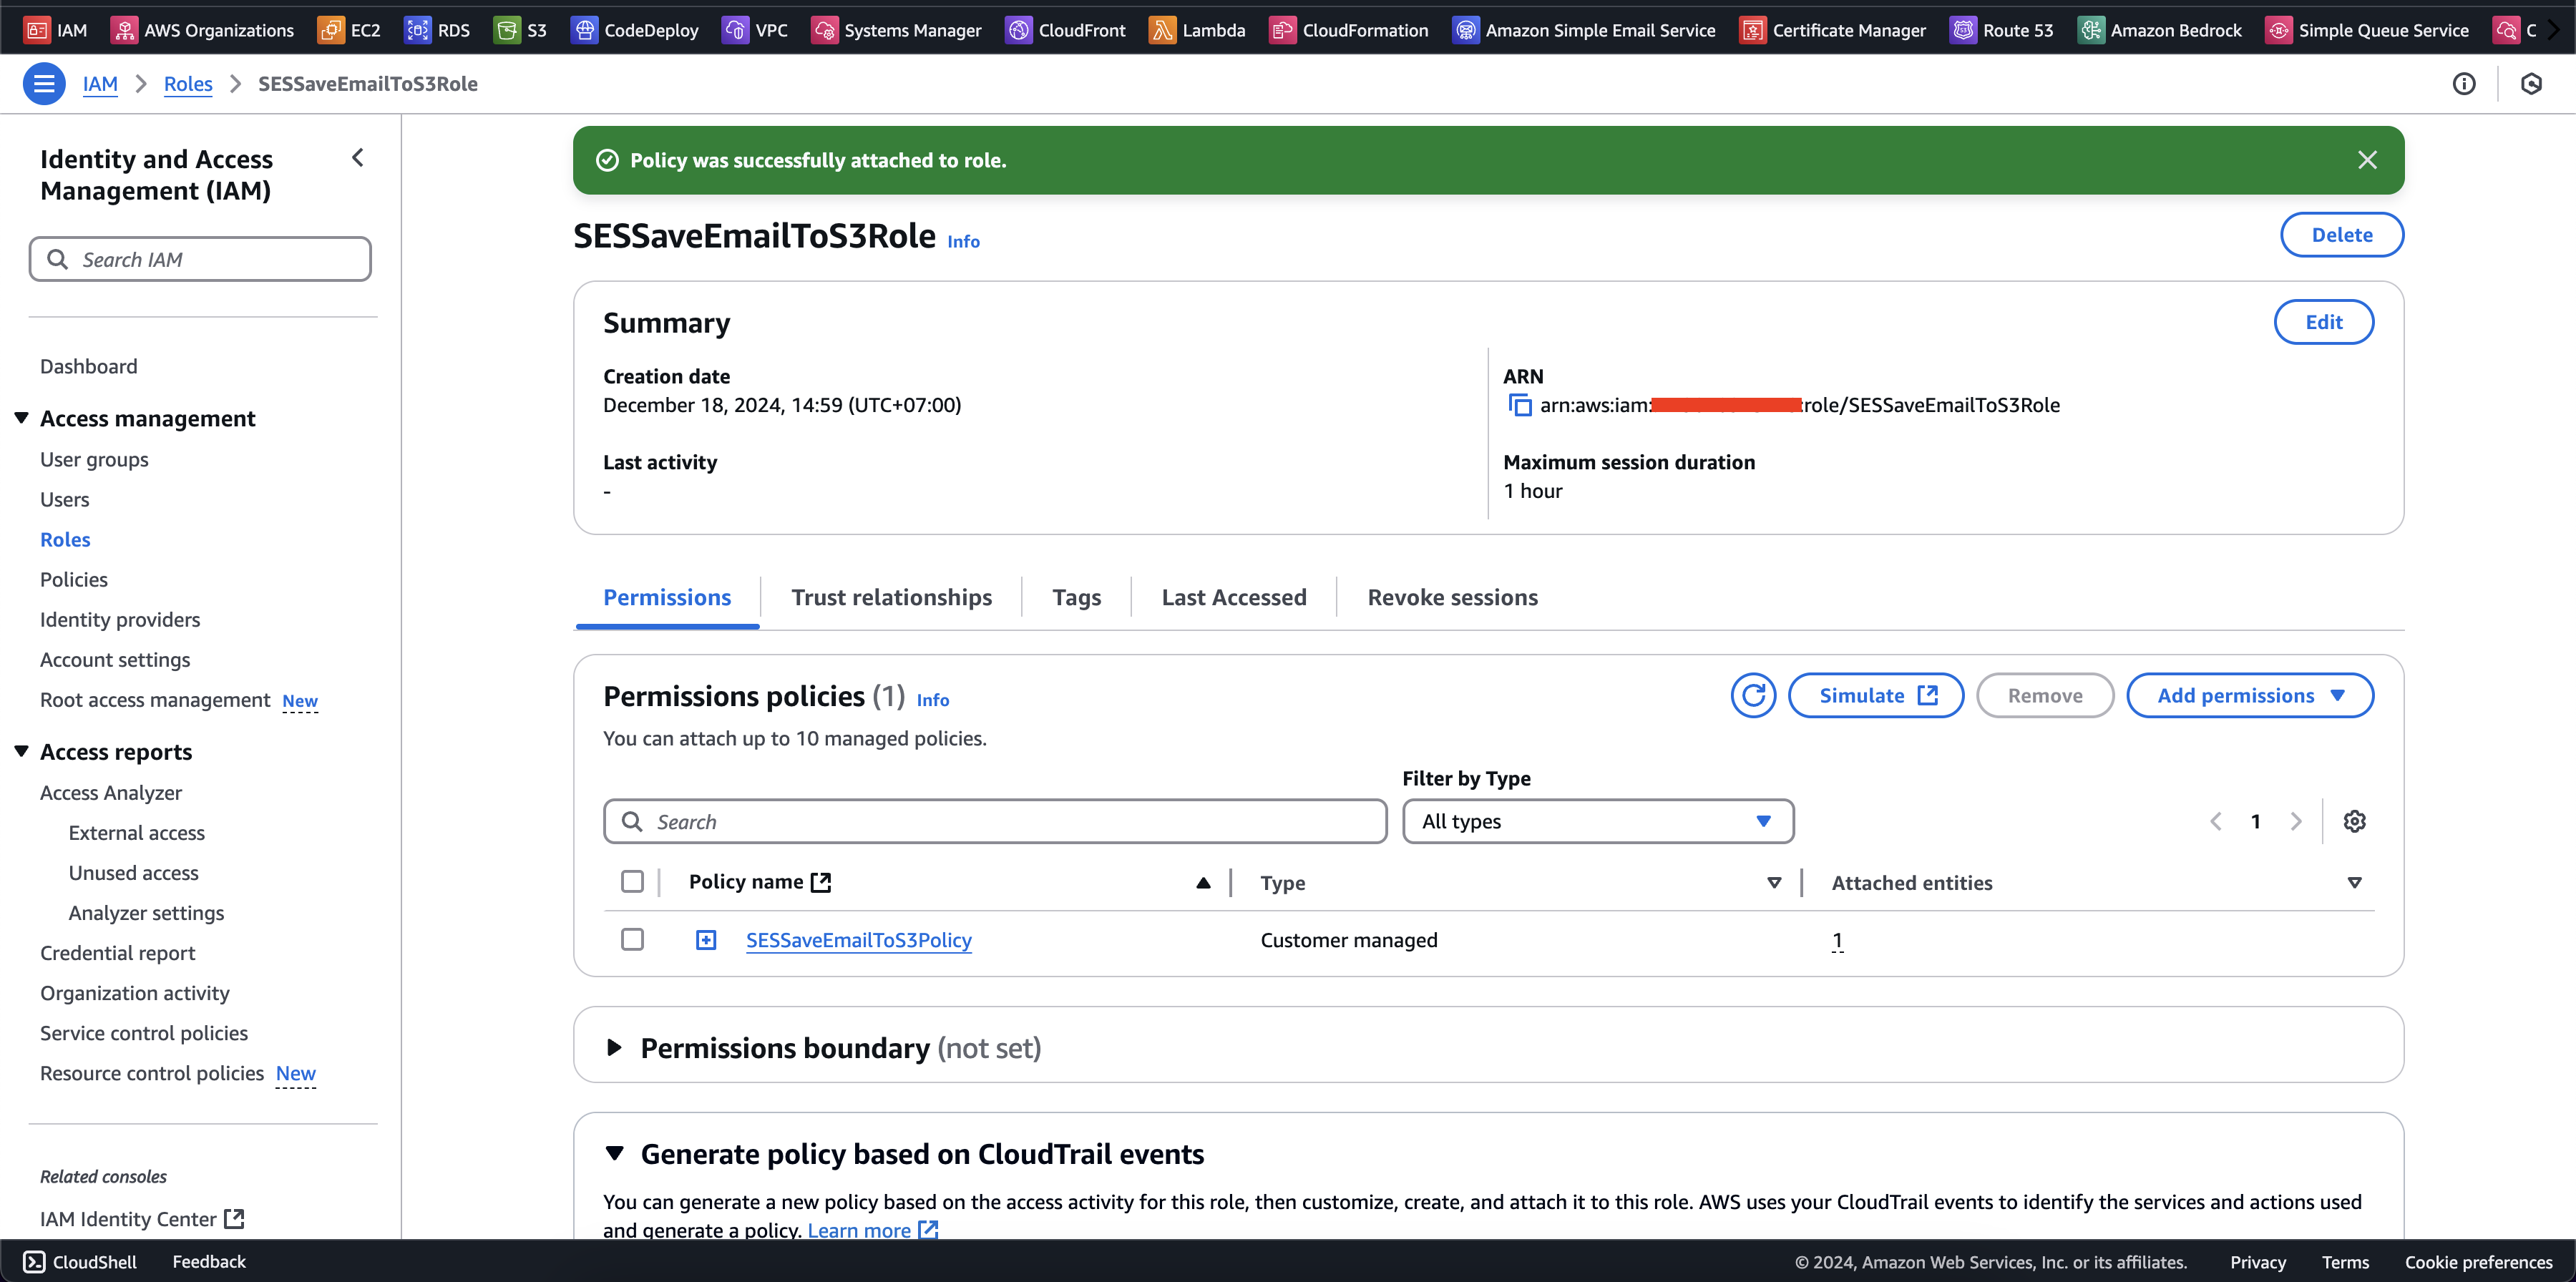
- Attach thành công
- Chúng ta quay ngược lại SES và chọn Next
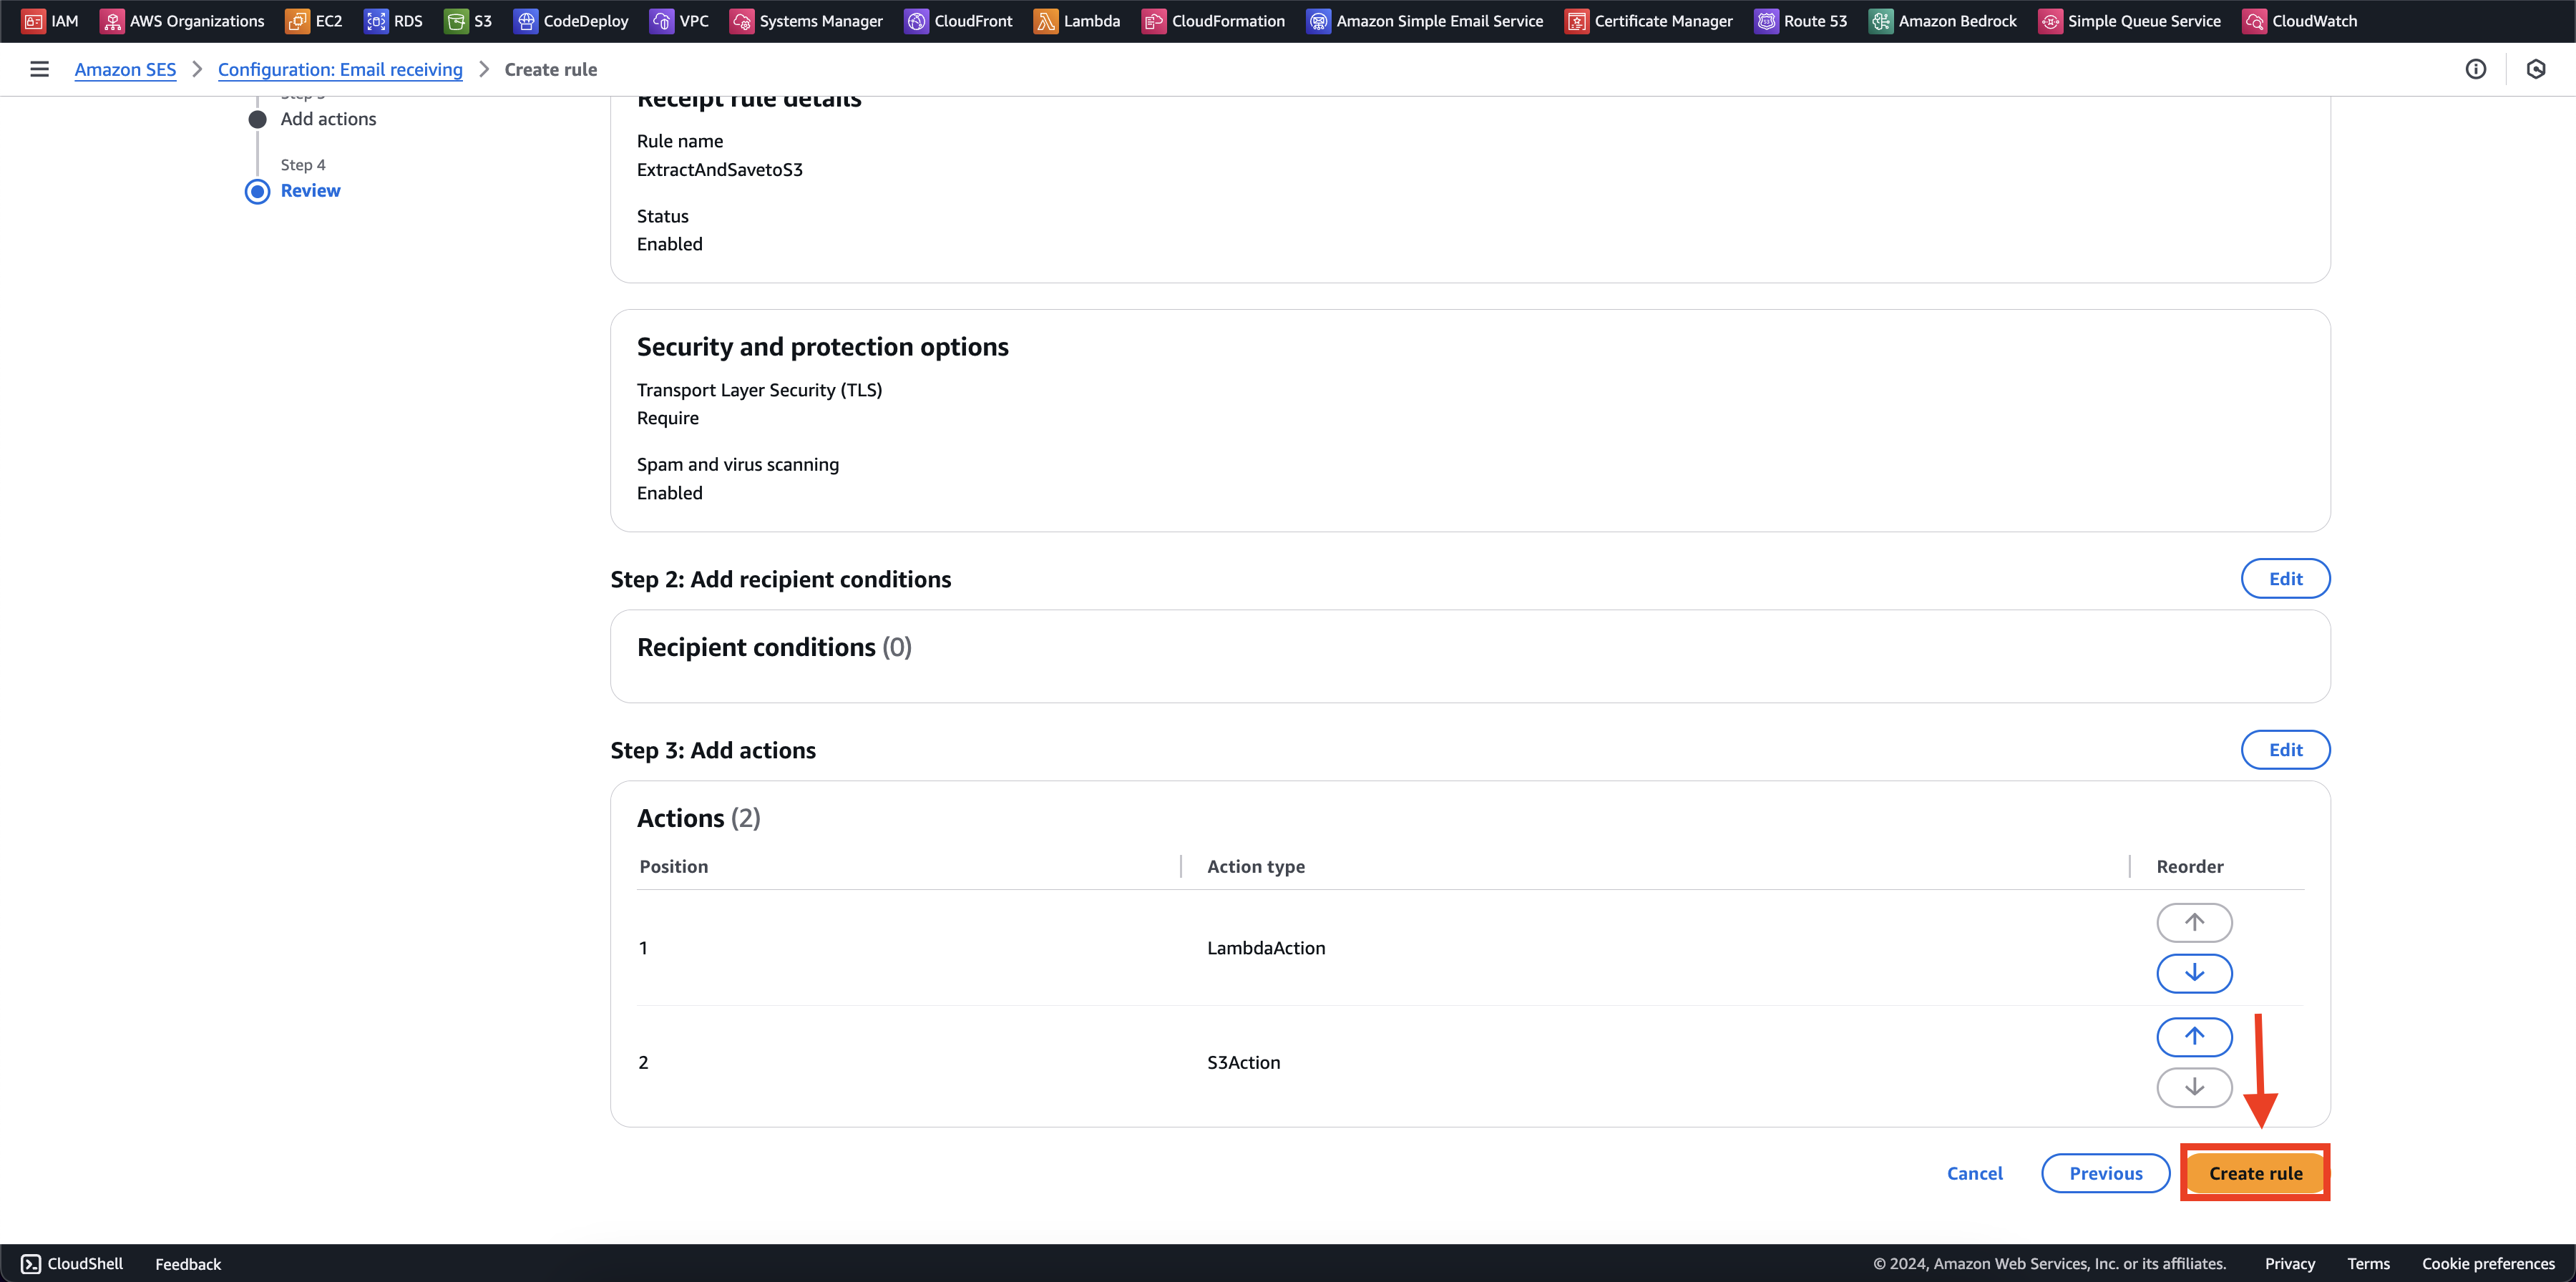
- Chọn Create rule
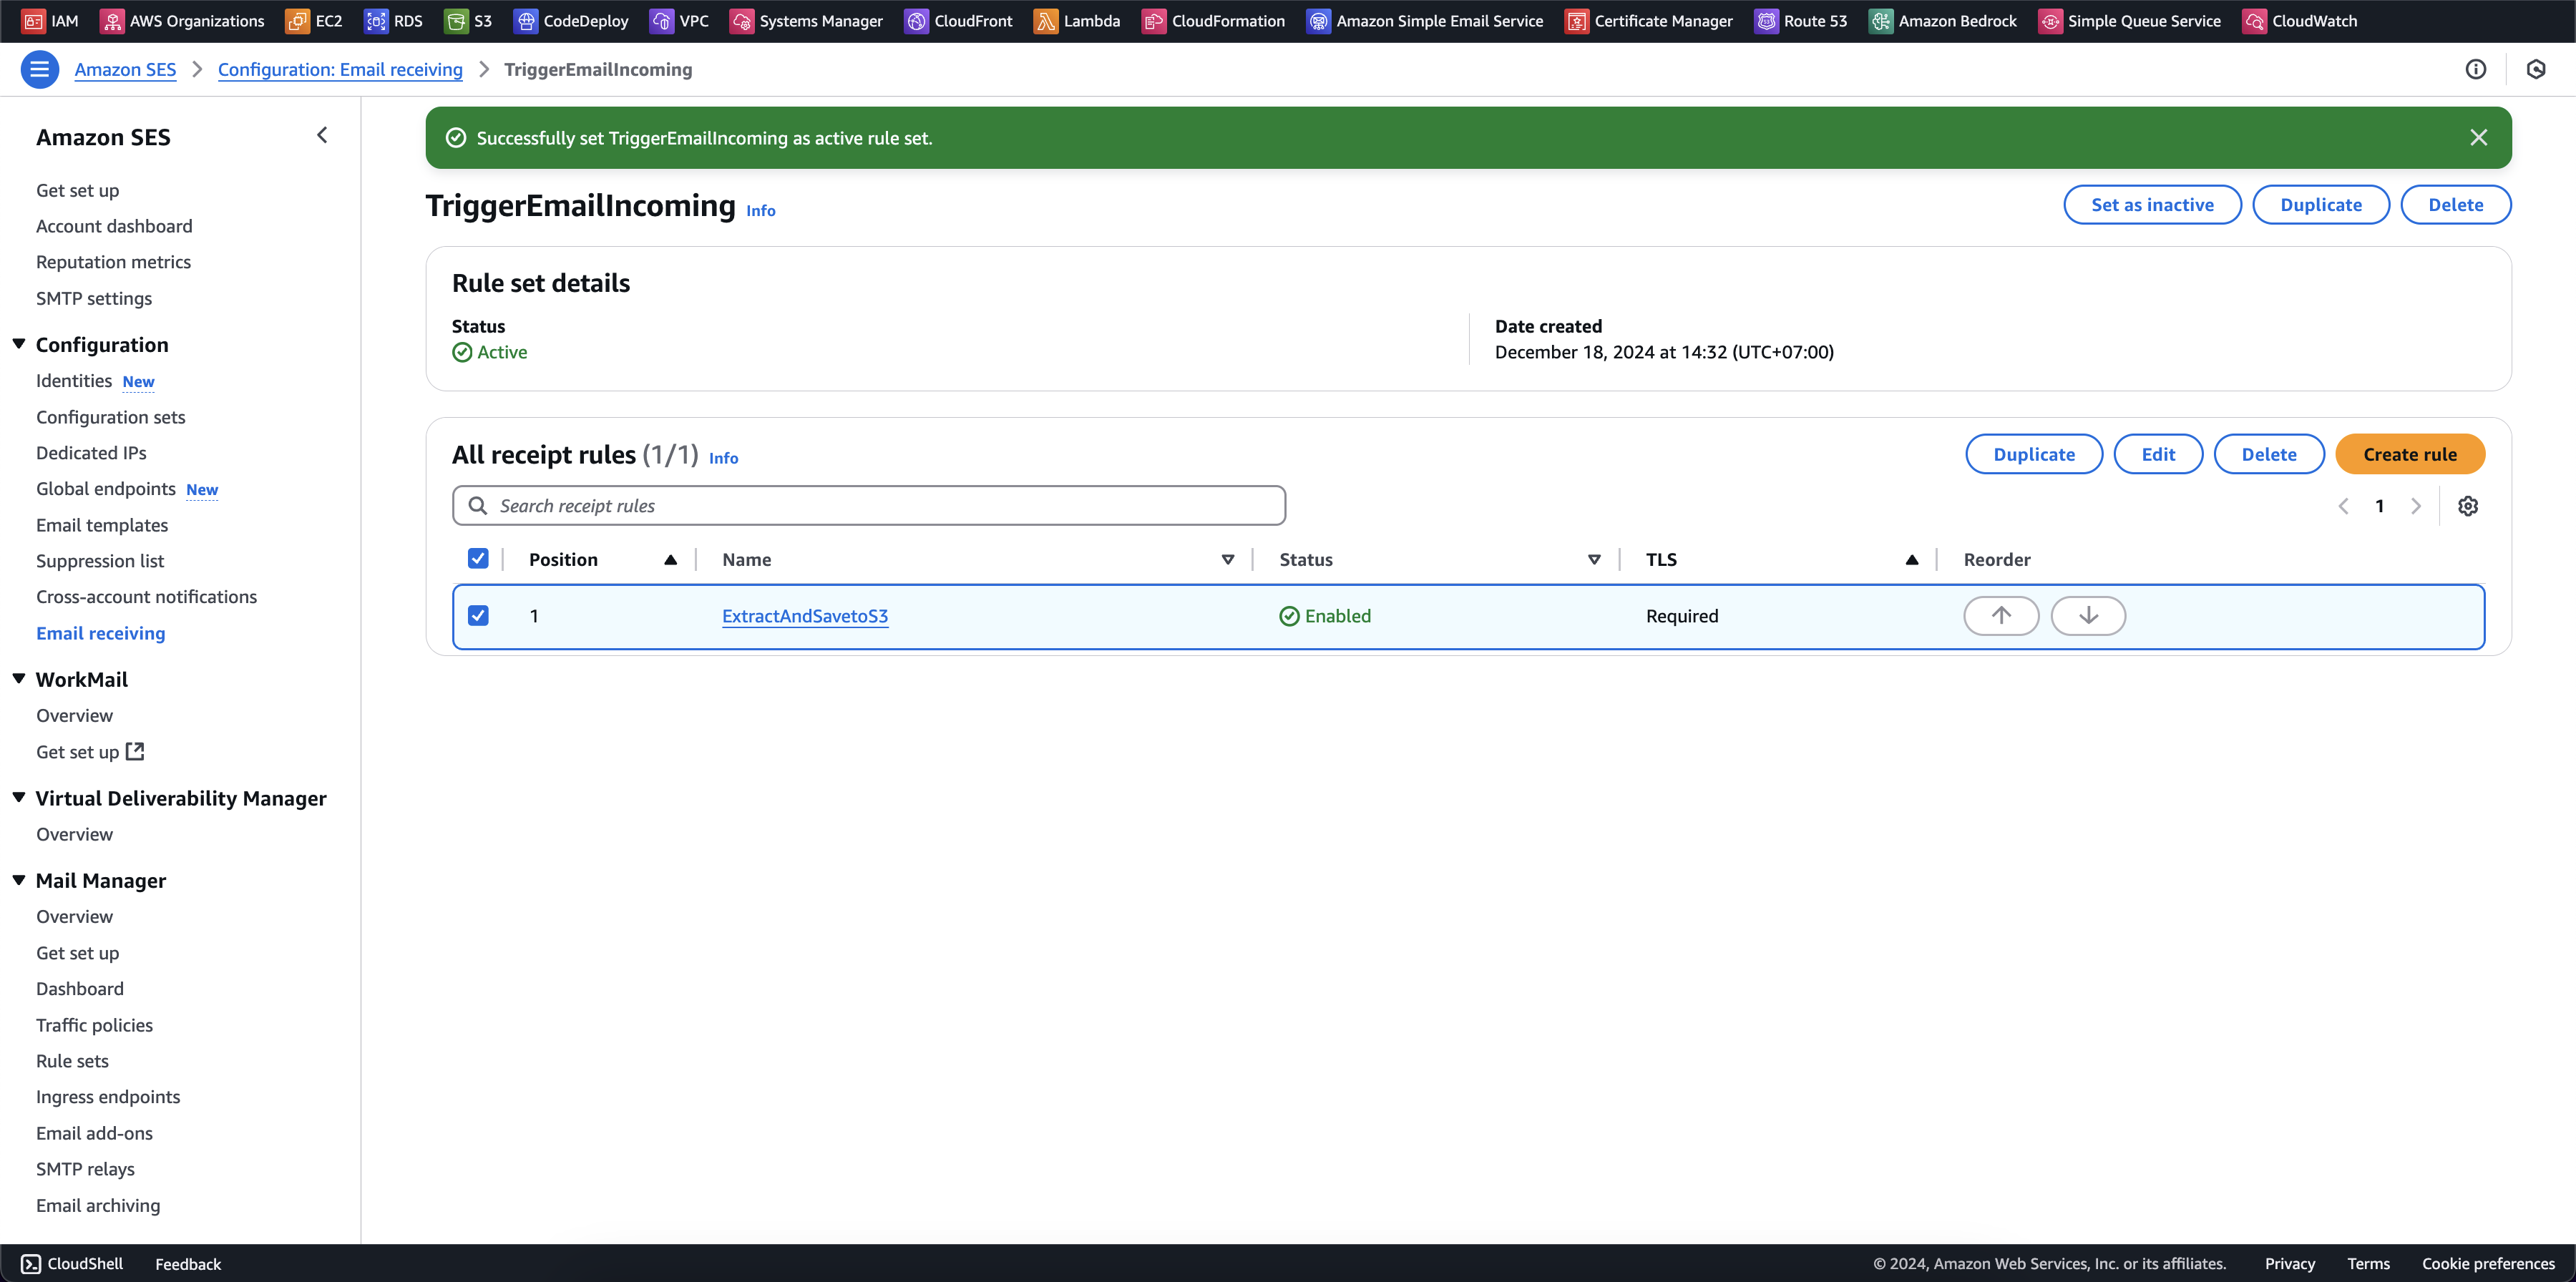
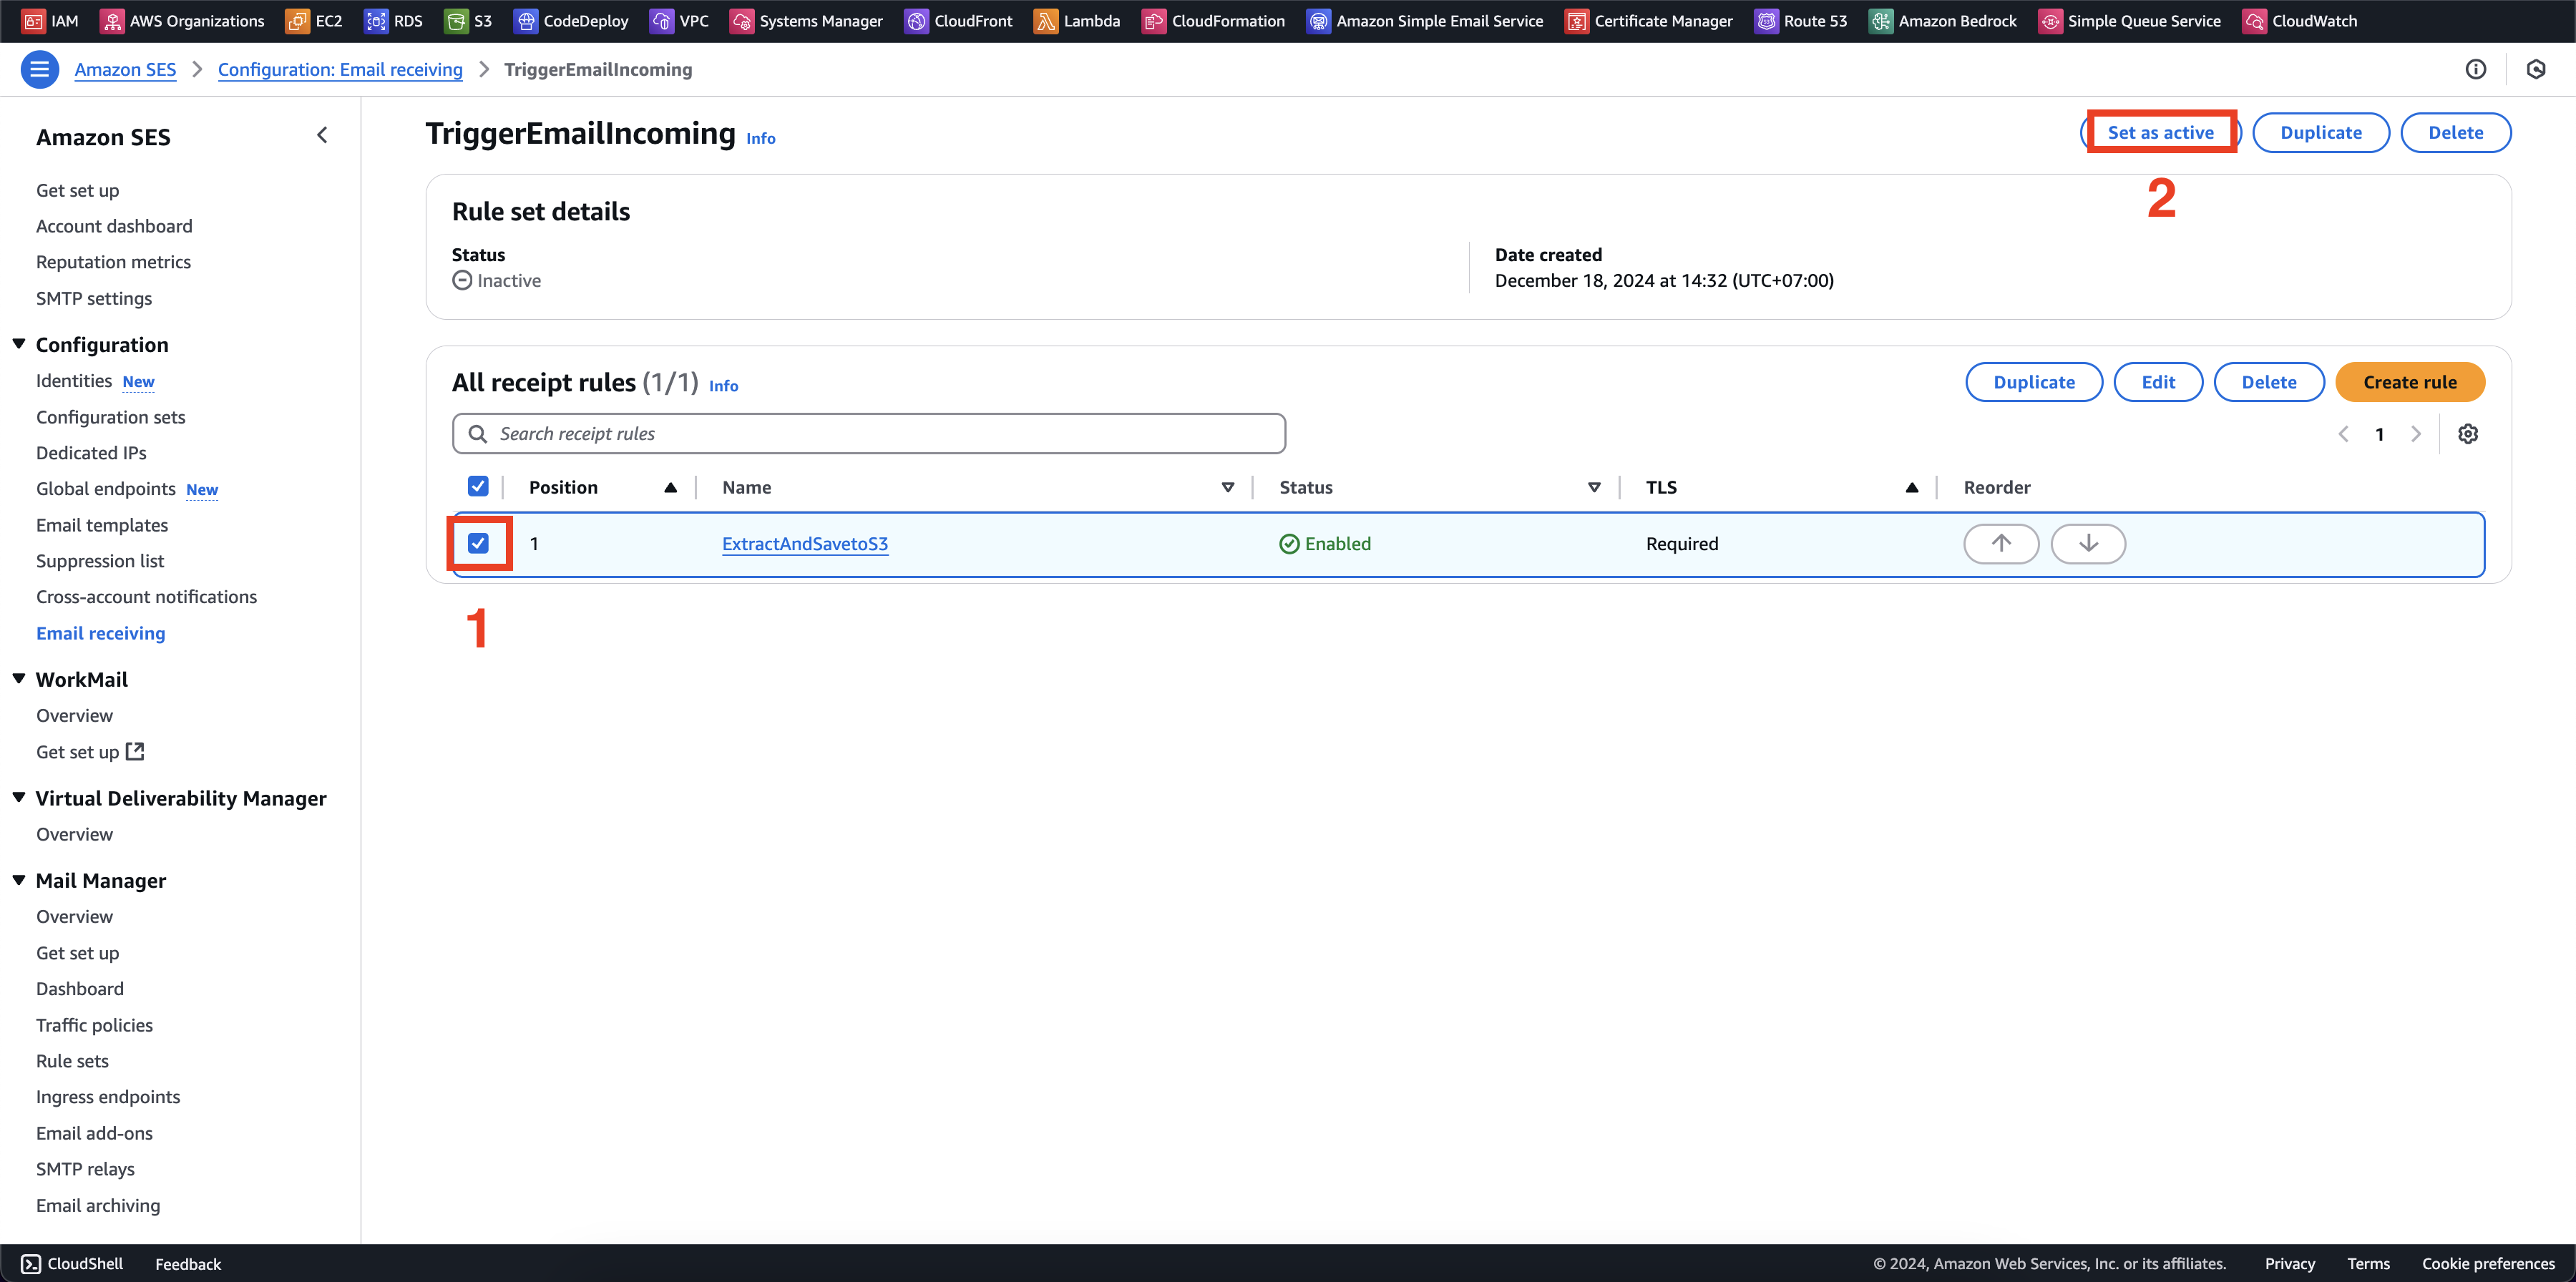
- Cuối cùng là active rule, chọn rule và chọn Set as active
- Xác nhận
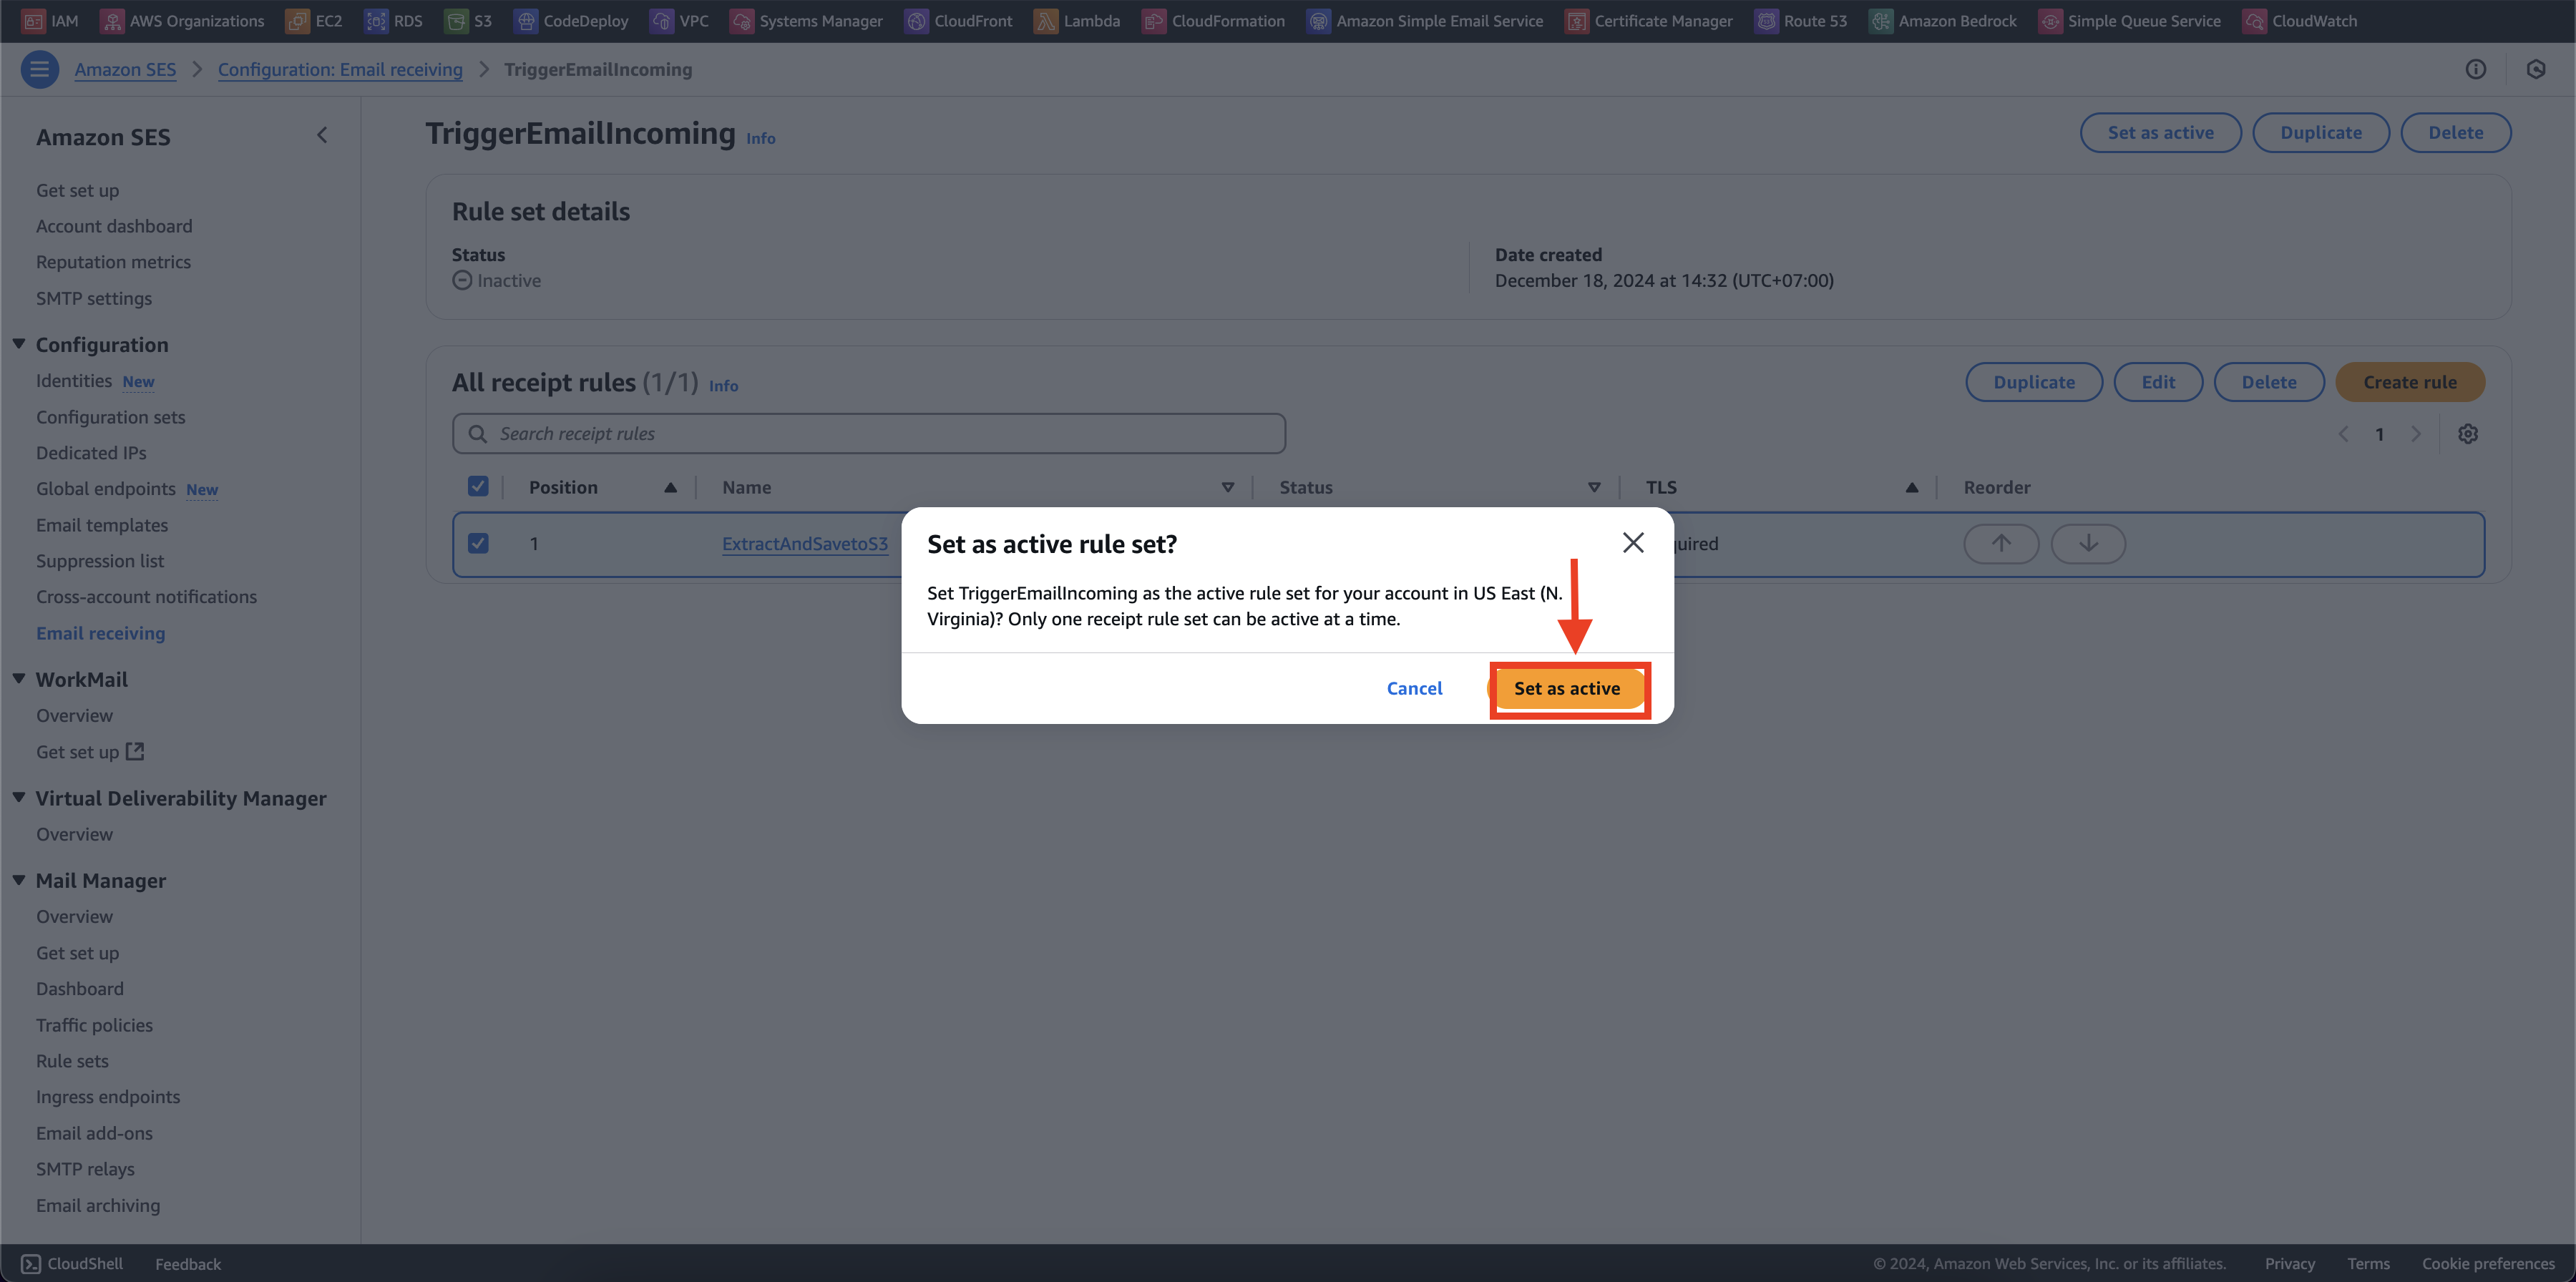
- Cấu hình thành công